How To Chop Samples In Logic Pro
Nov 04, 2021
A sampler is such a valuable tool for manipulating audio files. One of the most underrated techniques for creating unique sounds is using a sampler to chop up audio and play different splices from that audio file using different notes on a midi keyboard.
One of my favourite effects for authentic background sounds, is to chop up a sample and then, add a lot of reverb, and then find a placement that fits within the mix. Easier said than done, but here is a great video on creating reverb reverse sweeps which explains what I'm talking about.

Let's get into chopping samples and below is a step-by-step process on how to do it.
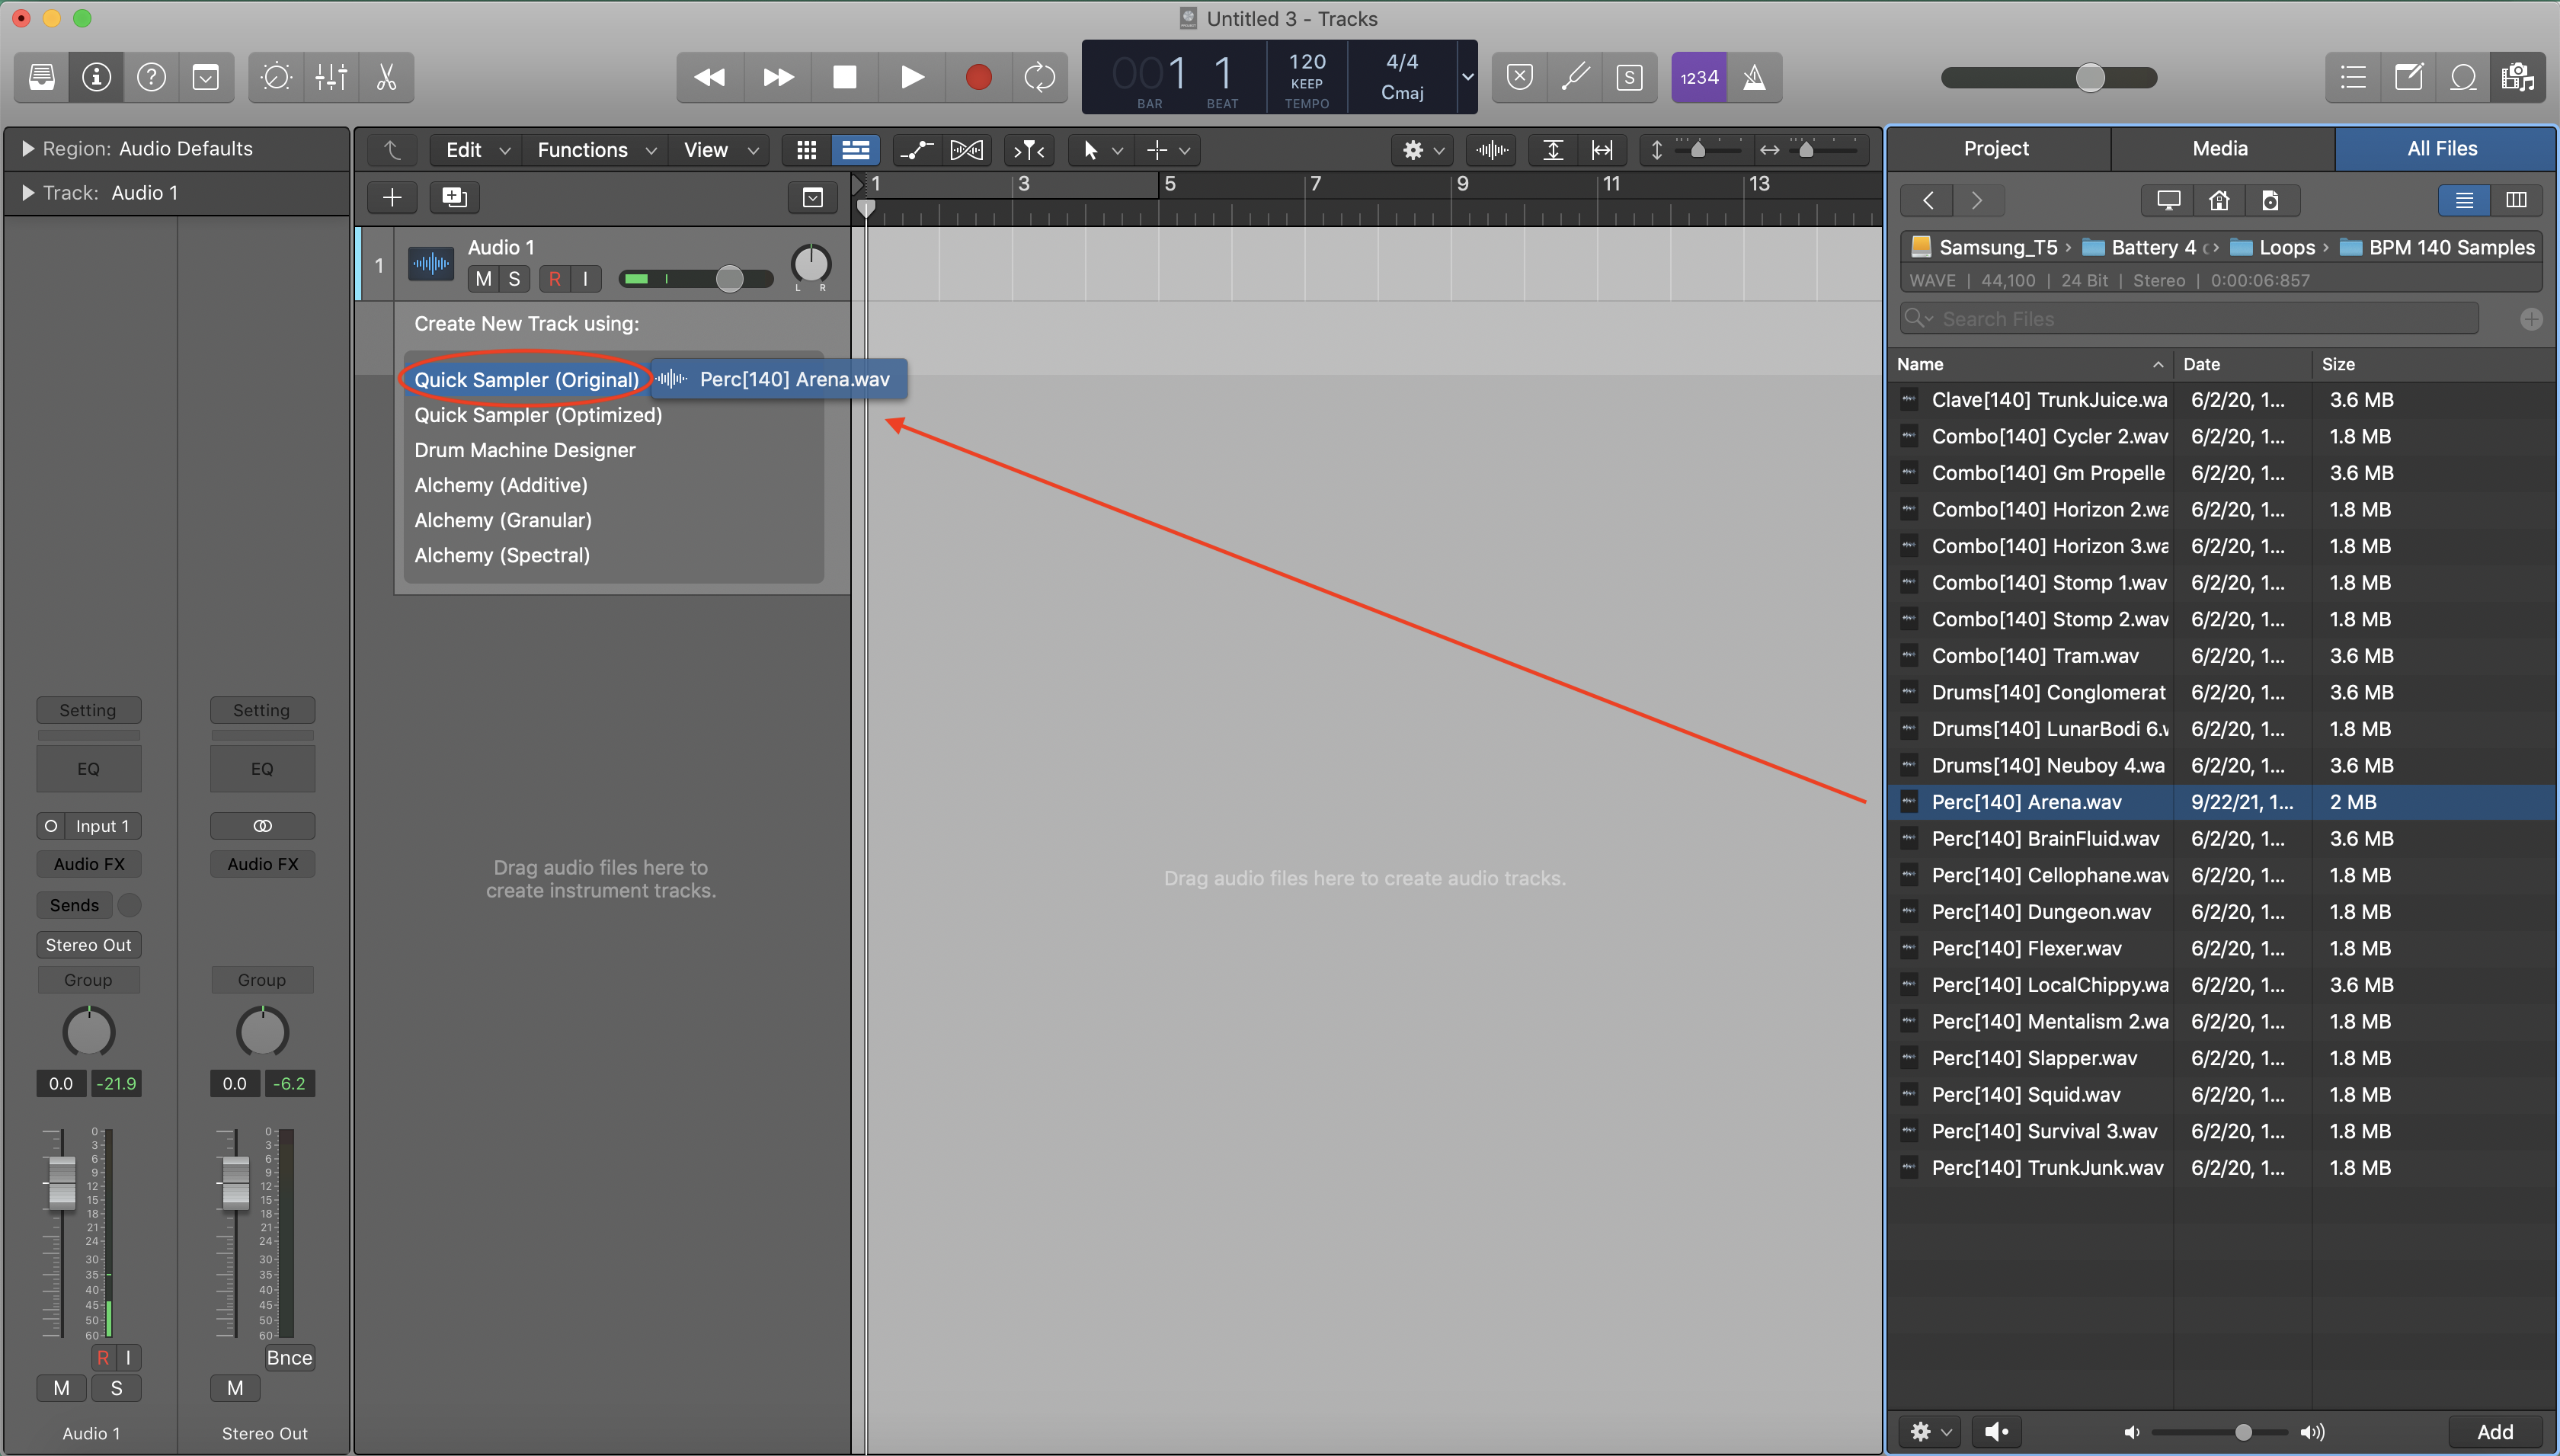
1. Import an audio file into Logic’s sampler by dragging into the grey space below the tracks in the main window (make sure you drag all the way over to the left or the sampler option won’t show up).
2. Hold and drag over “Quick Sampler (Original)”.
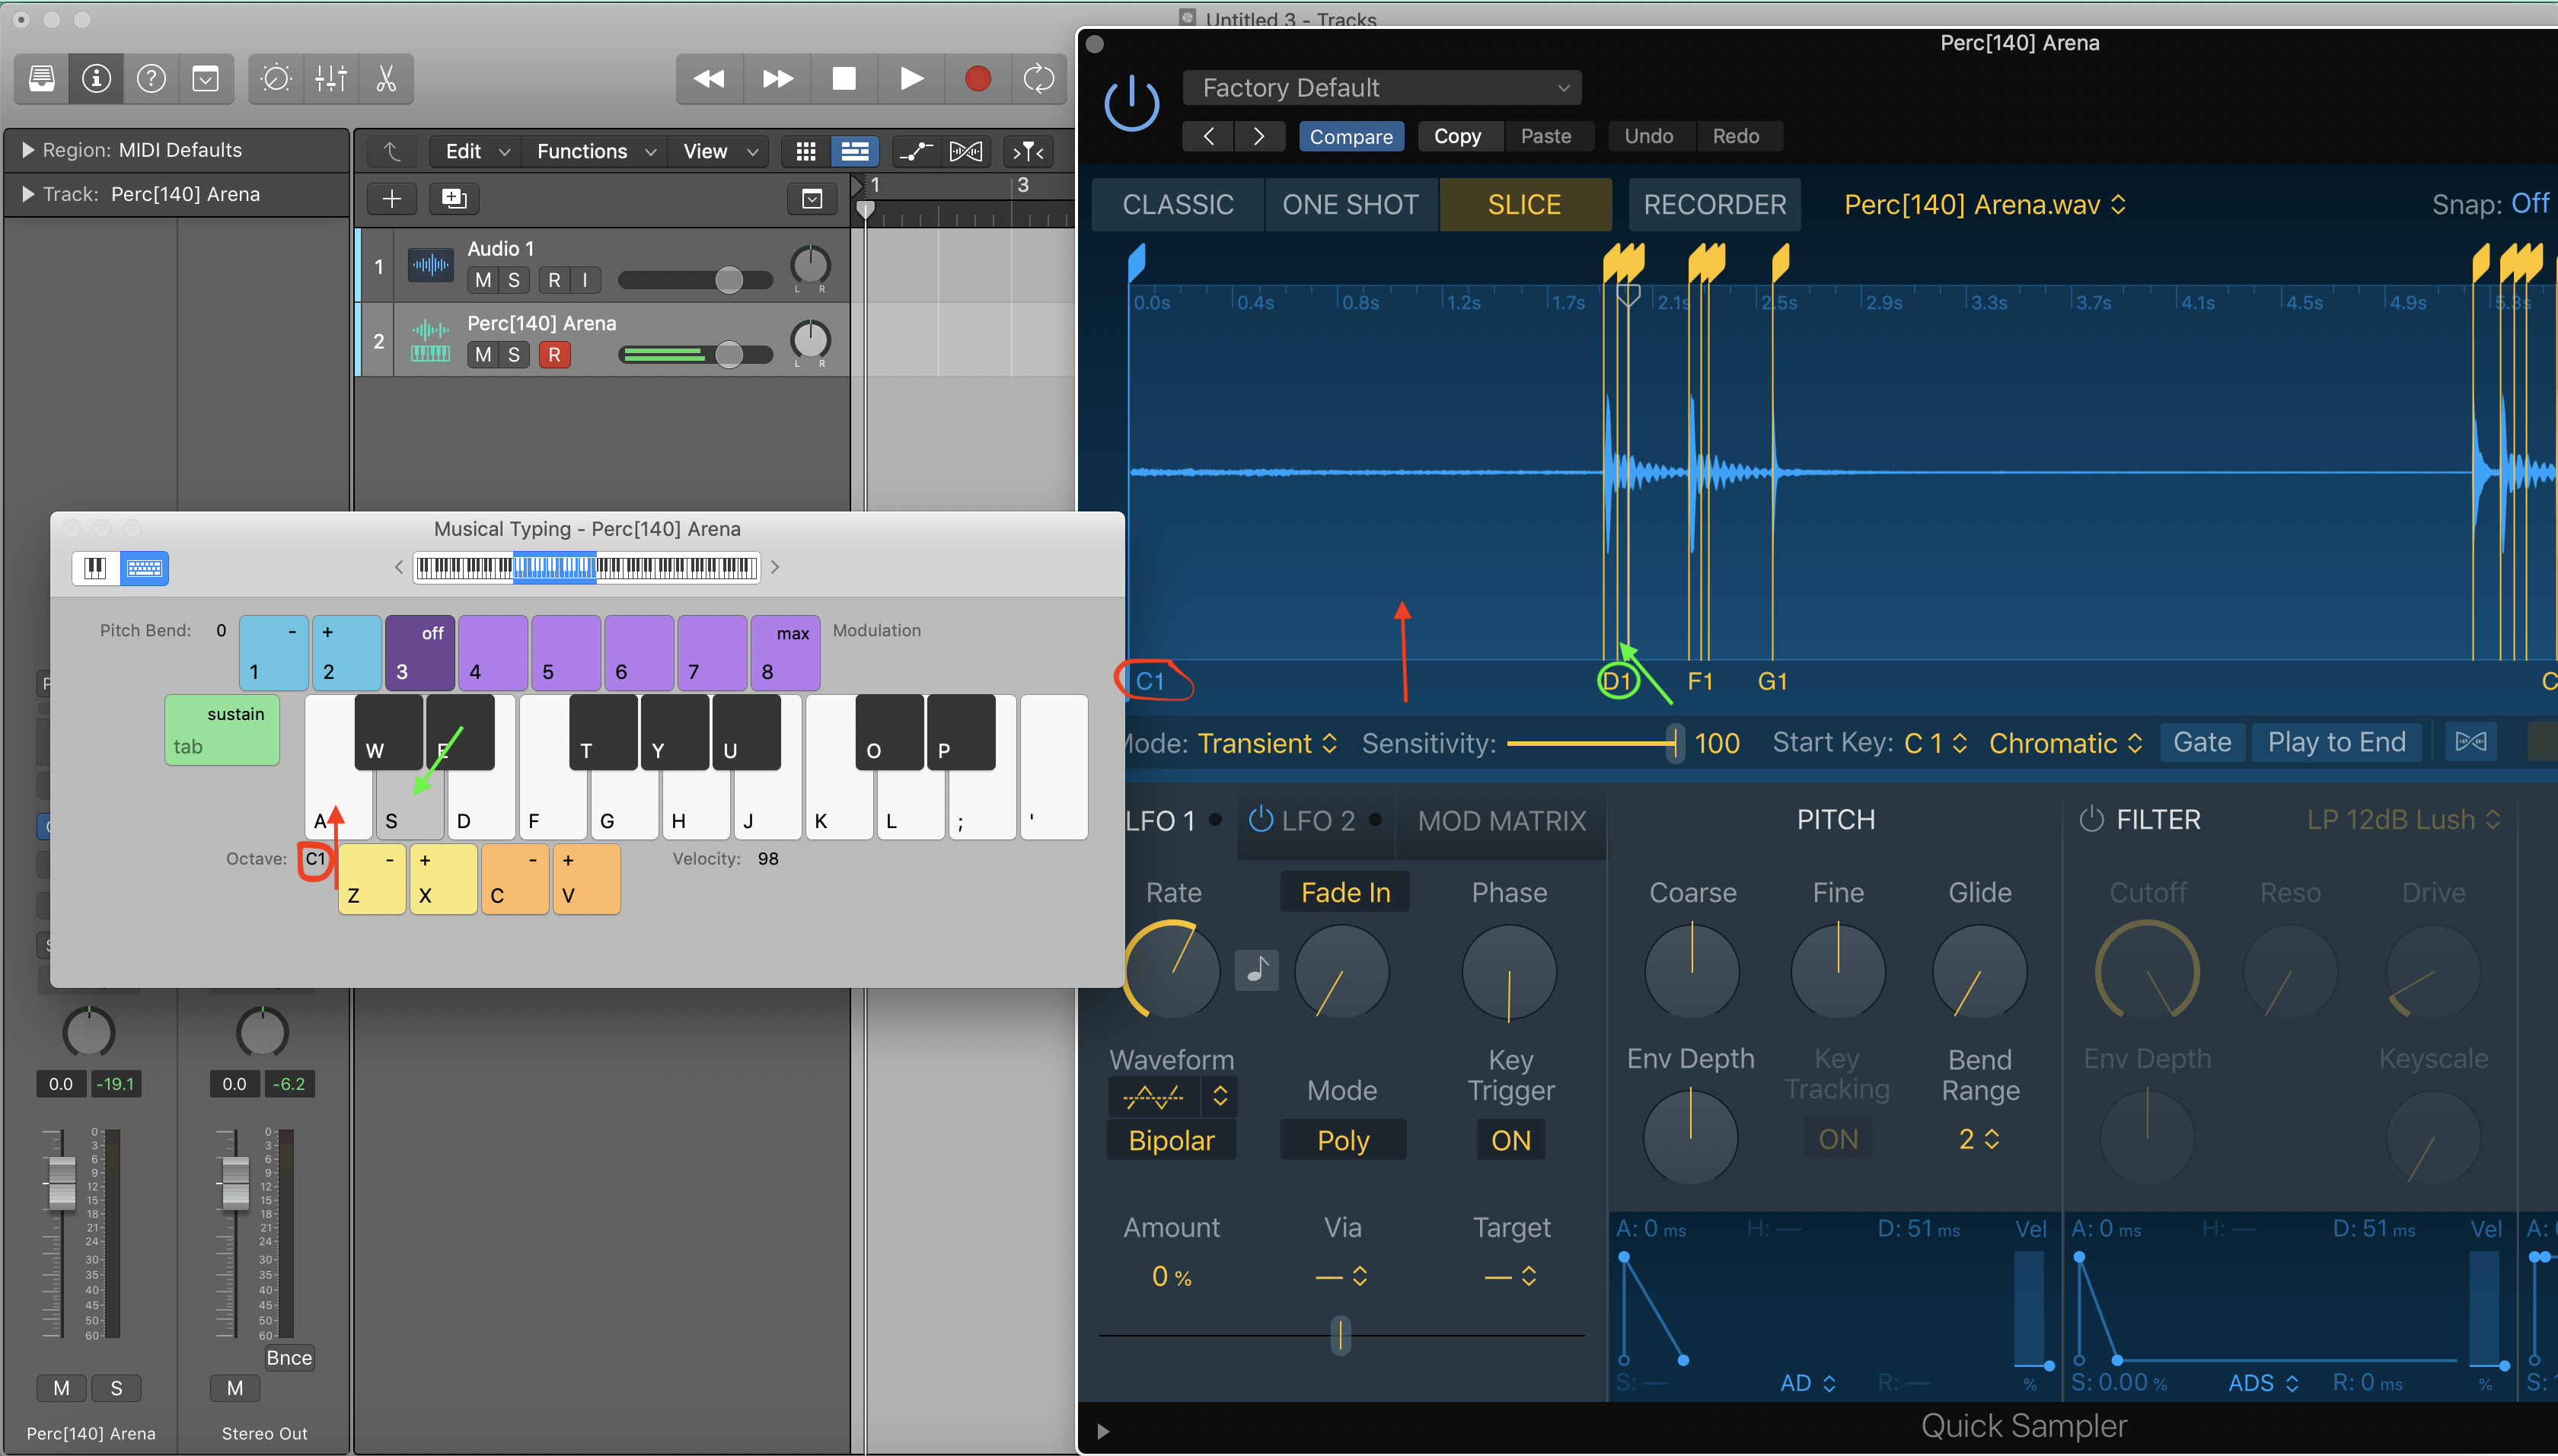
The default mode for Logic’s quick sampler is “slice”, which analyzes the transients (peak amplitude at the beginning of a waveform or the “attack” of the sound), slices them up and assigns them to notes on your keyboard.
This is the tool that we’ll be using.
Open the keyboard display to help understand how each “slice” of audio is assigned (by using the quick key command “K”).
You’ll notice when you play the note that says “C1”, it will play the first slice of audio in the sampler (as shown in the photo below).
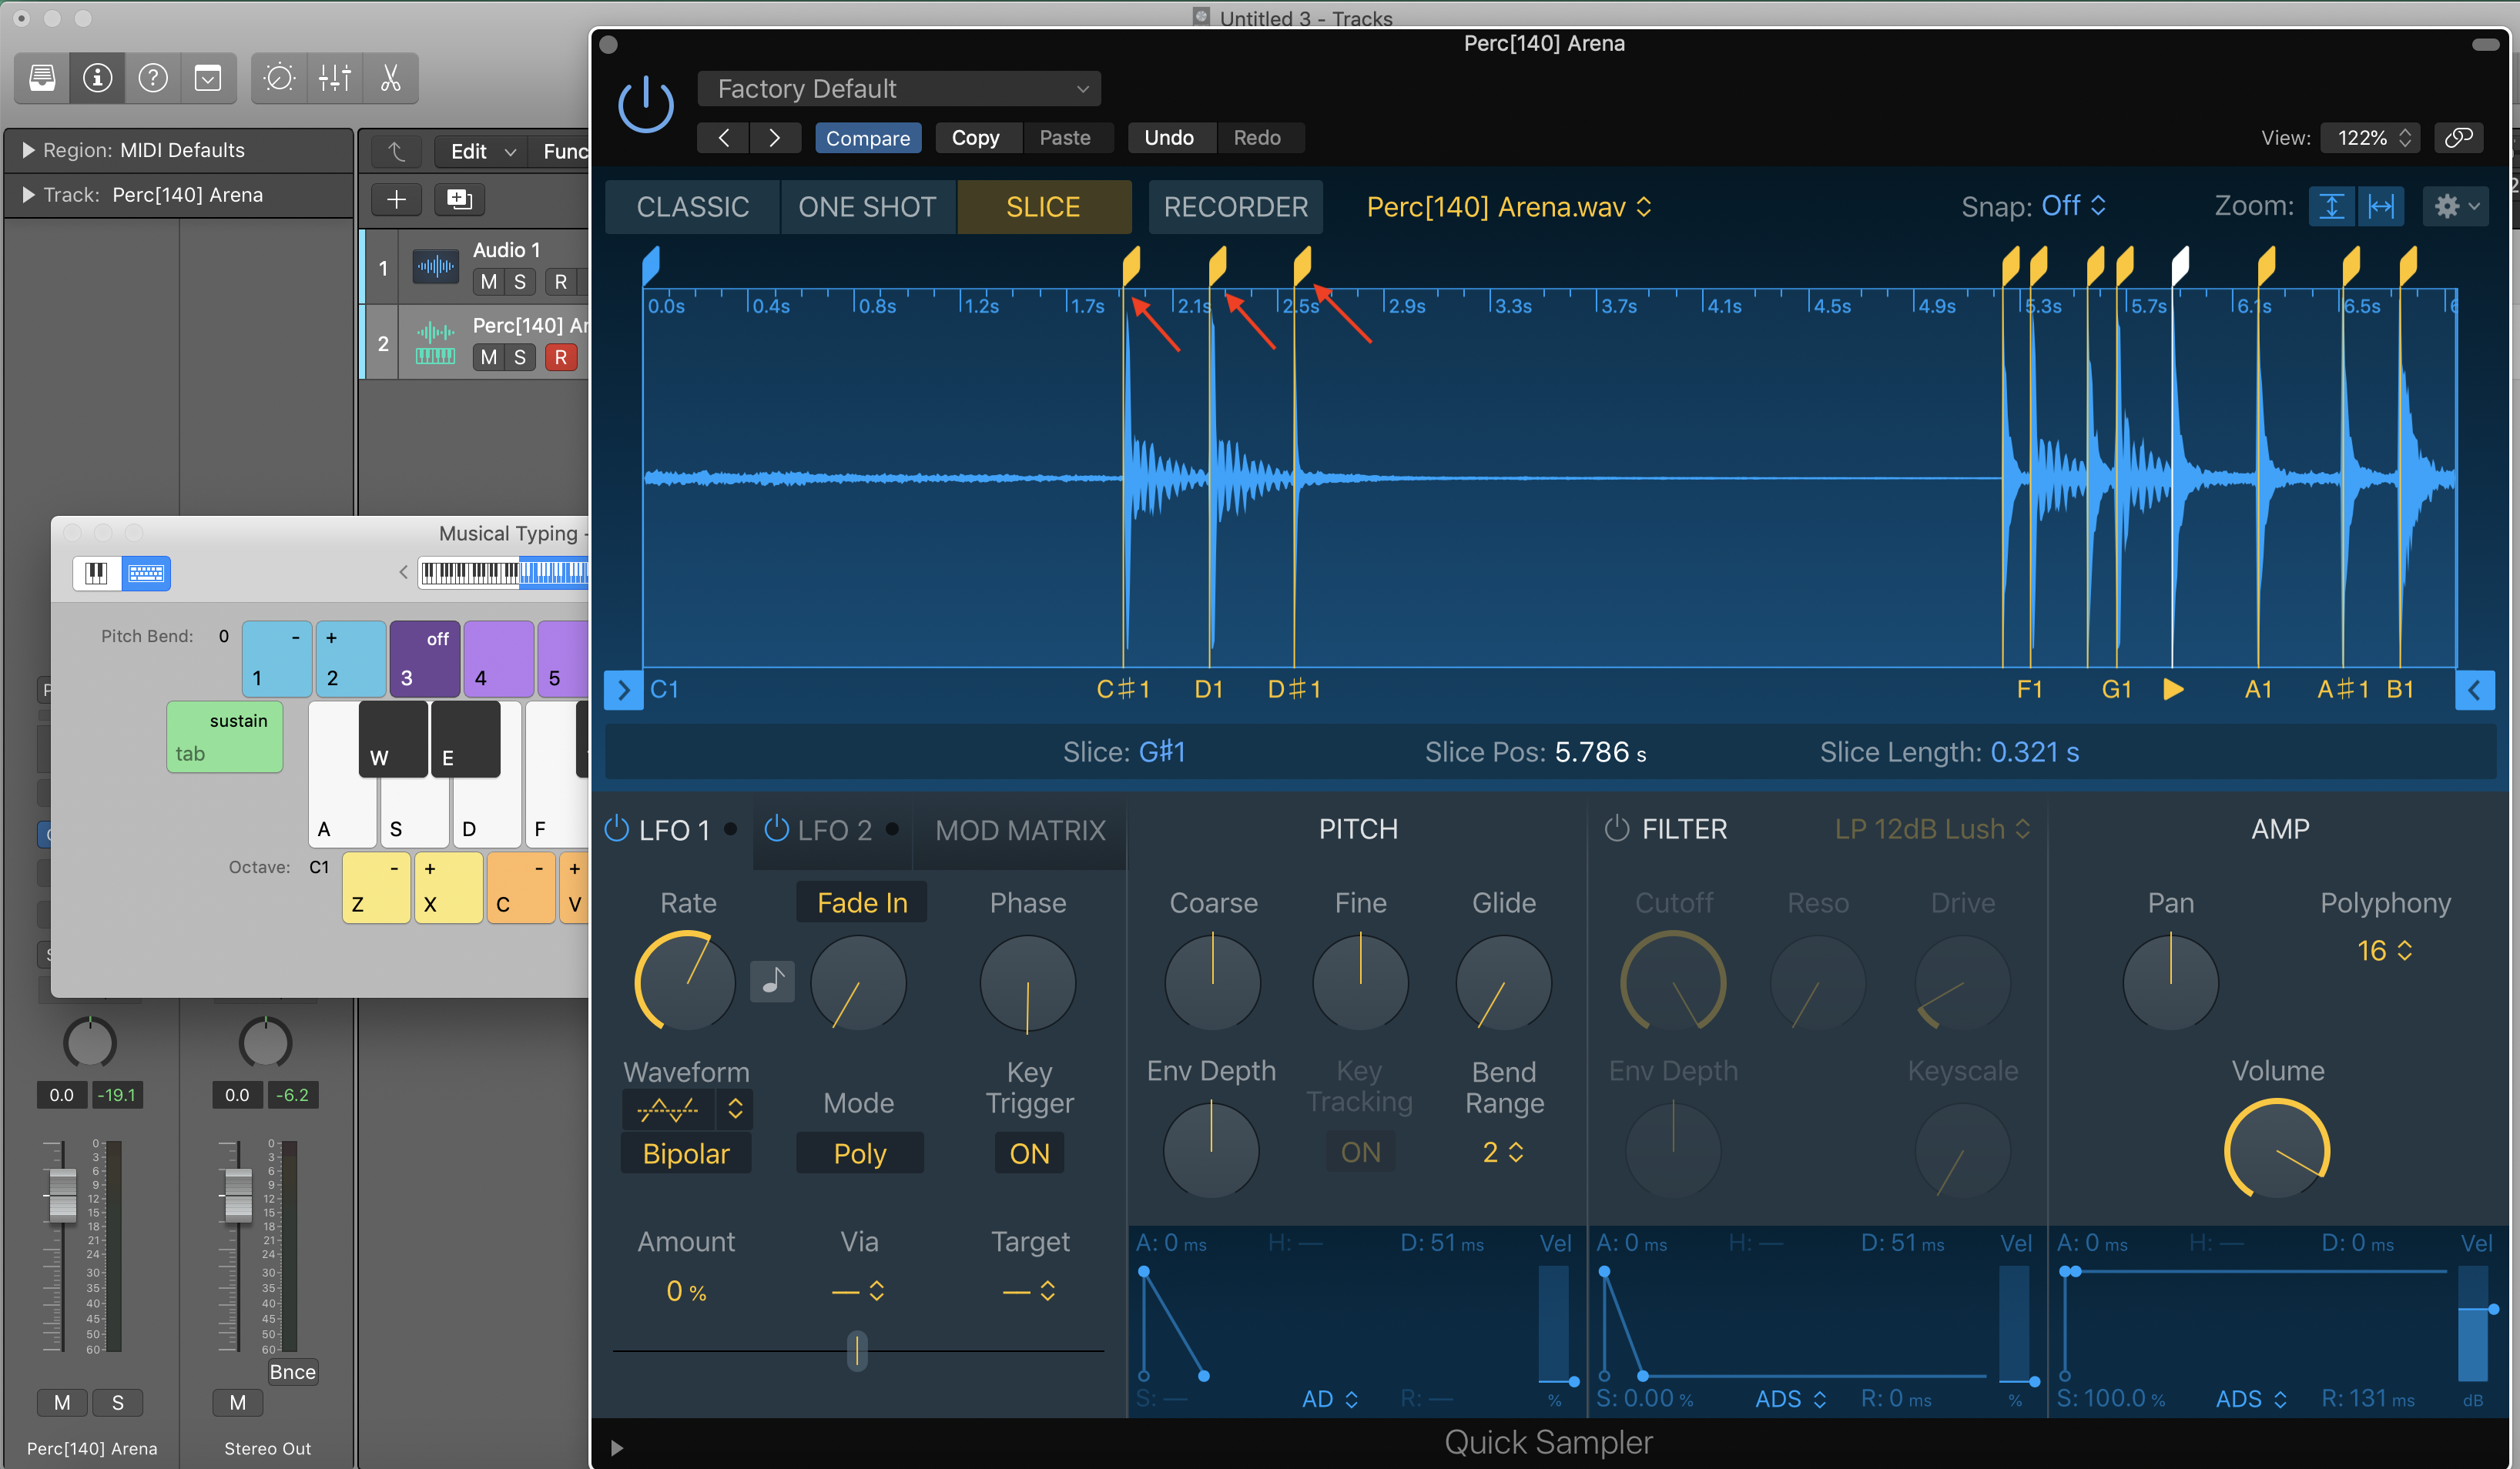
3. Double click on the yellow transient markers to remove markers in places that aren’t transients or that you don’t want sliced (hint: if you’re slicing up a beat, make sure the markers start exactly on the attack of each hit).
You can add transient markers by simply clicking in the centre of the waveform in the sampler. As you add and remove markers, it will affect how each slice is assigned, so make sure you edit the slices before recording on your keyboard.

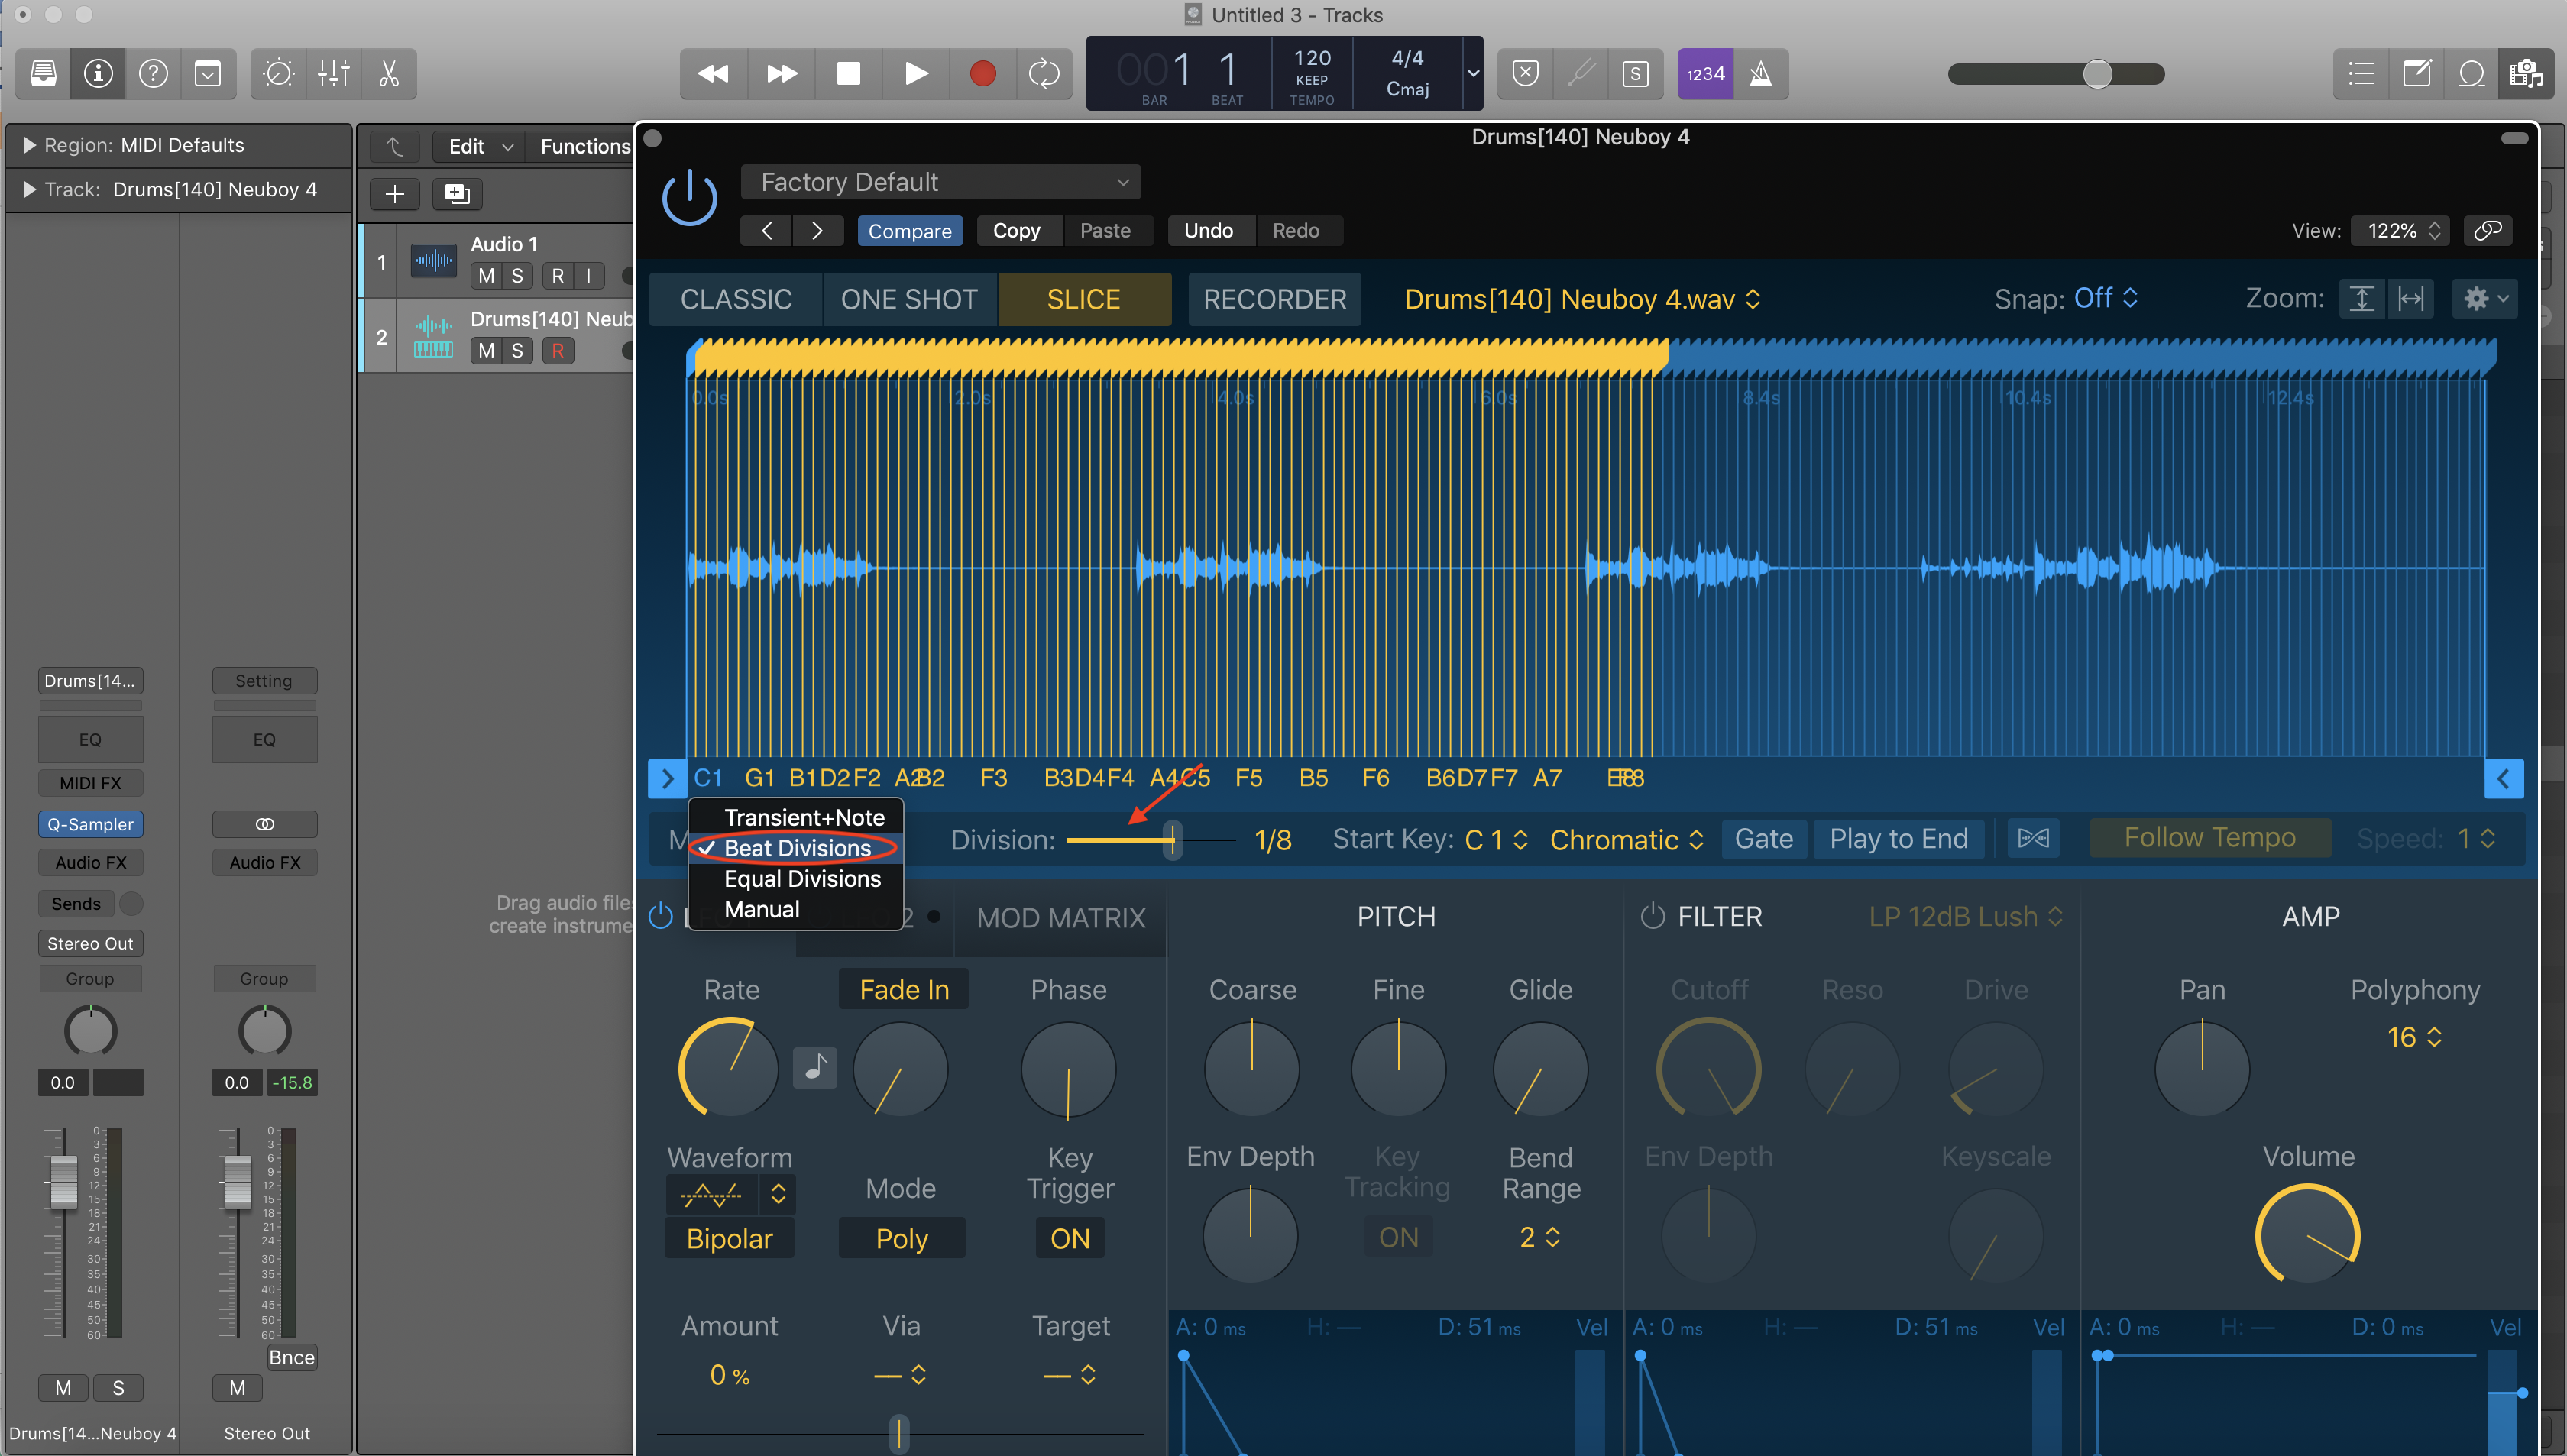
You can also change the mode from “transient” to “beat divisions”, which divides each marker by each beat rather than at the transient.
Change the division length by clicking and dragging on the yellow bar next to where it says “division”. I prefer “transient” mode over “beat divisions” because it is more tailored to the audio file and allows you to play each percussive sound individually.
4. Press record (‘r’ on your keyboard) and play your sliced up audio file using your keyboard!

For such a simple tool in Logic’s sampler, the possibilities that slicing audio allows are endless.
Instead of getting lazy and dragging overused loops straight into your project (as most music producers have been guilty of at one point or another), take those loops and find the perfect slice.
If you're still unsure on how to manage your samples within your overall production then you would be interested in this post on how to produce music in Logic Pro. And by the way, if you're looking to learn Logic Pro faster then here is my 6 Pillars on Learning Logic Pro Faster.


