How To Reverse Audio in Logic Pro
Sep 13, 2021
Reversing audio is a useful tool for producers. It’s one of those tricks that takes only a few clicks and gives you a brand-new sound! It’s also a great way to create risers out of elements you already have in your track such as vocals, snare reverbs, cymbals, and drum sounds.

Like many things in Logic Pro, there are multiple ways to reverse audio. The three main ways that we will discuss are listed below. If you'd rather watch a video, then I've also made one here on how to create a reverse sweep with an audio signal.
1. Using the audio editor
2. Using the inspector panel
3. Importing audio into a sampler in Logic.
Reversing an audio file straight in Logic is much simpler if that’s all you want to do (options 1 and 2). However, a sampler (option 3) allows you to play your reversed audio file on a MIDI keyboard and has other tools built into it that allow you to manipulate the audio file even more (pitch, time stretching, etc.). This can be a great production tool if you're looking to chop samples in Logic and get fresh ideas.
There’s no “right” or “wrong” way.
It’s really a matter of preference.
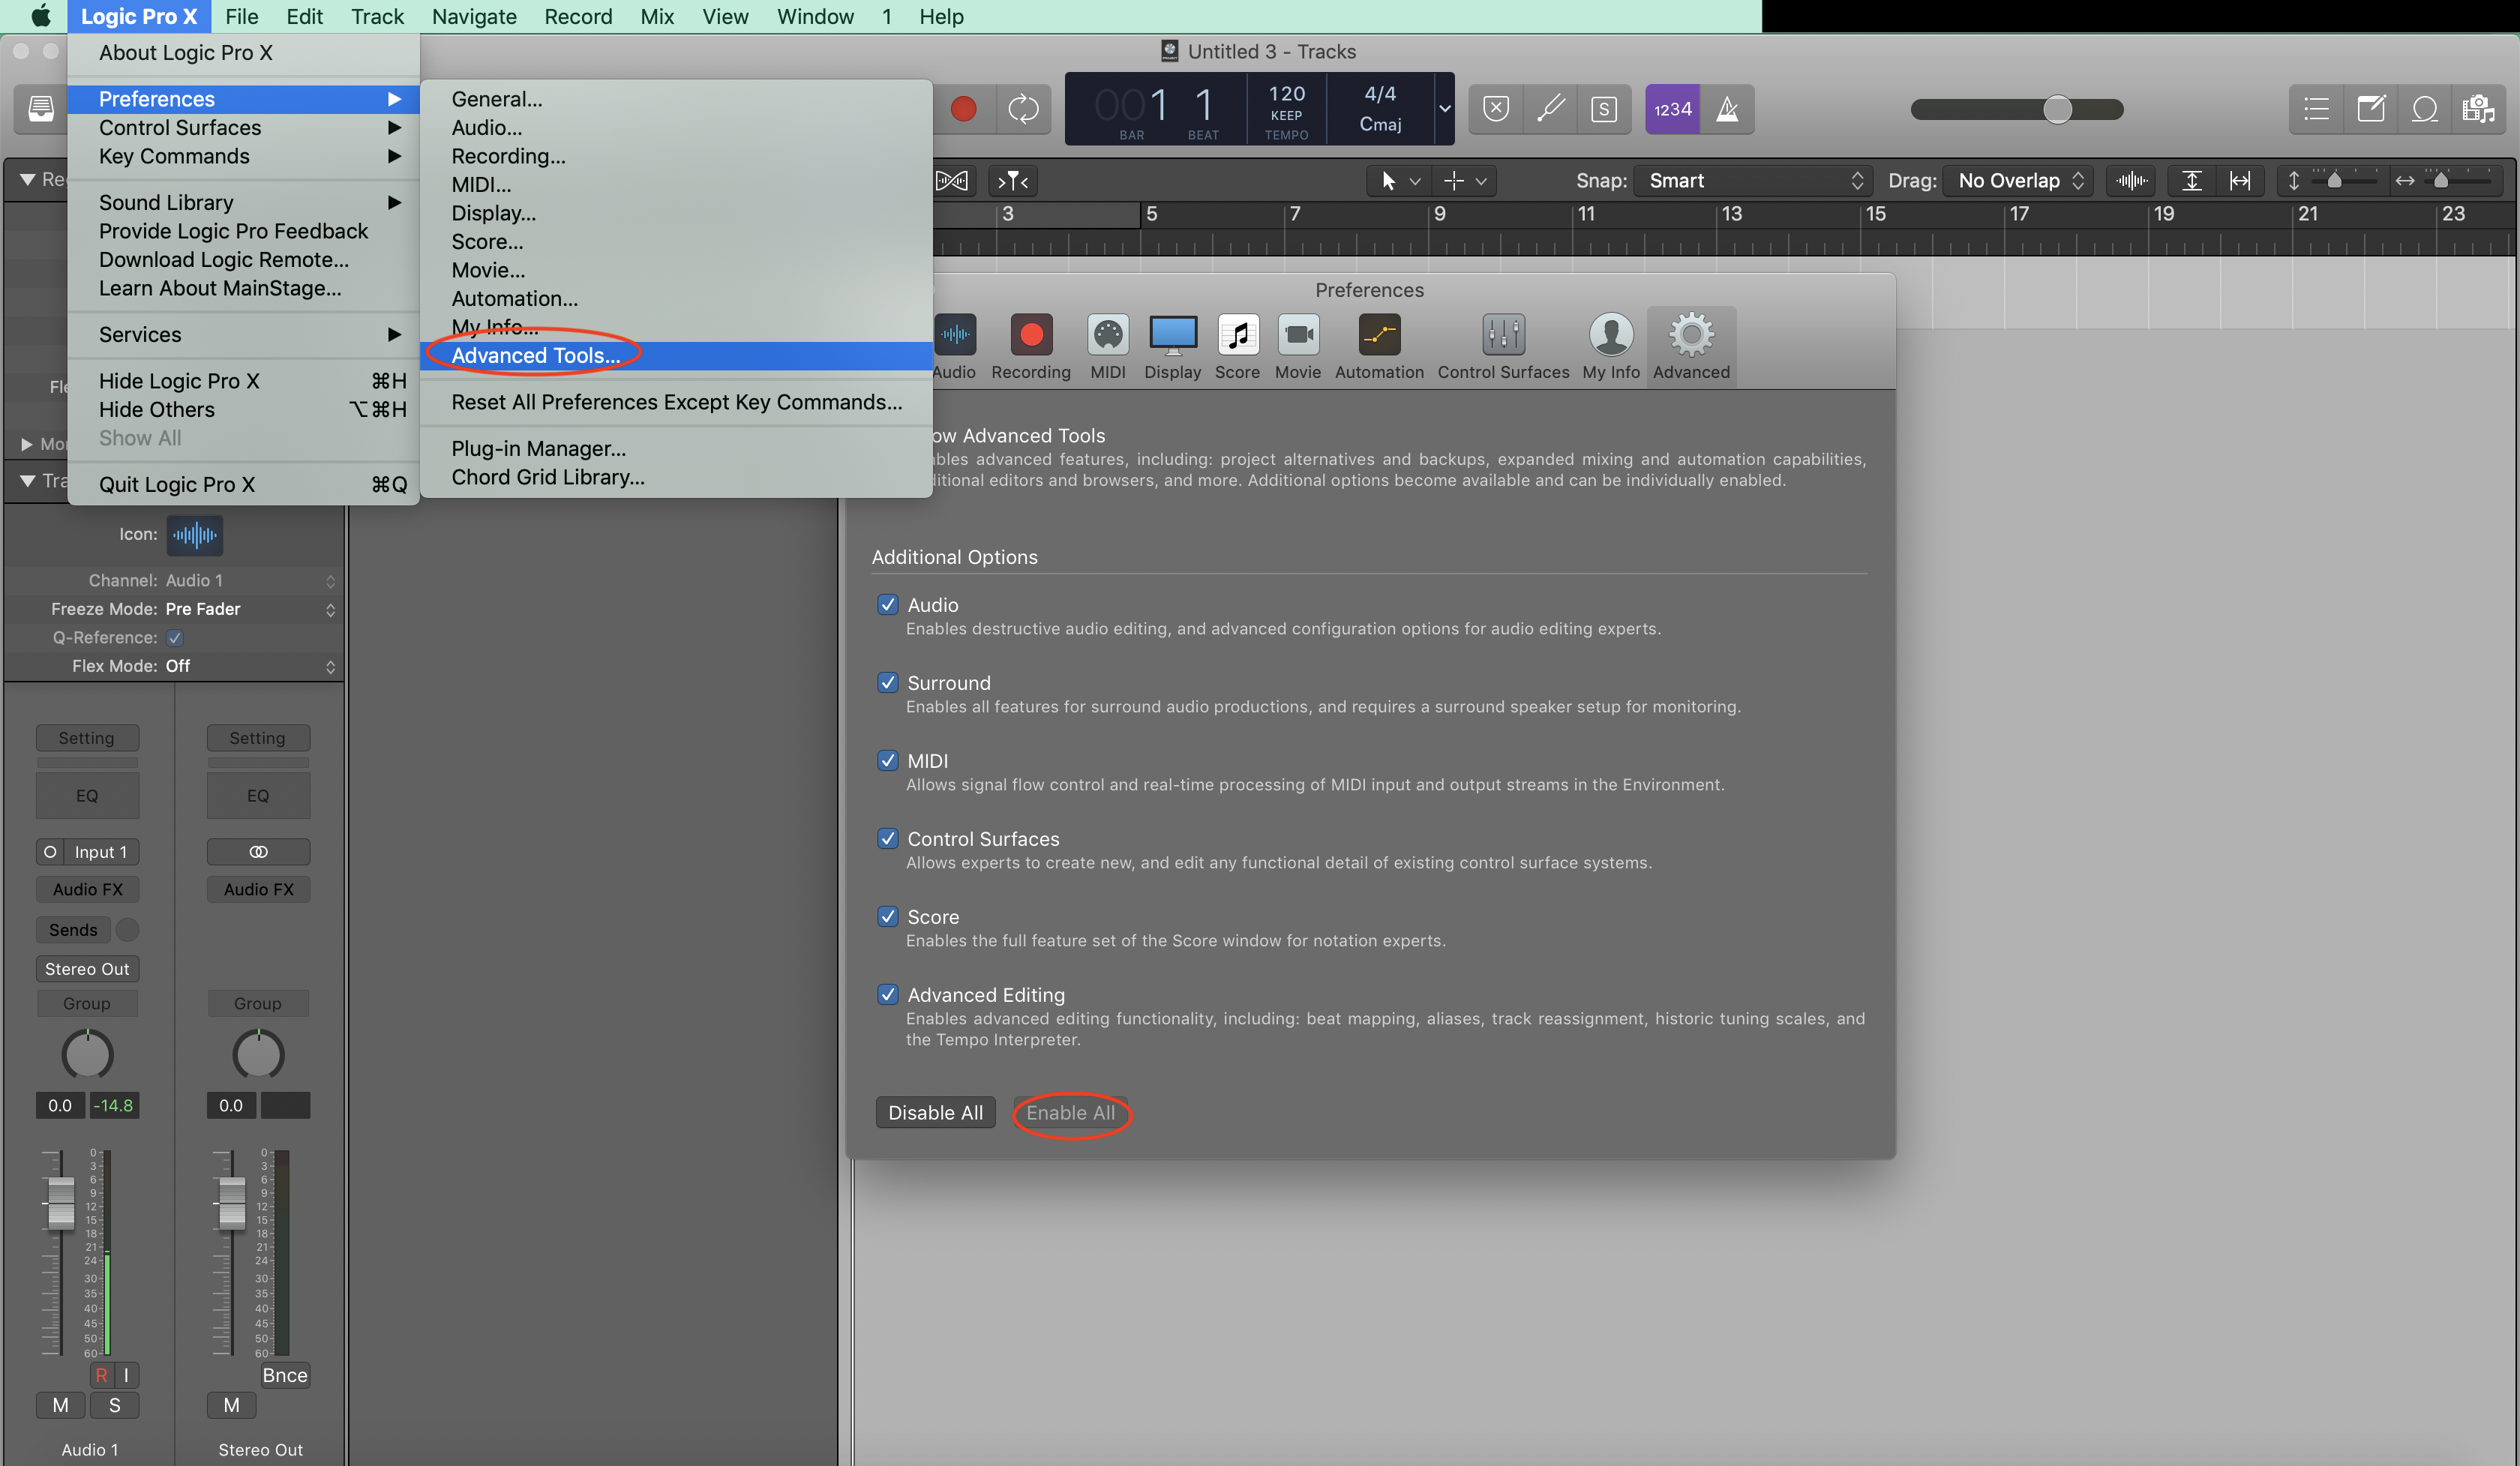
First, make sure that your advanced tools are enabled by going to:
Logic Pro > Preferences > Advanced Tools.
Check all the boxes.
Here is a step-by-step guide on how to reverse audio by importing audio straight into Logic and using the audio editor.
A. Import an audio file into Logic by dragging from your files or using the file browser.
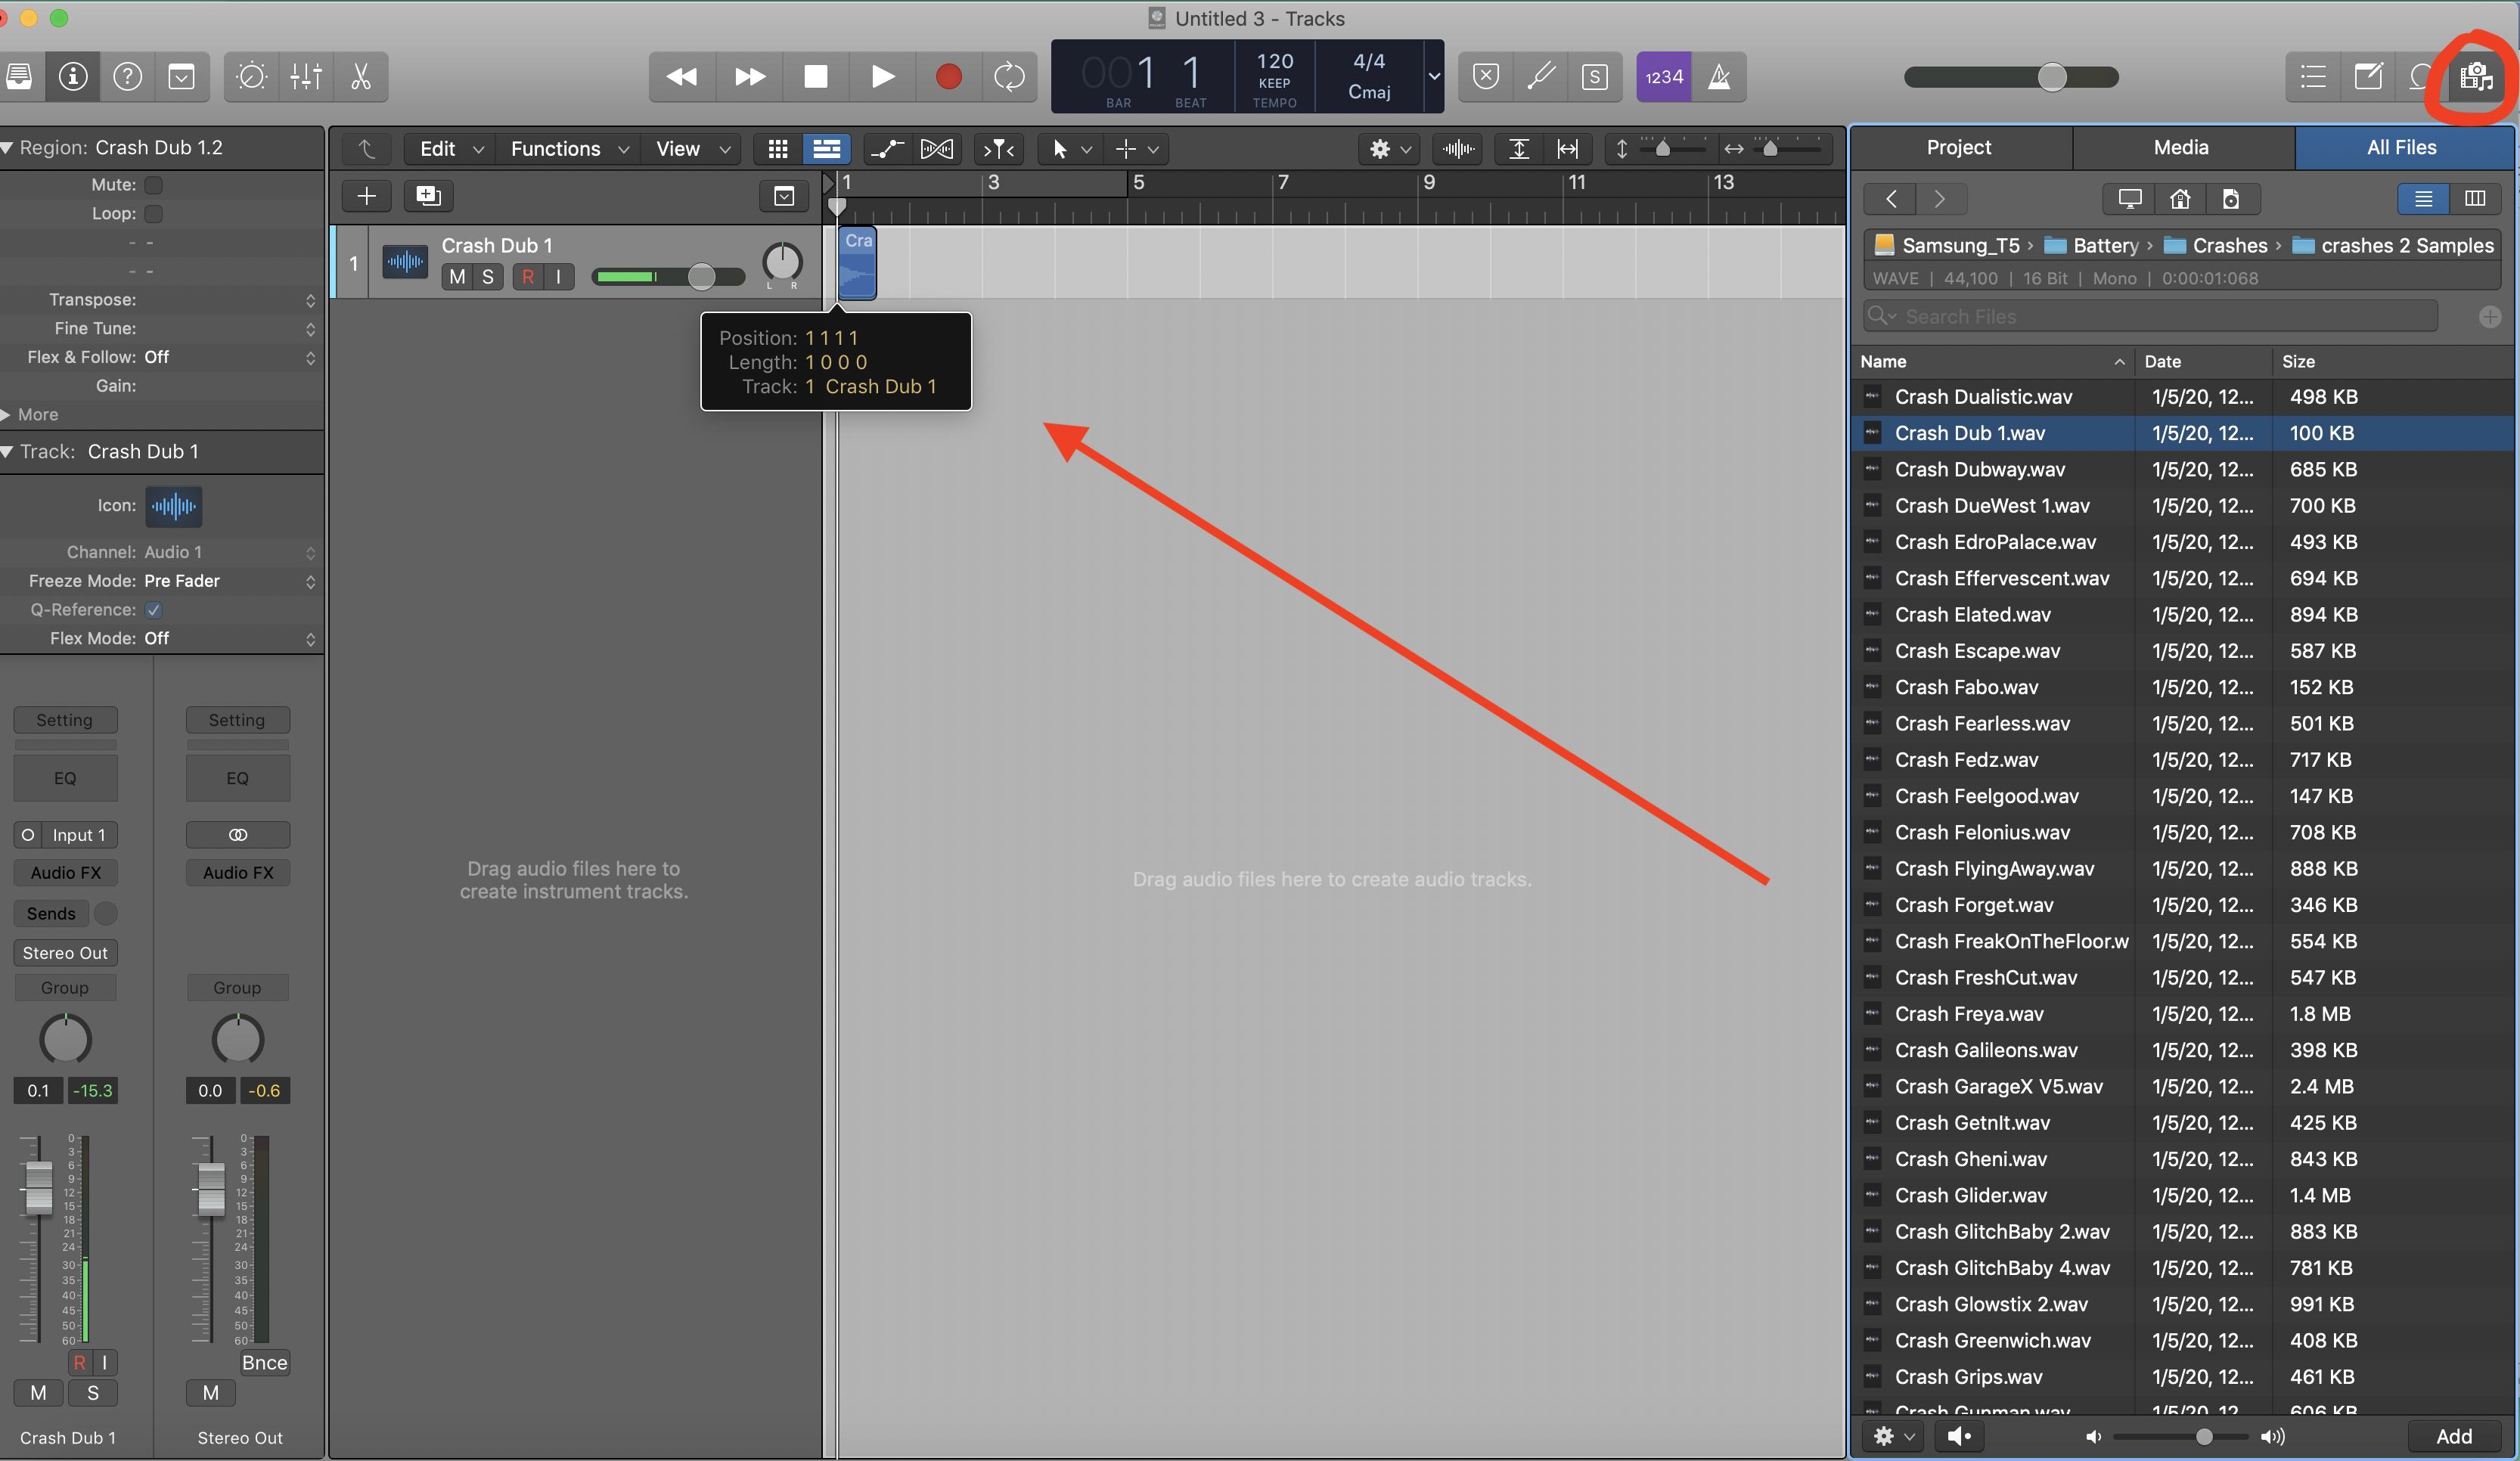
B. Then, click on the audio file in the main browser and use the key command:
“Control shift R”
OR
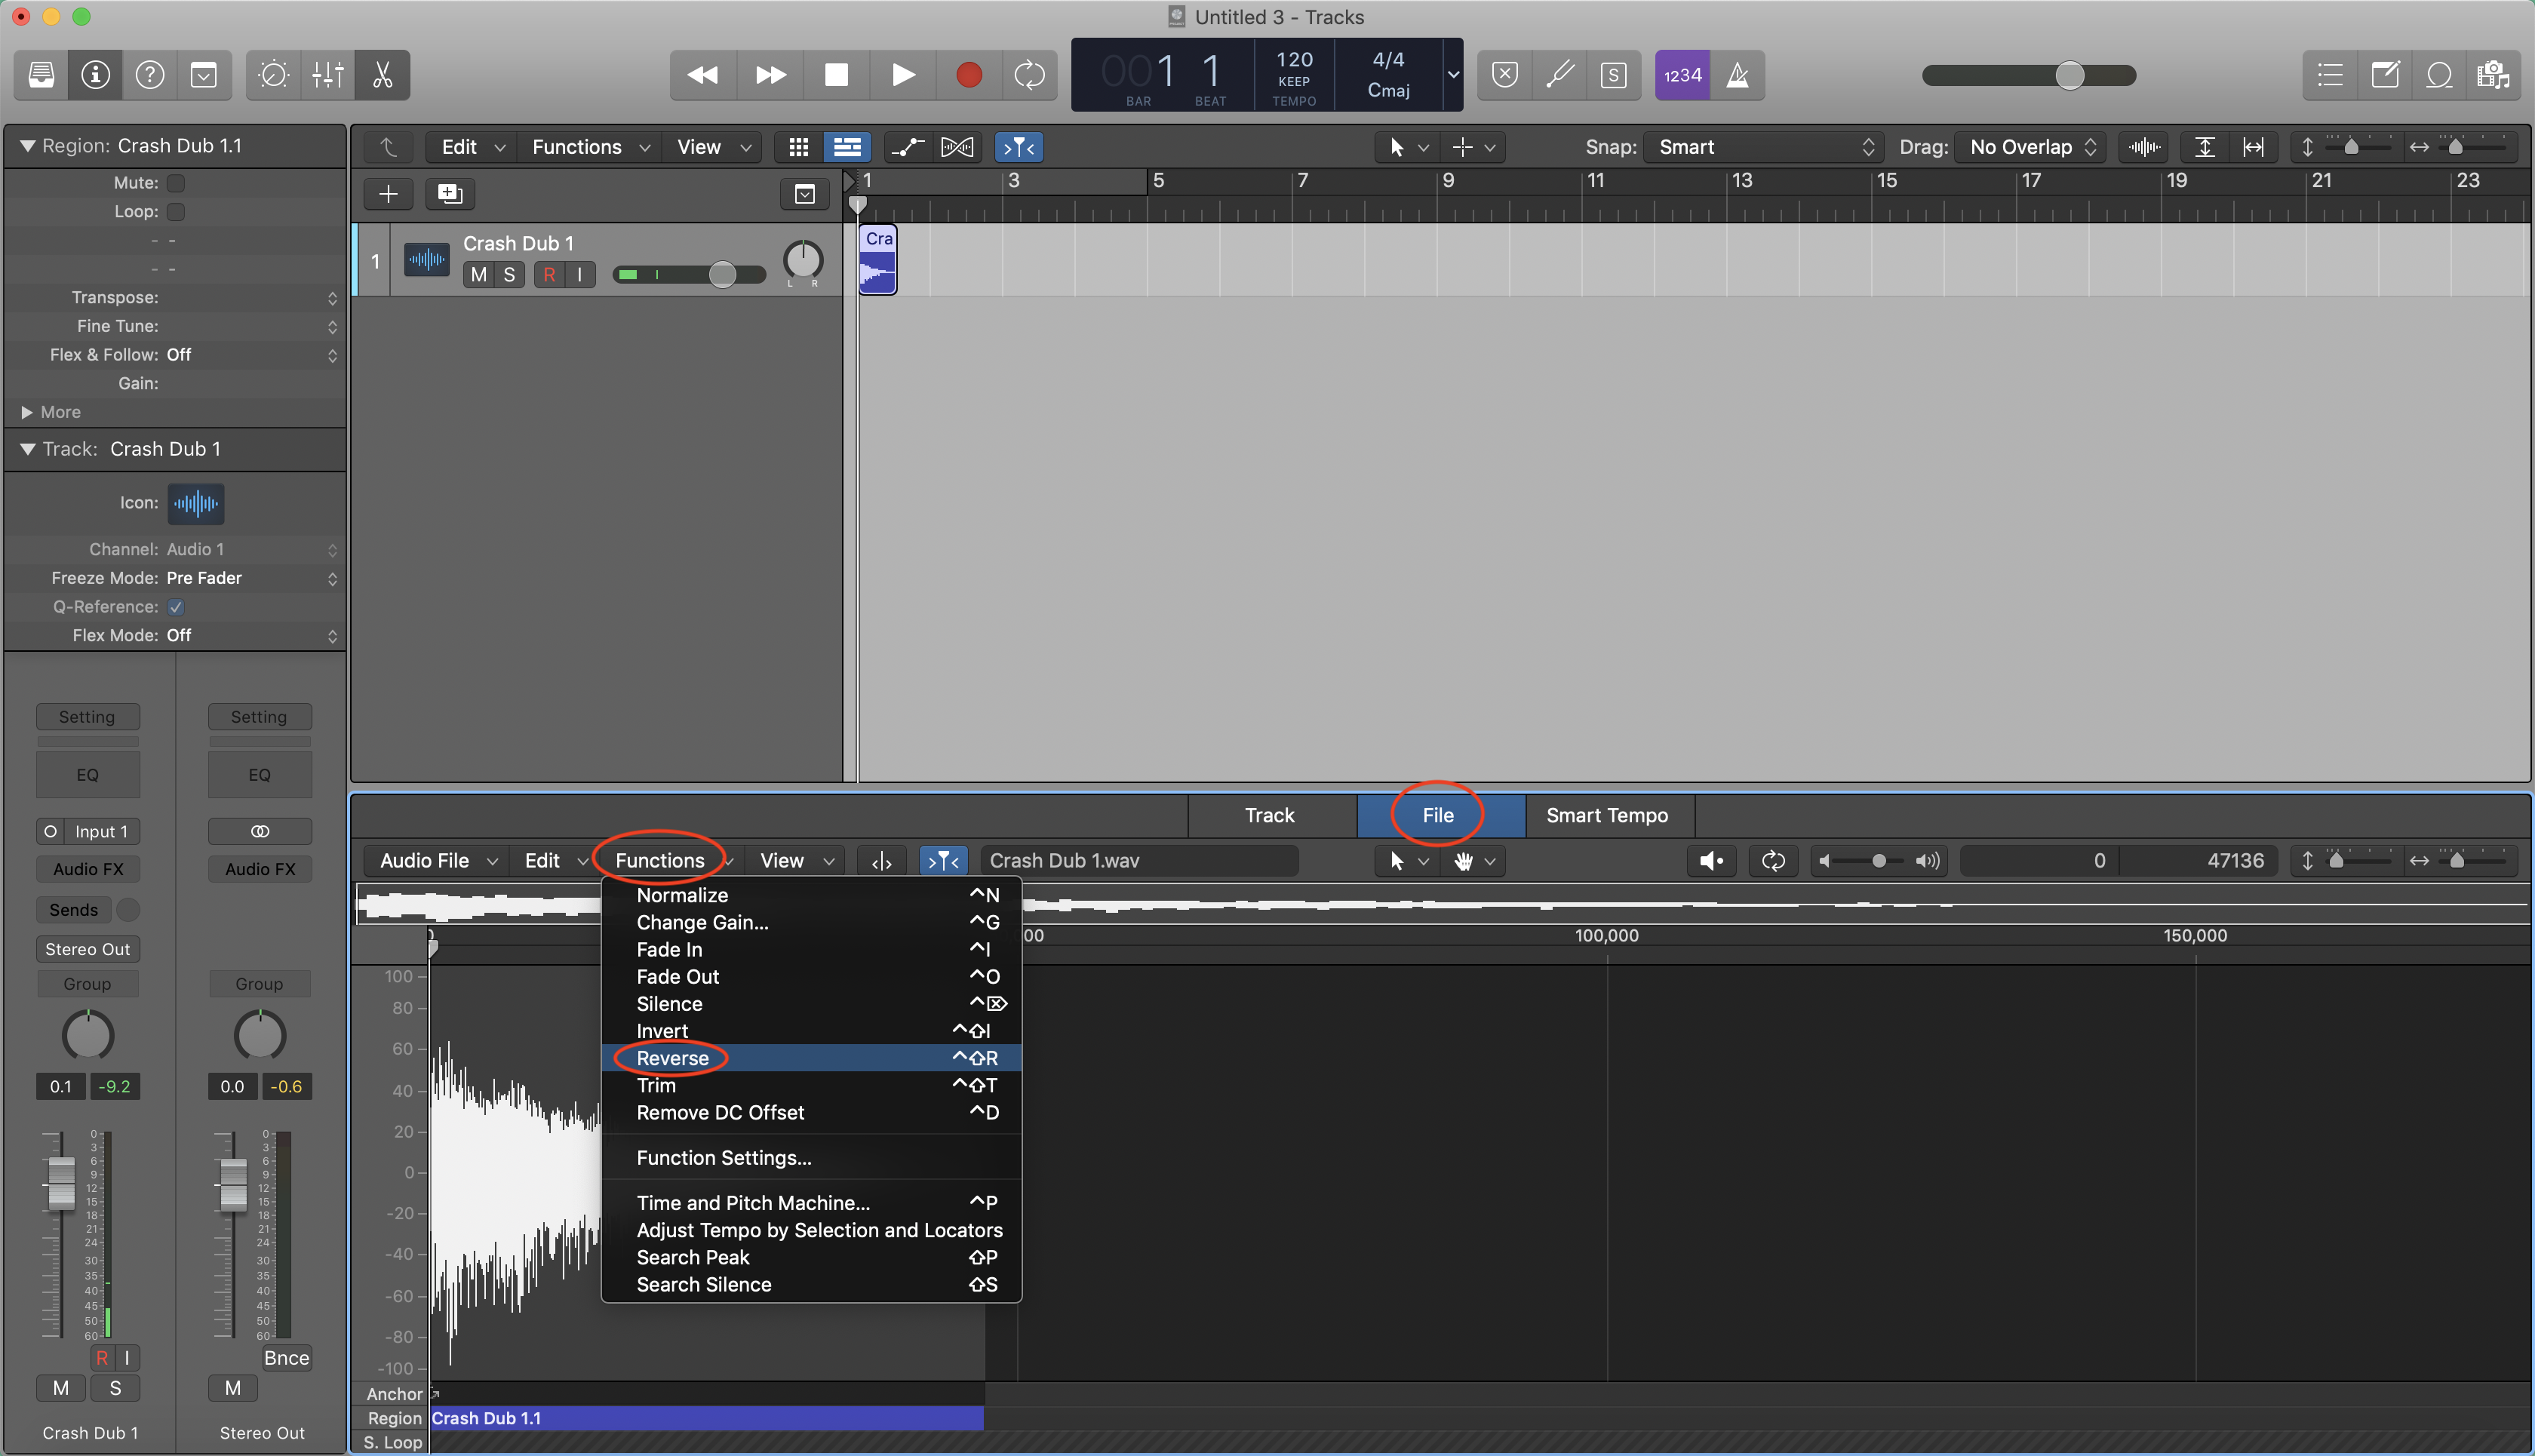
if you’d prefer to do it manually go to the edit window (by clicking on the scissors icon in the top left). Then click on:
File > functions > reverse.

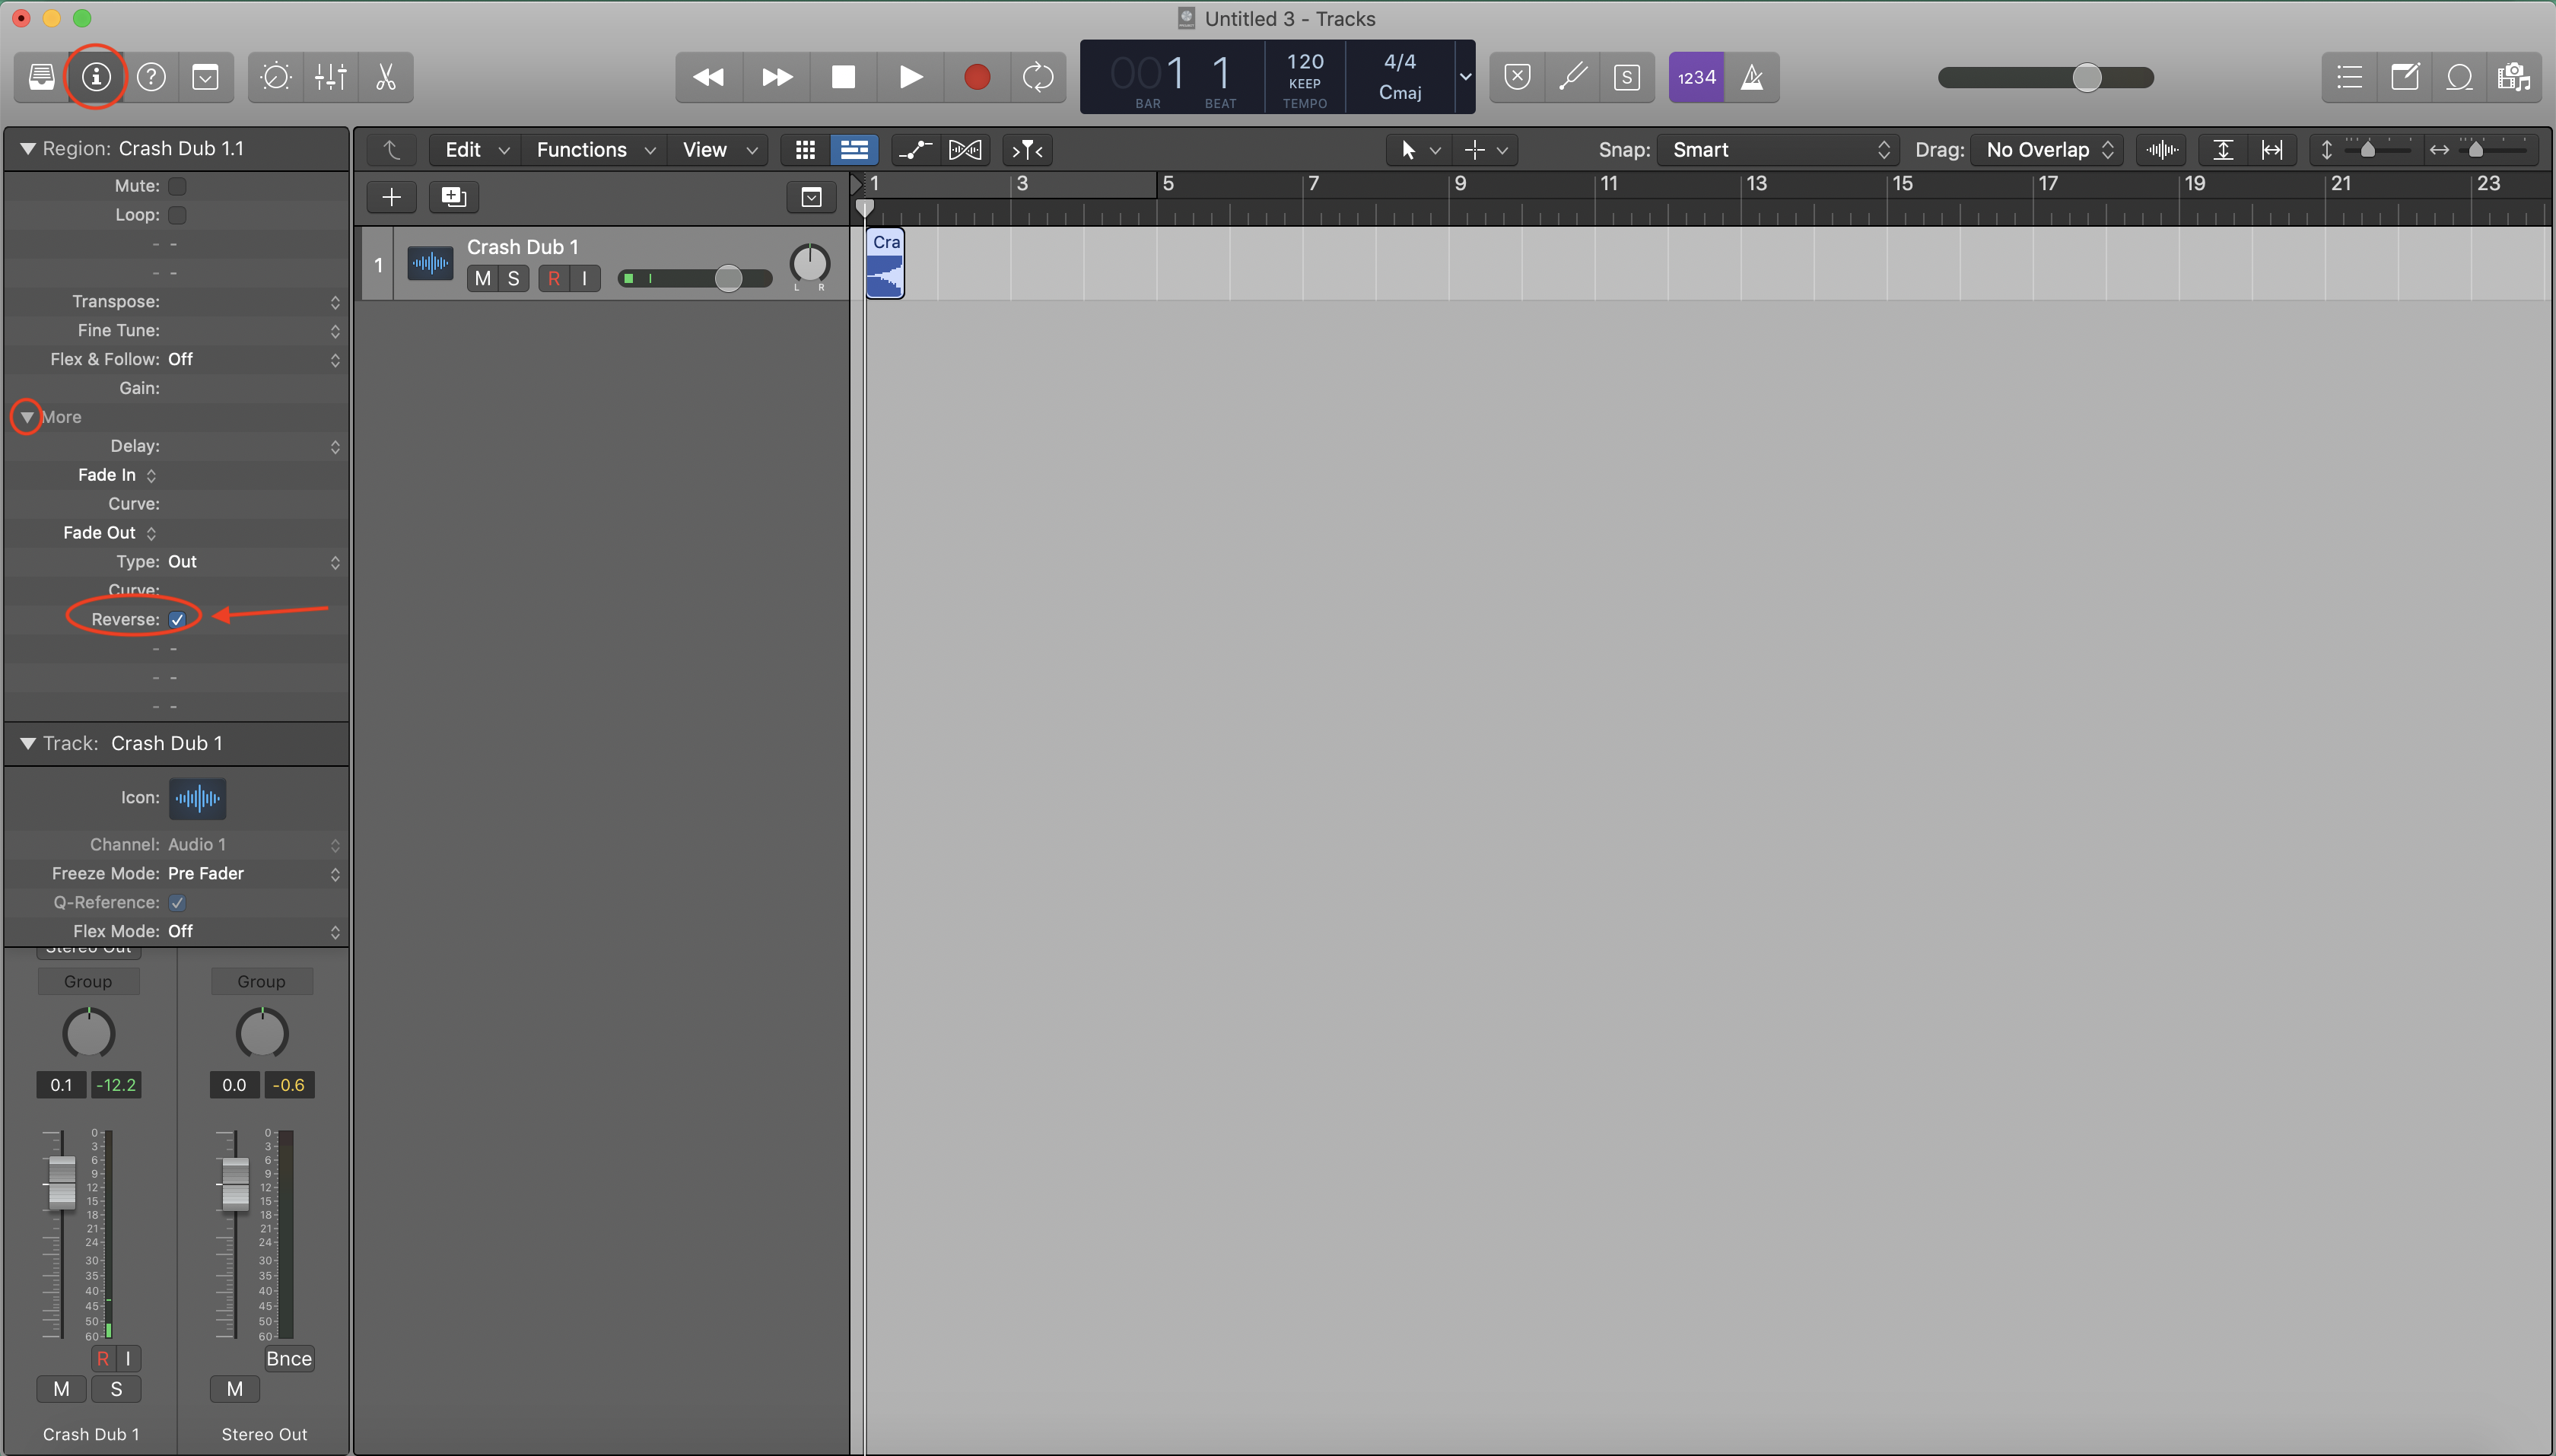
Here is a step-by-step guide on how to reverse audio importing audio straight into Logic and using the inspector panel:
A. See step A above to import audio into Logic.
B. Open the inspector panel by clicking on the “i” icon at the top left. Click on the little arrow next to where it says “more” under the region panel. Checkmark the box that says “reverse”.
Here is a step-by-step guide on how to reverse audio by using the Quick sampler in Logic:
A. Import an audio file into Logic’s sampler by dragging into the grey space below the tracks in the main window (make sure you drag all the way over to the left or the sampler option won’t show up).

B. Hold and drag over “Quick Sampler (Original)”.
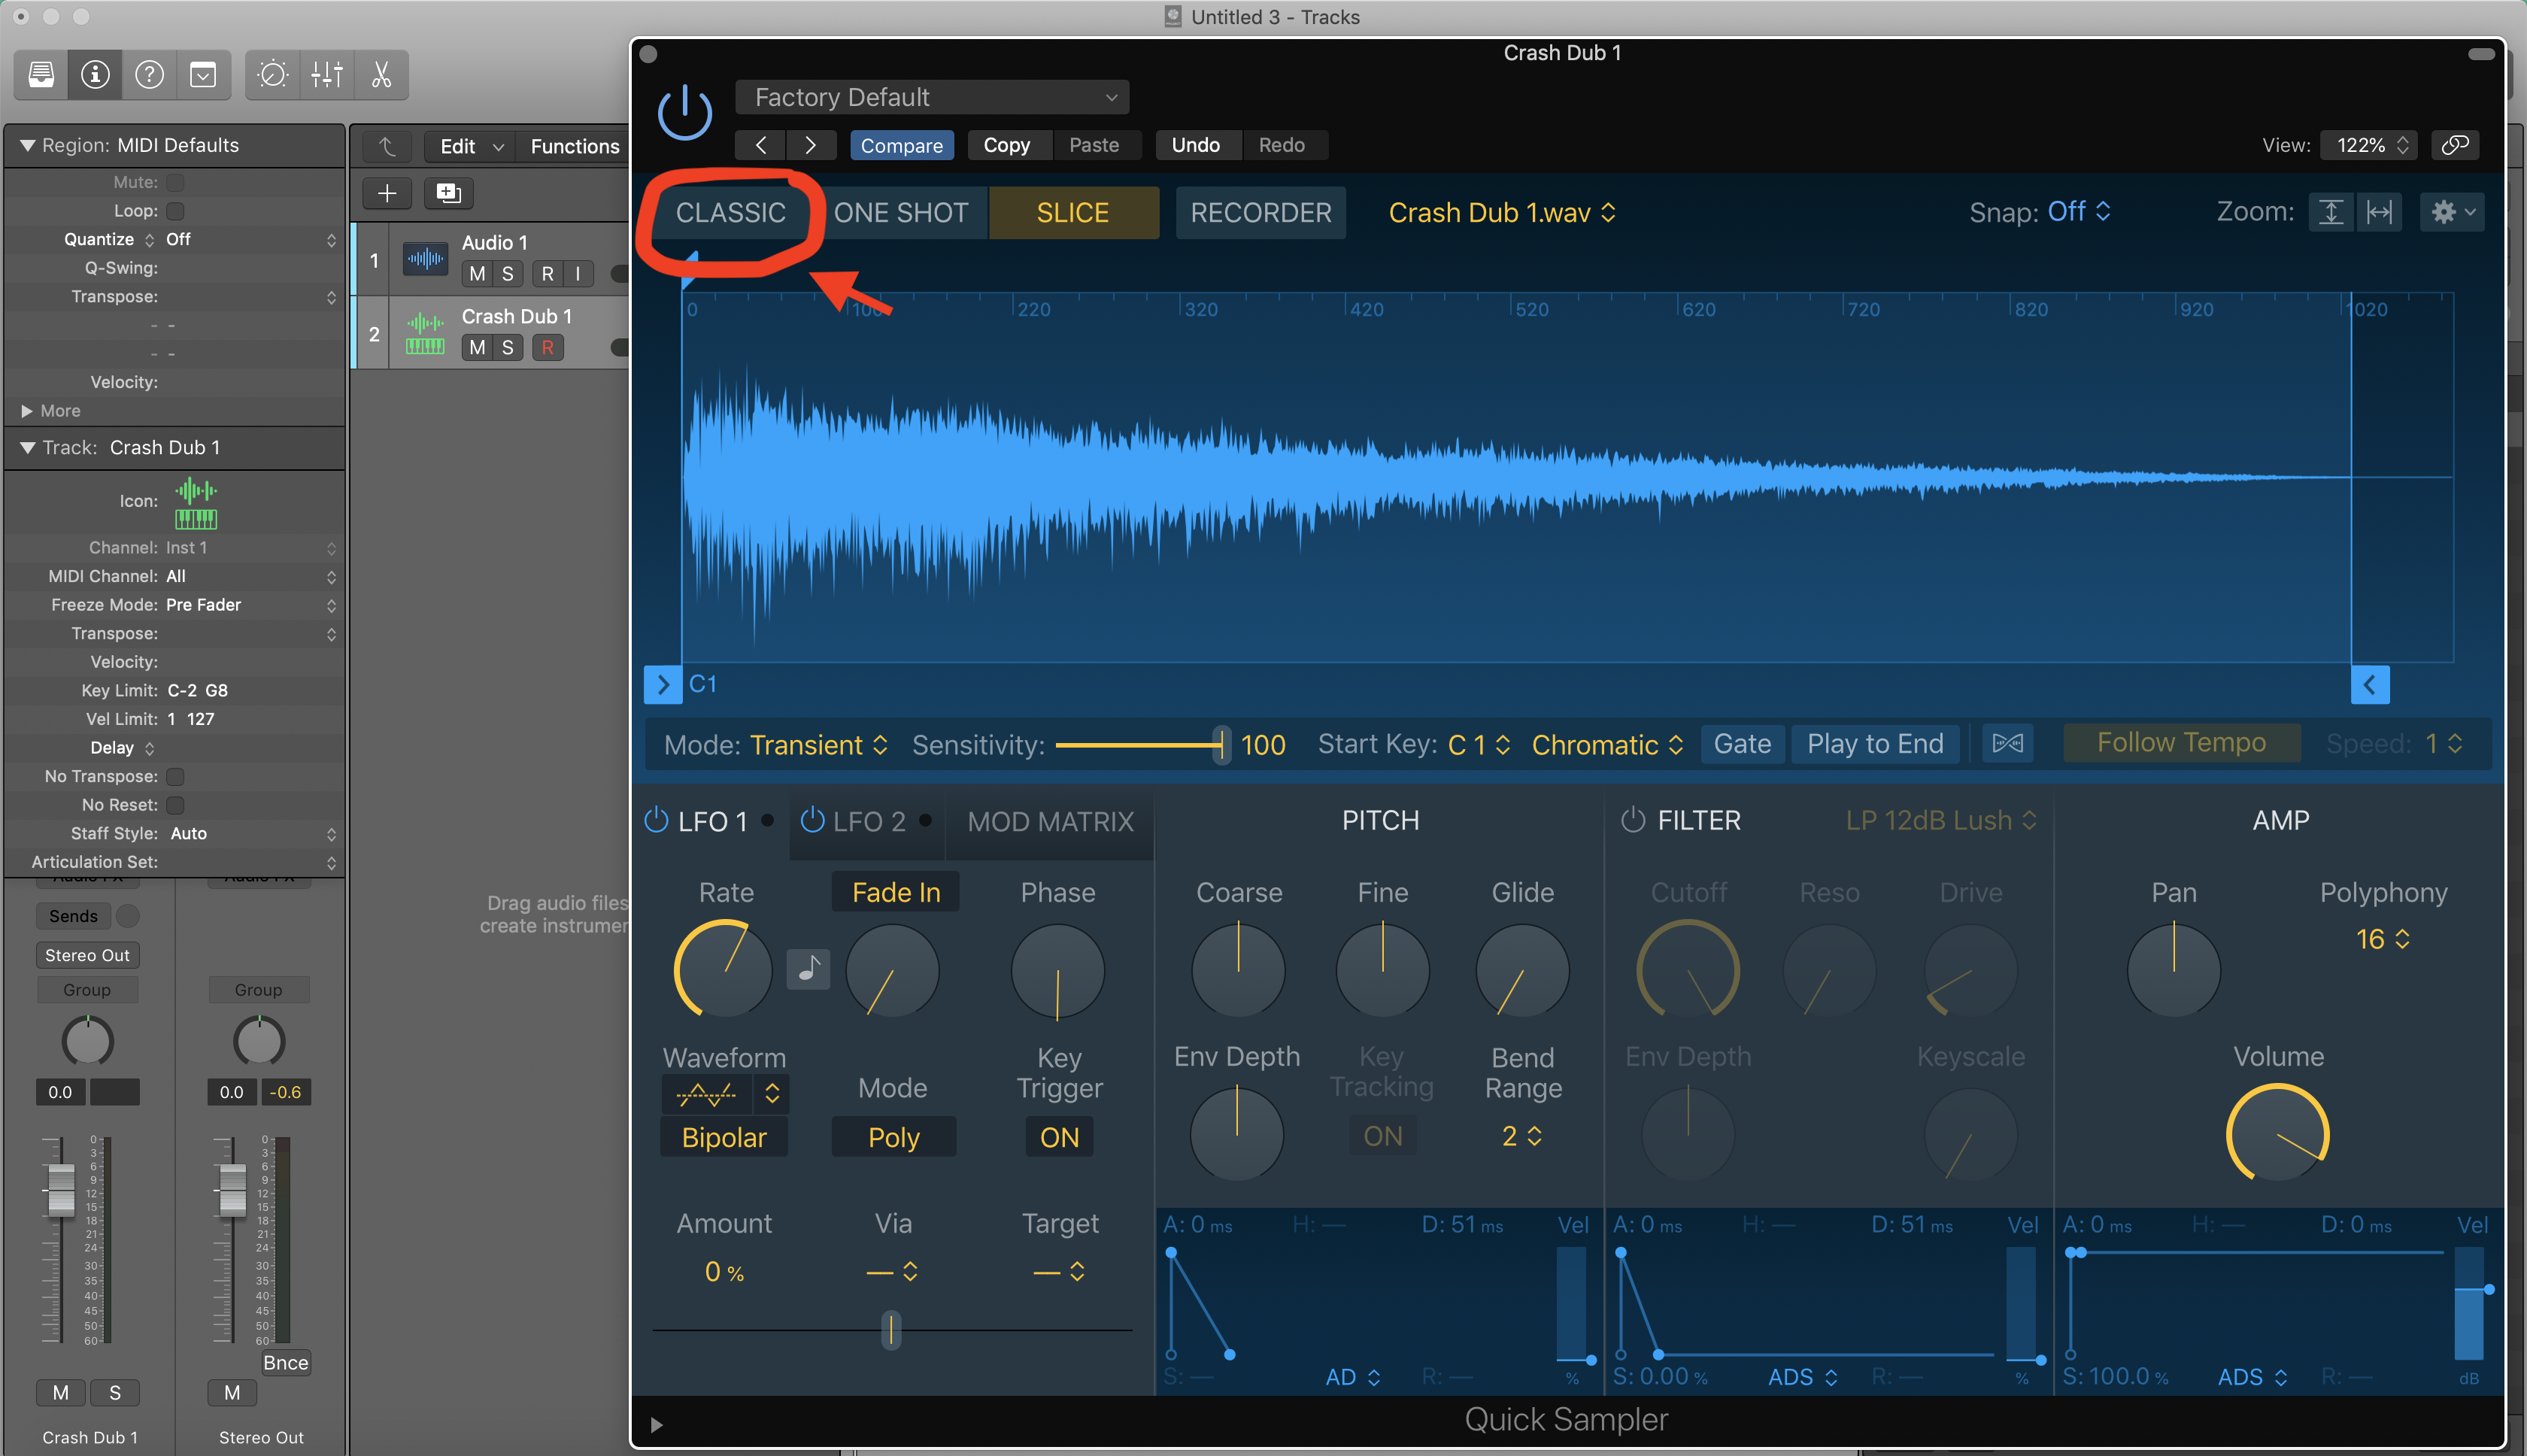
C. In the sampler window, change the playback from “slice” to “classic”. The “slice” mode doesn’t have a feature for reversing audio.
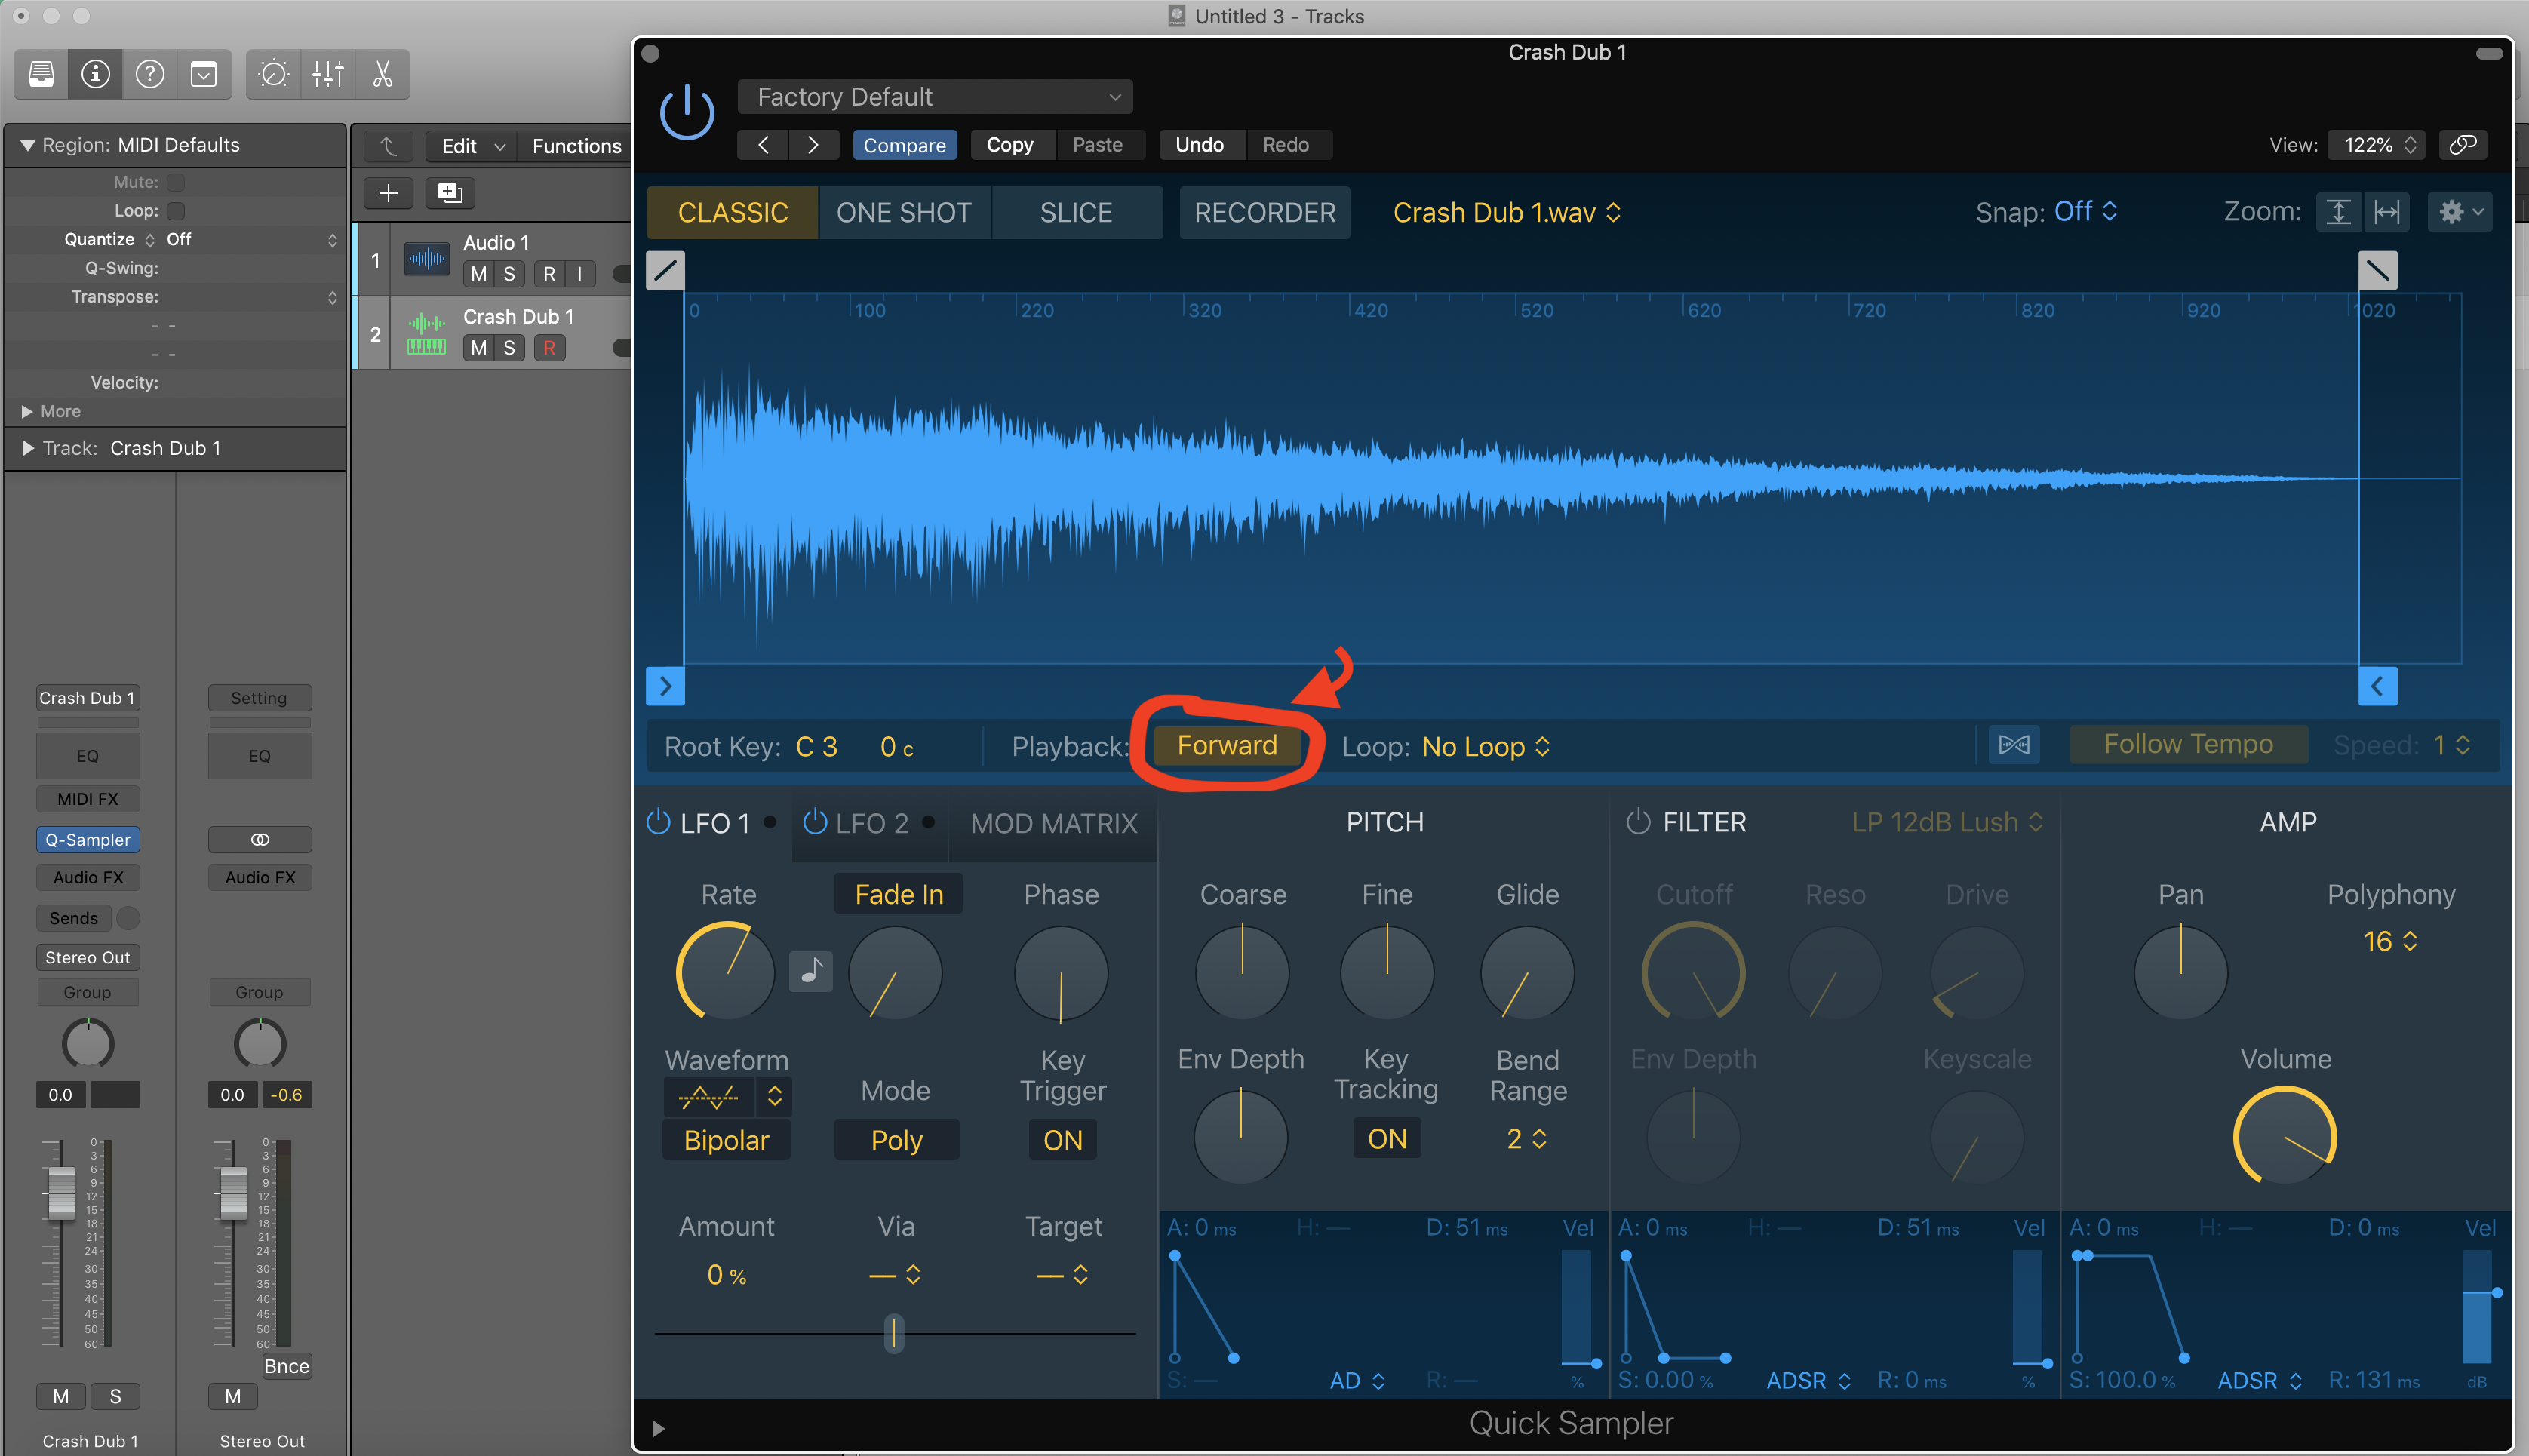
D. Click on the yellow button where it says “forward”, and it will change to “reverse”.
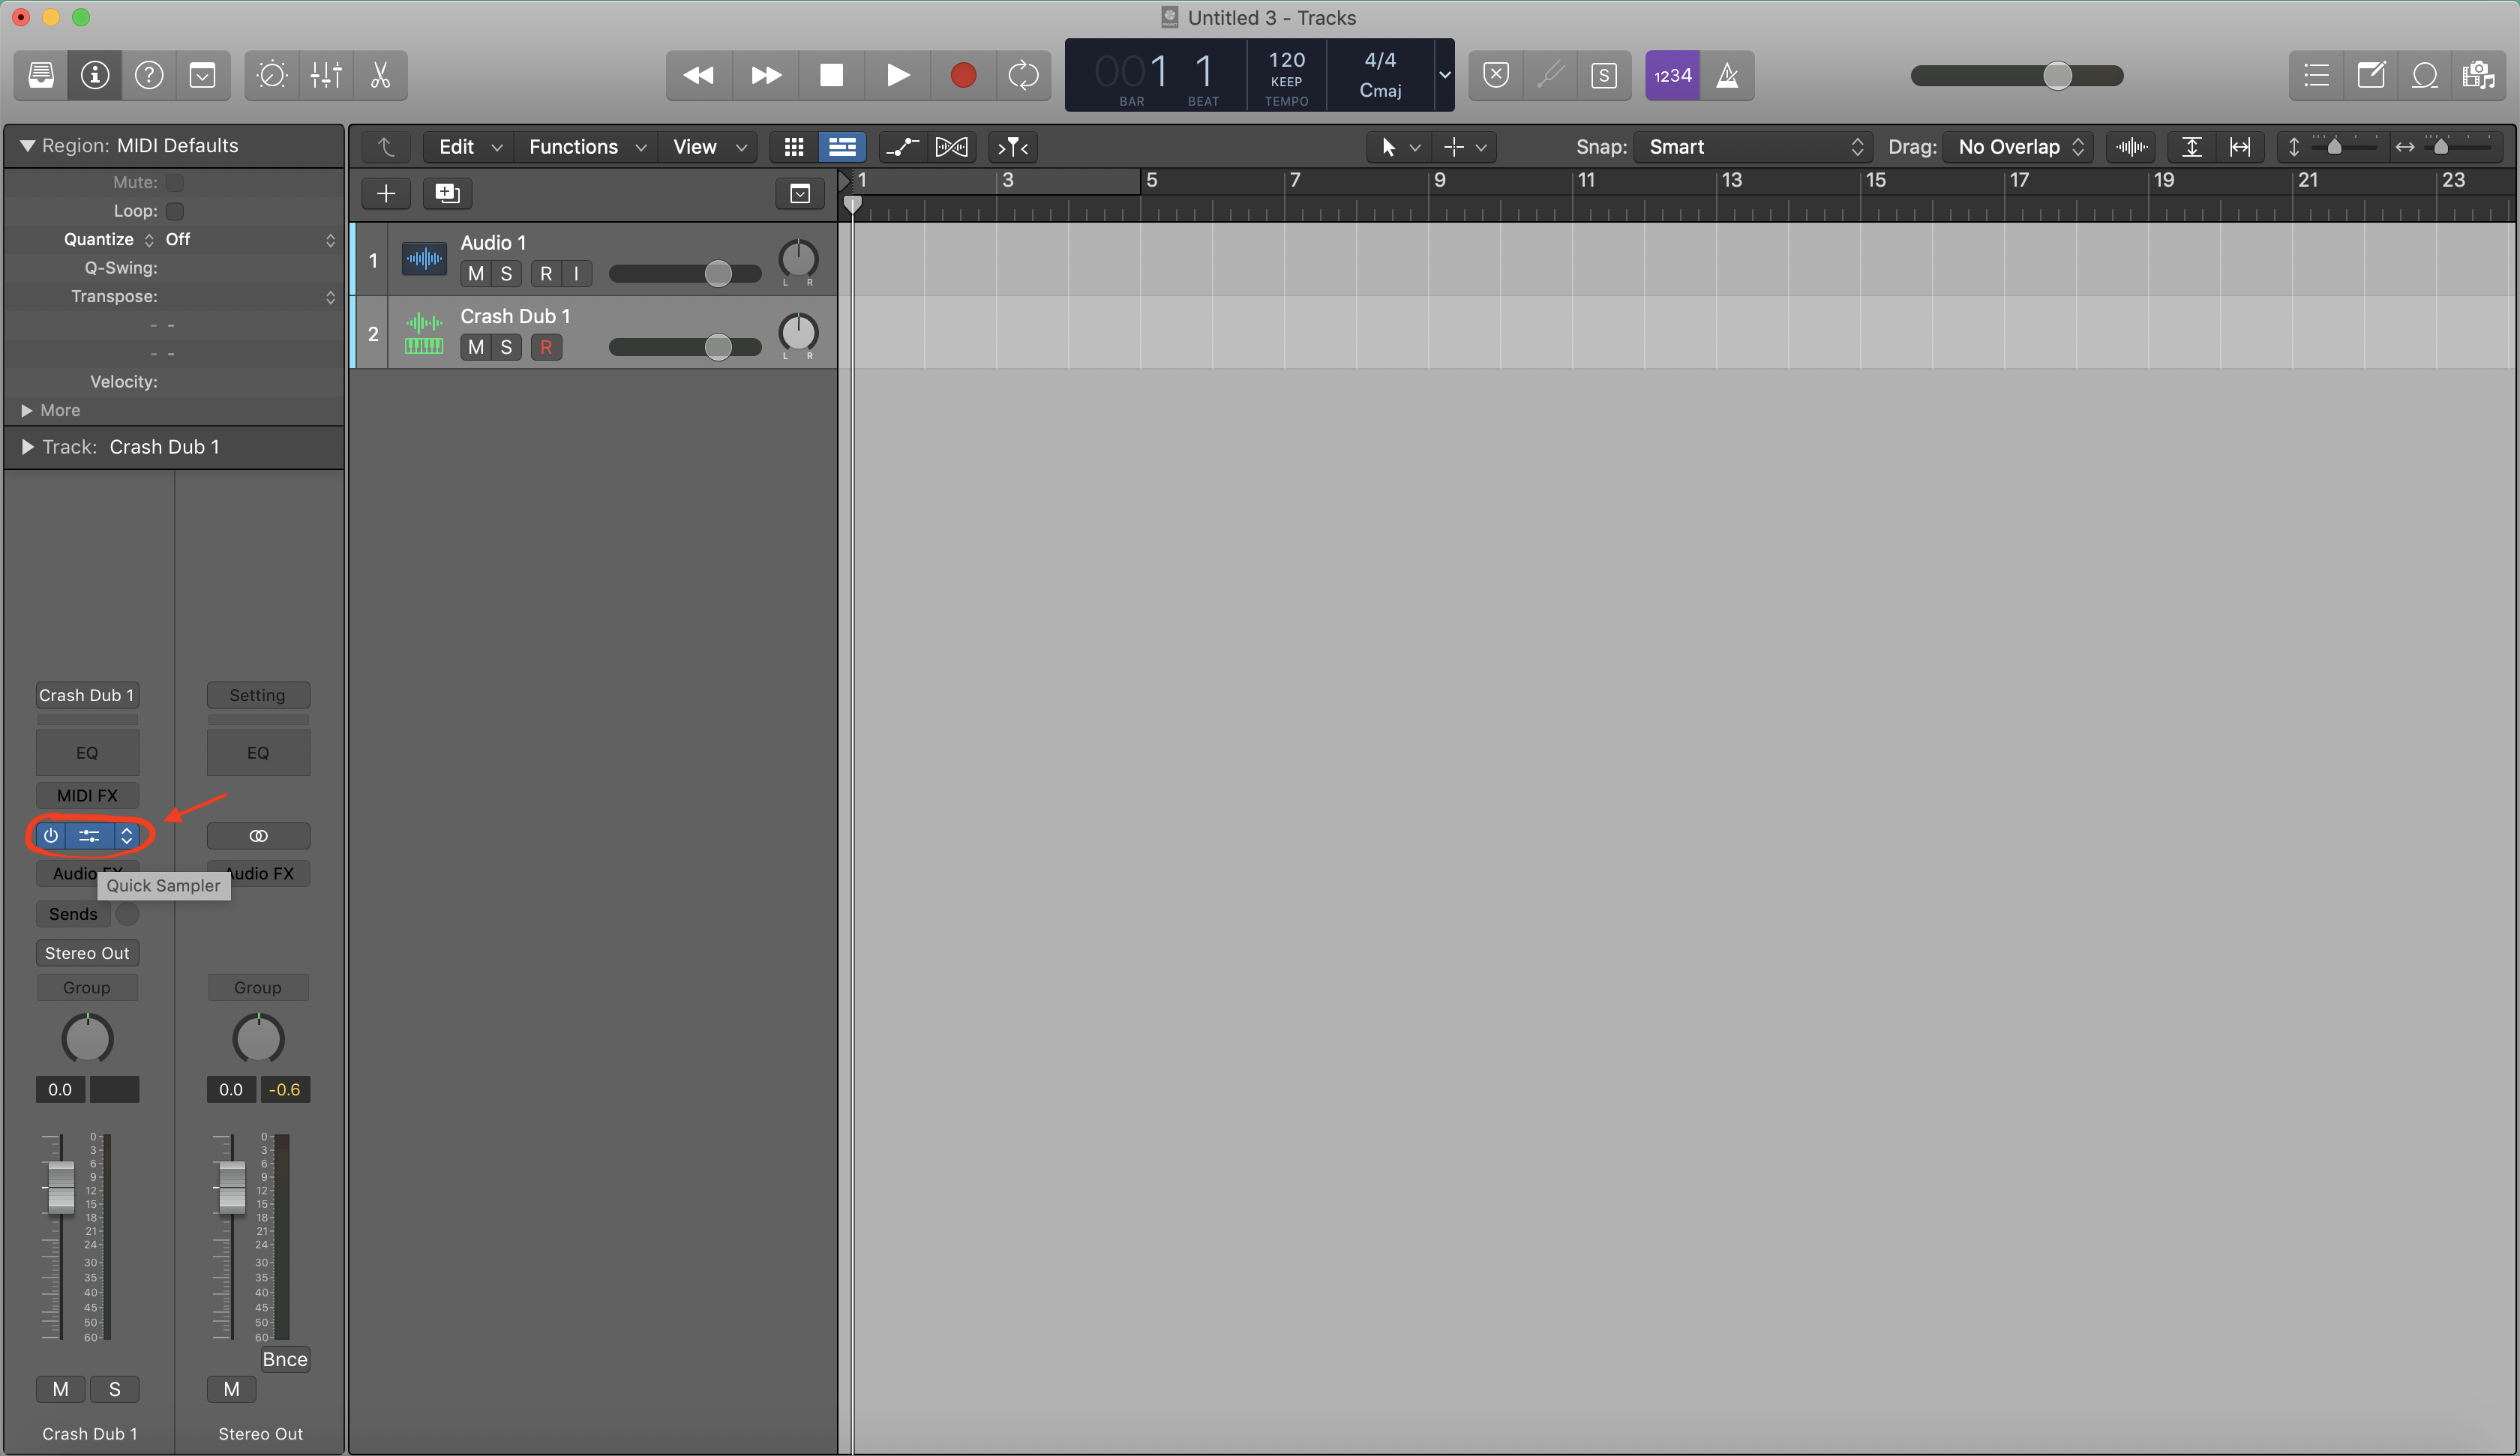
Tip: To open and close the sampler window, click on “Q-Sampler” on the side pane (track must be selected). If you can’t see it, make sure that the little arrows next to region and track are horizontal or they might be covering it up.

Play on your keyboard and record. The original reversed audio will be mapped to the “Root Note” (default is C3).
If you're looking to learn more about topics such as reversing audio, Logic Pro, Songwriting, or music production, then you might be interested in learning Logic faster with my free 6 Pillars to learning Logic.


