How To Add Plugins In Logic Pro
Sep 21, 2021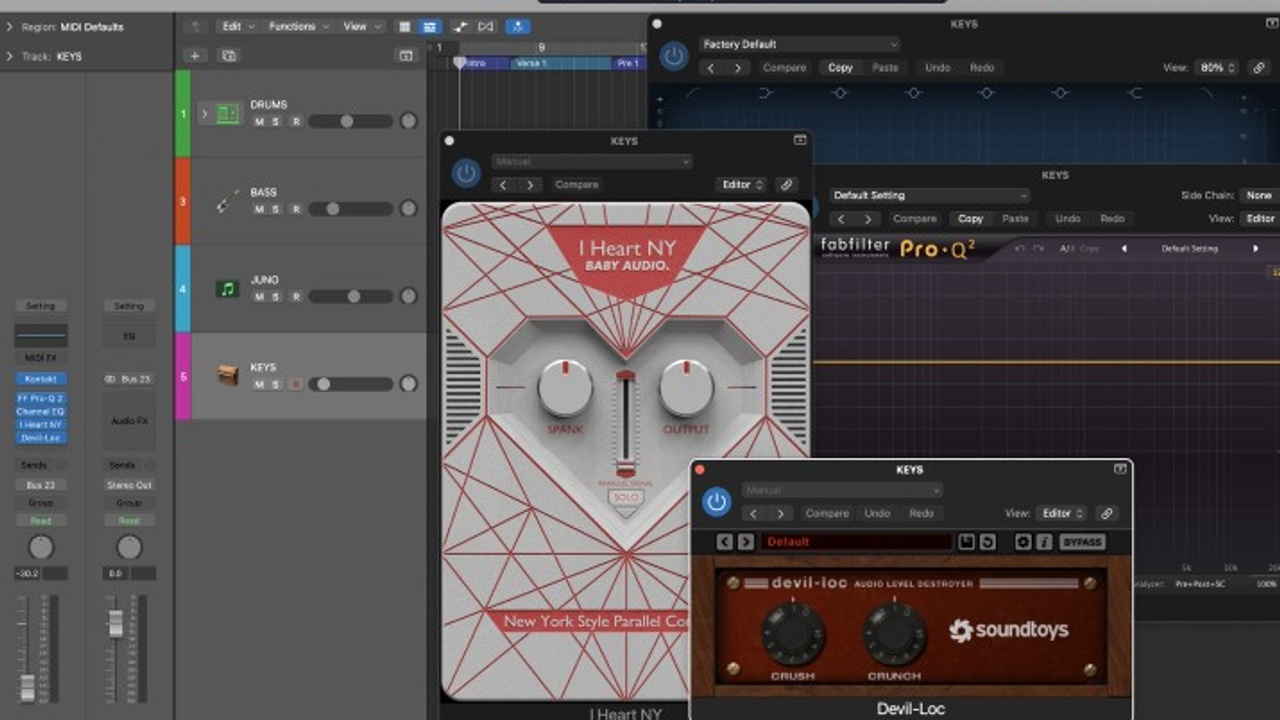
Plugins are a music producer’s best friend…or at least, they’re my best friend.
From EQ's and compressors to reverbs and delays, plugins in Logic Pro and other digital audio workstations enhance audio-related functionality and are critical to both the technical and creative aspects of music production.
Plugins also give you the opportunity to help improve the production and mixing process of making a great song. Whether you are mixing vocals to try and achieve a crisp pop vocal or you're looking to record guitars that have a lot of crunch and attitude. Plugins can help you achieve your desired outcome.

I want to point out though, plugins aren't magic! They cannot turn a bad song into a good song. You still need great songwriting, arrangement, and sound selection. Plugins are the icing on the cake!
If you’re a real plugin nerd, you may have already bought expensive 3rd party plugins from companies such as Sound Toys, Waves or Universal Audio.
But luckily, Logic comes with its own set of built-in plugins, so you don’t have to invest any money to start using them in your projects.
Here is a step-by-step guide on how to add plugins in Logic Pro:
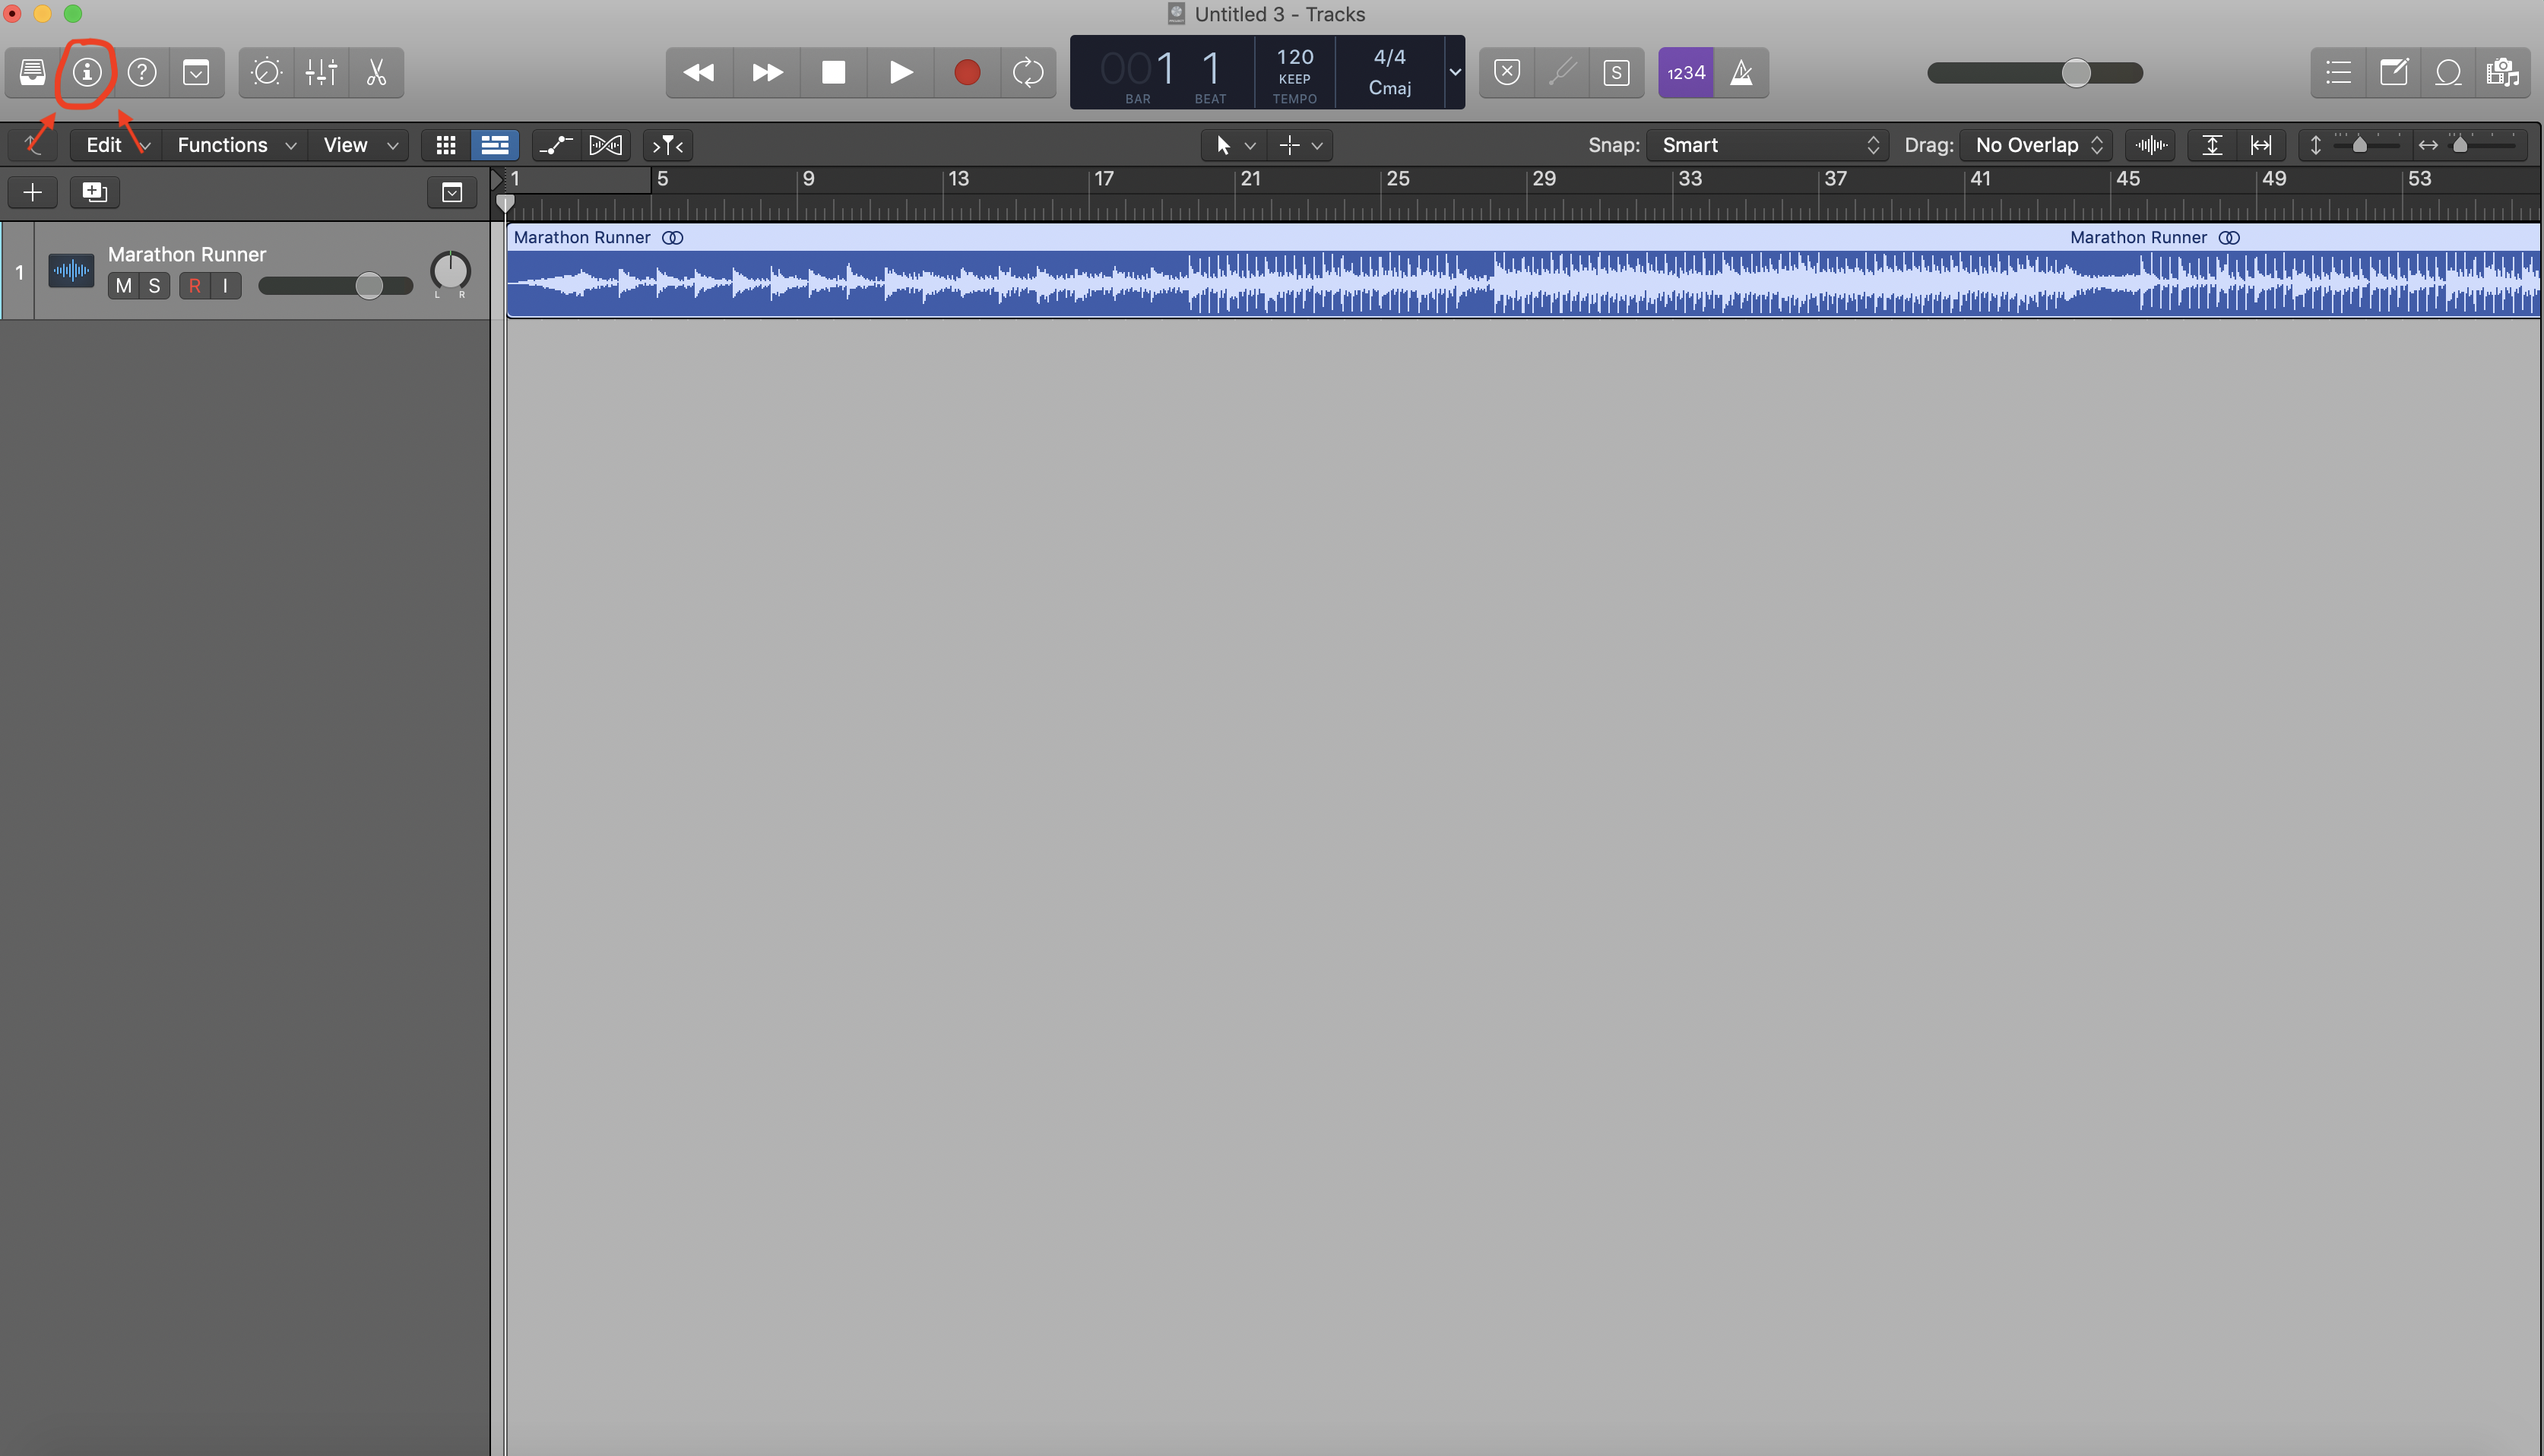
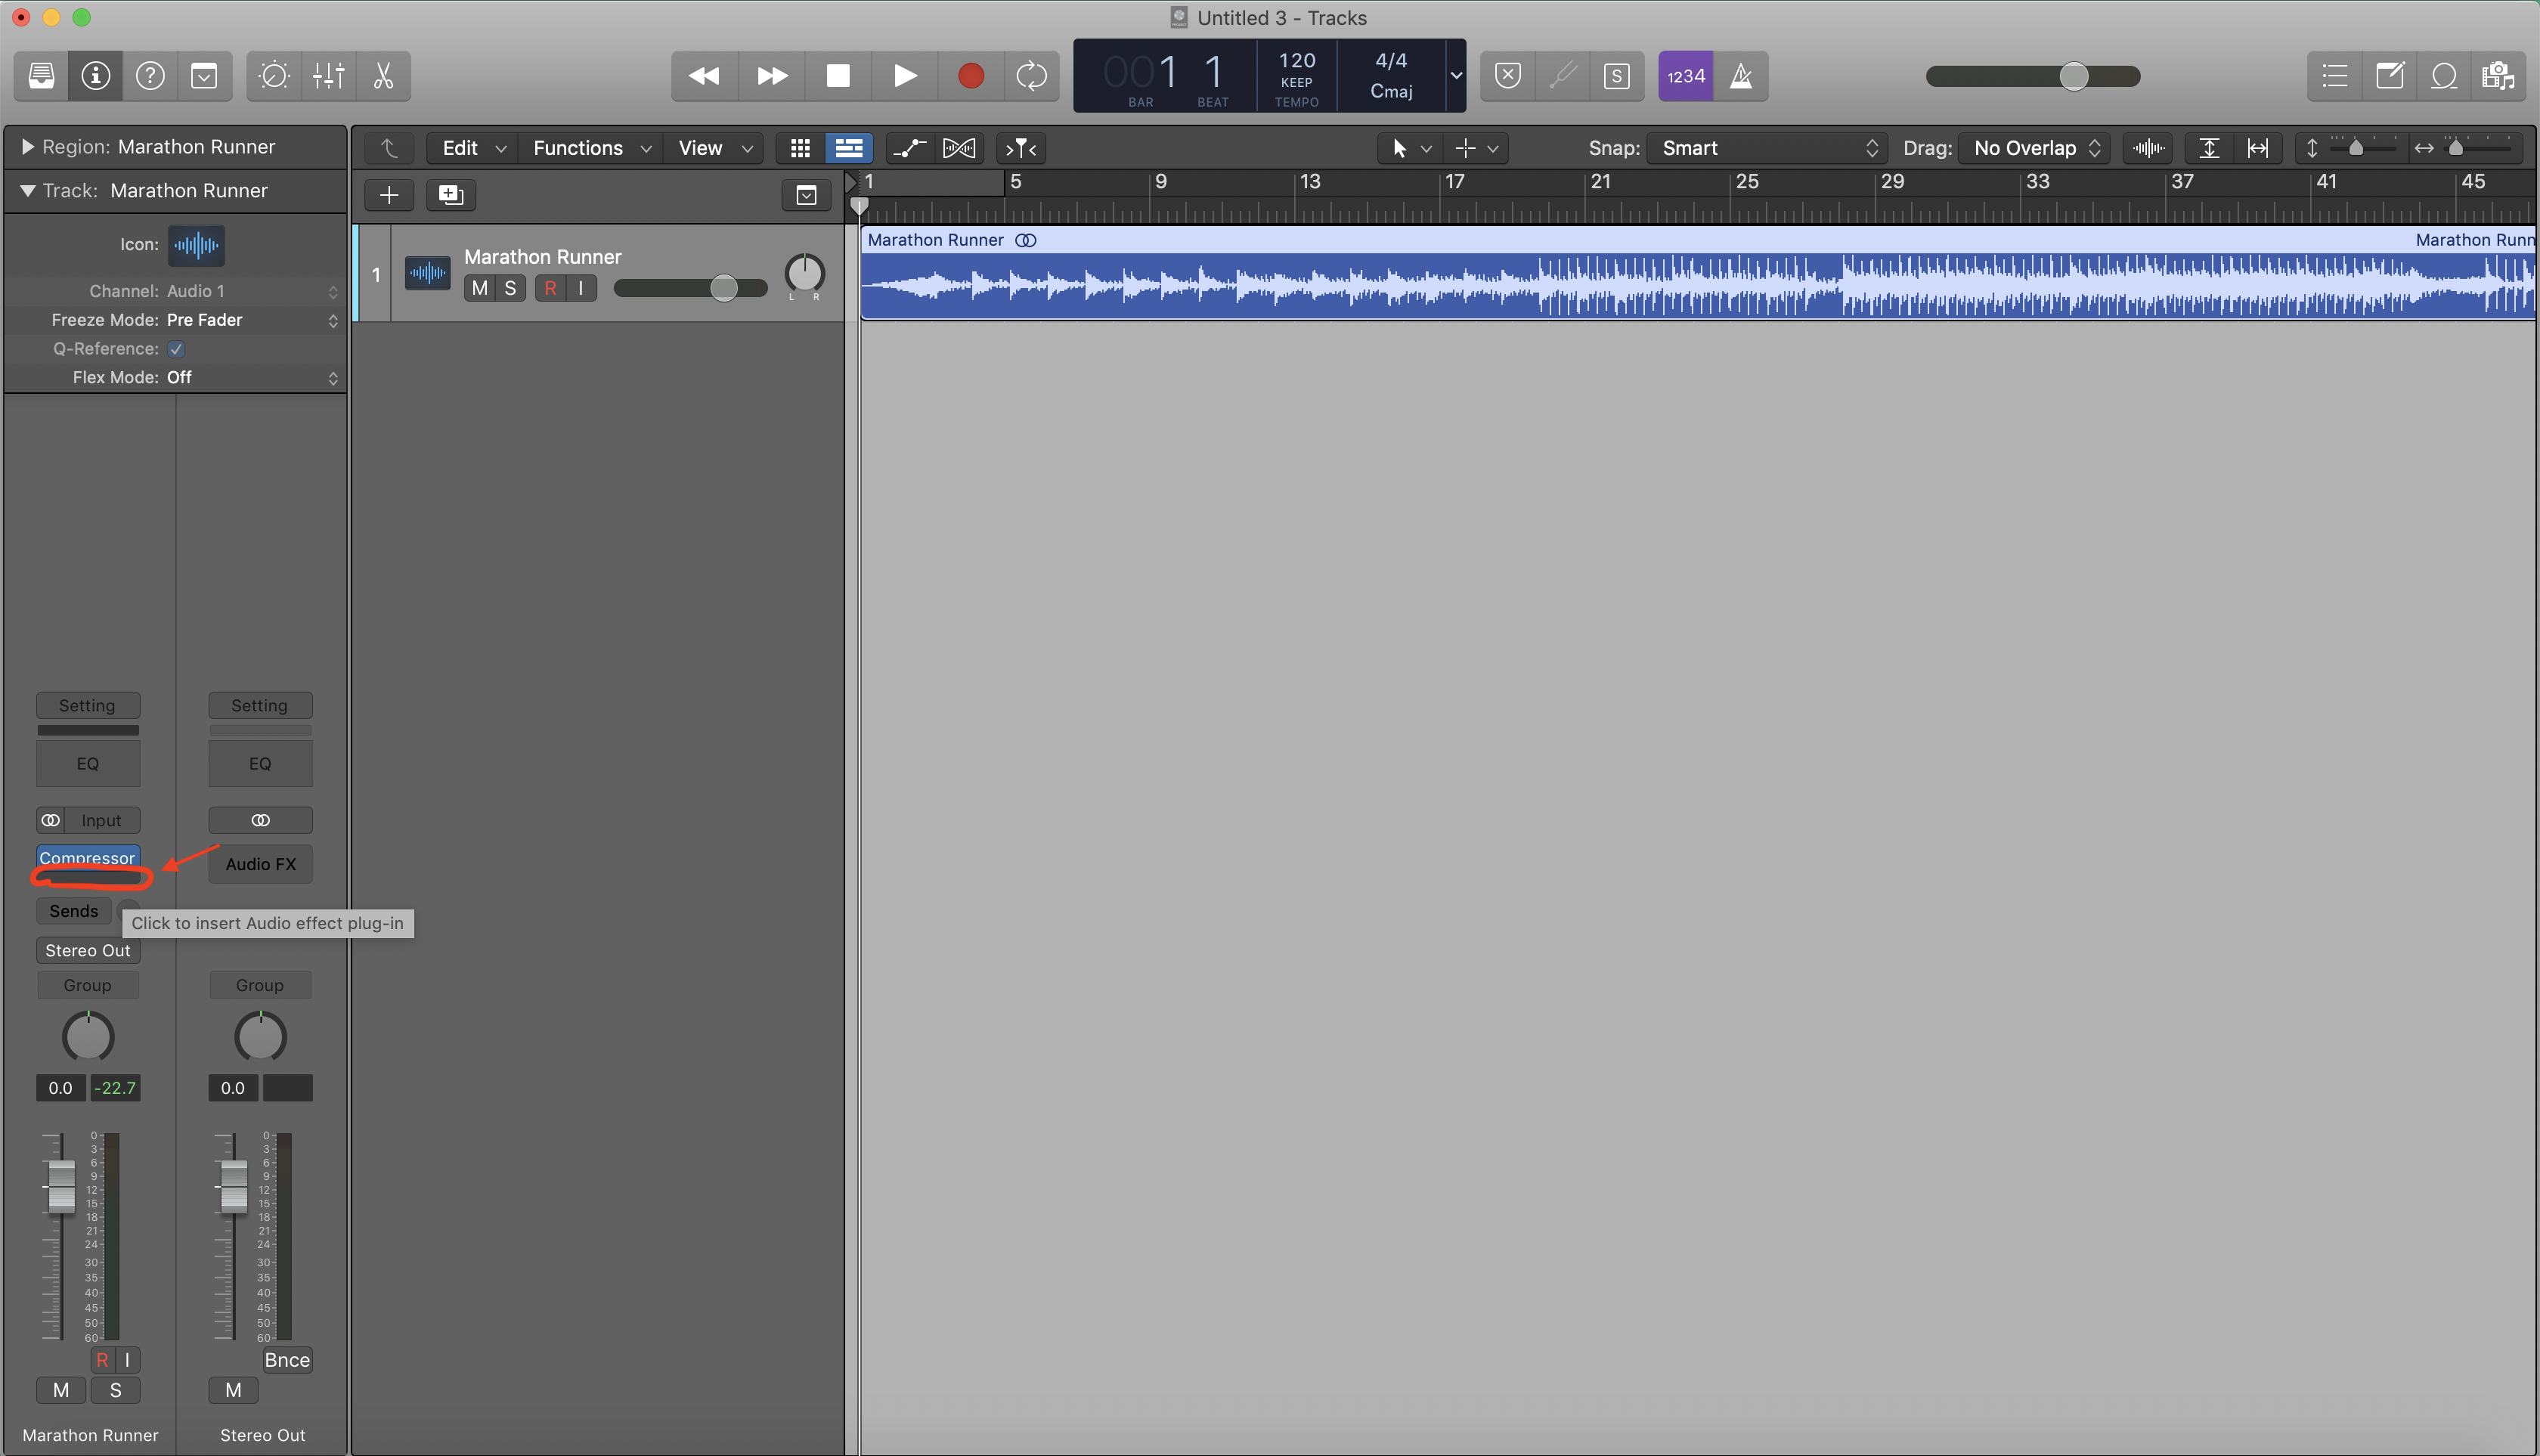
- Click on an audio track or software instrument track in the main view. Then click on the inspector icon (looks like an “i”) in the top left corner.
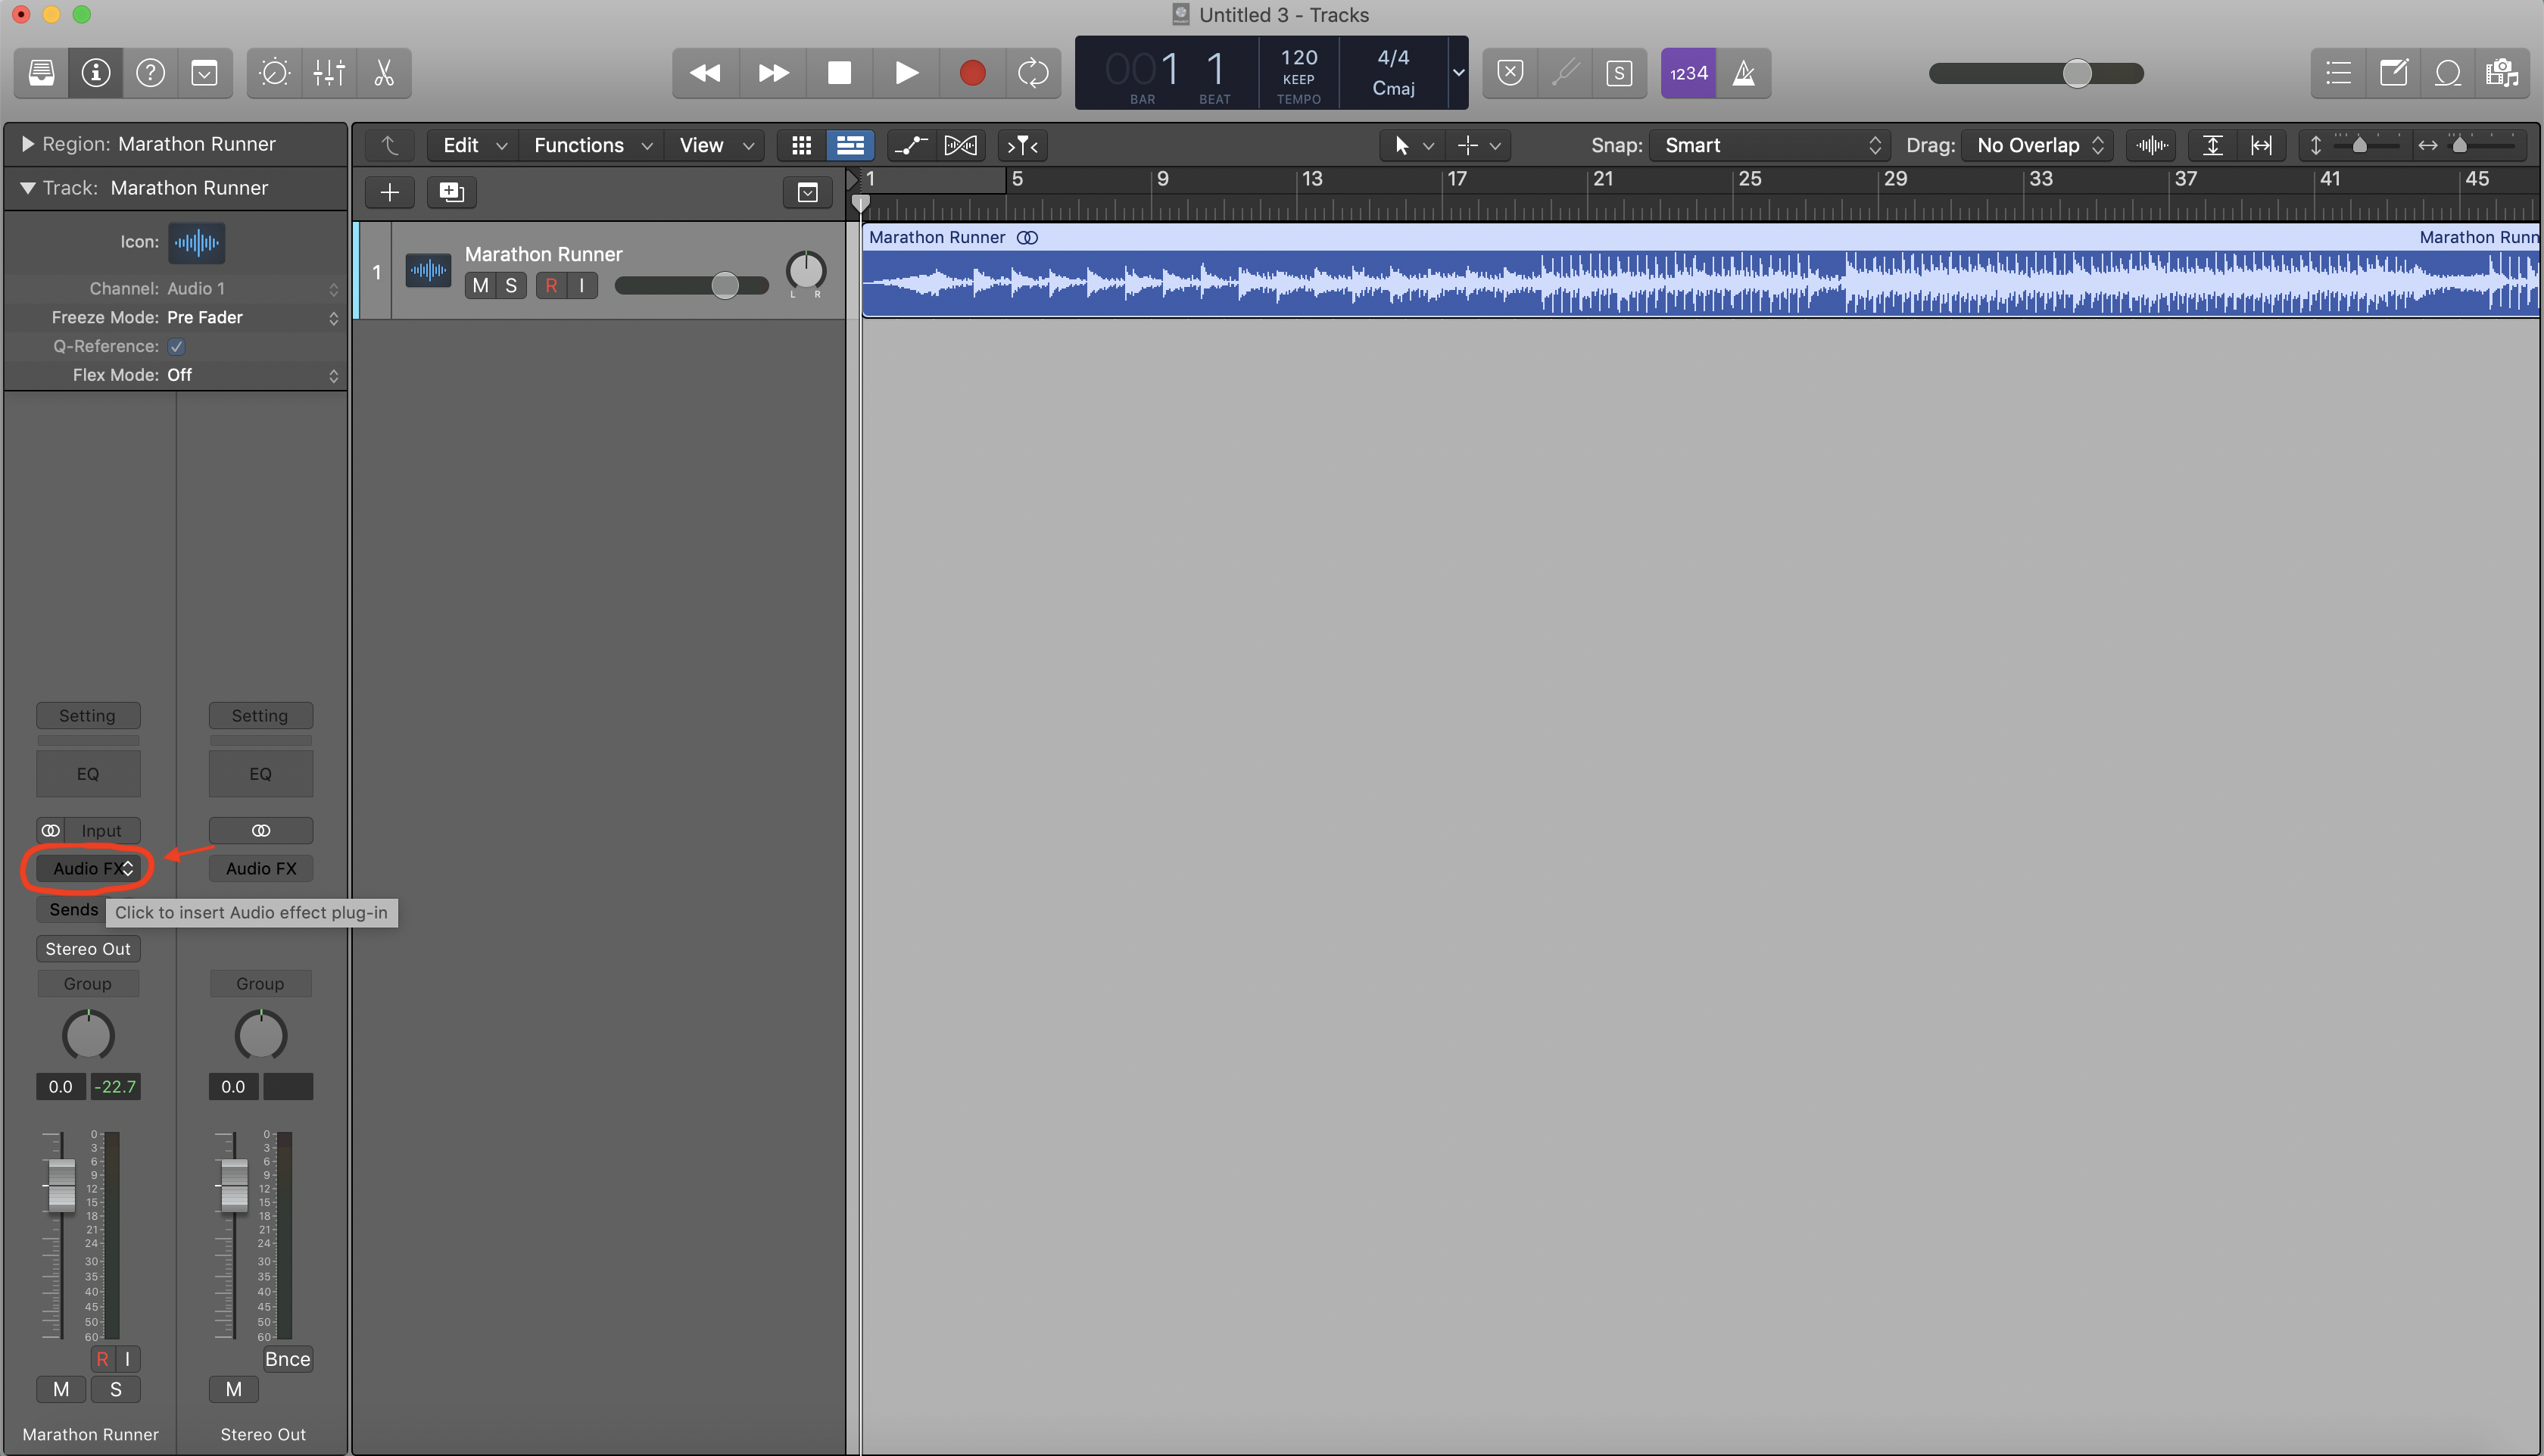
2. Click on the grey box that says “Audio FX” in the centre of the inspector panel (tip: make sure the arrows where it says “region” and “track” at the top of the panel are facing horizontal or else it may cover it up).
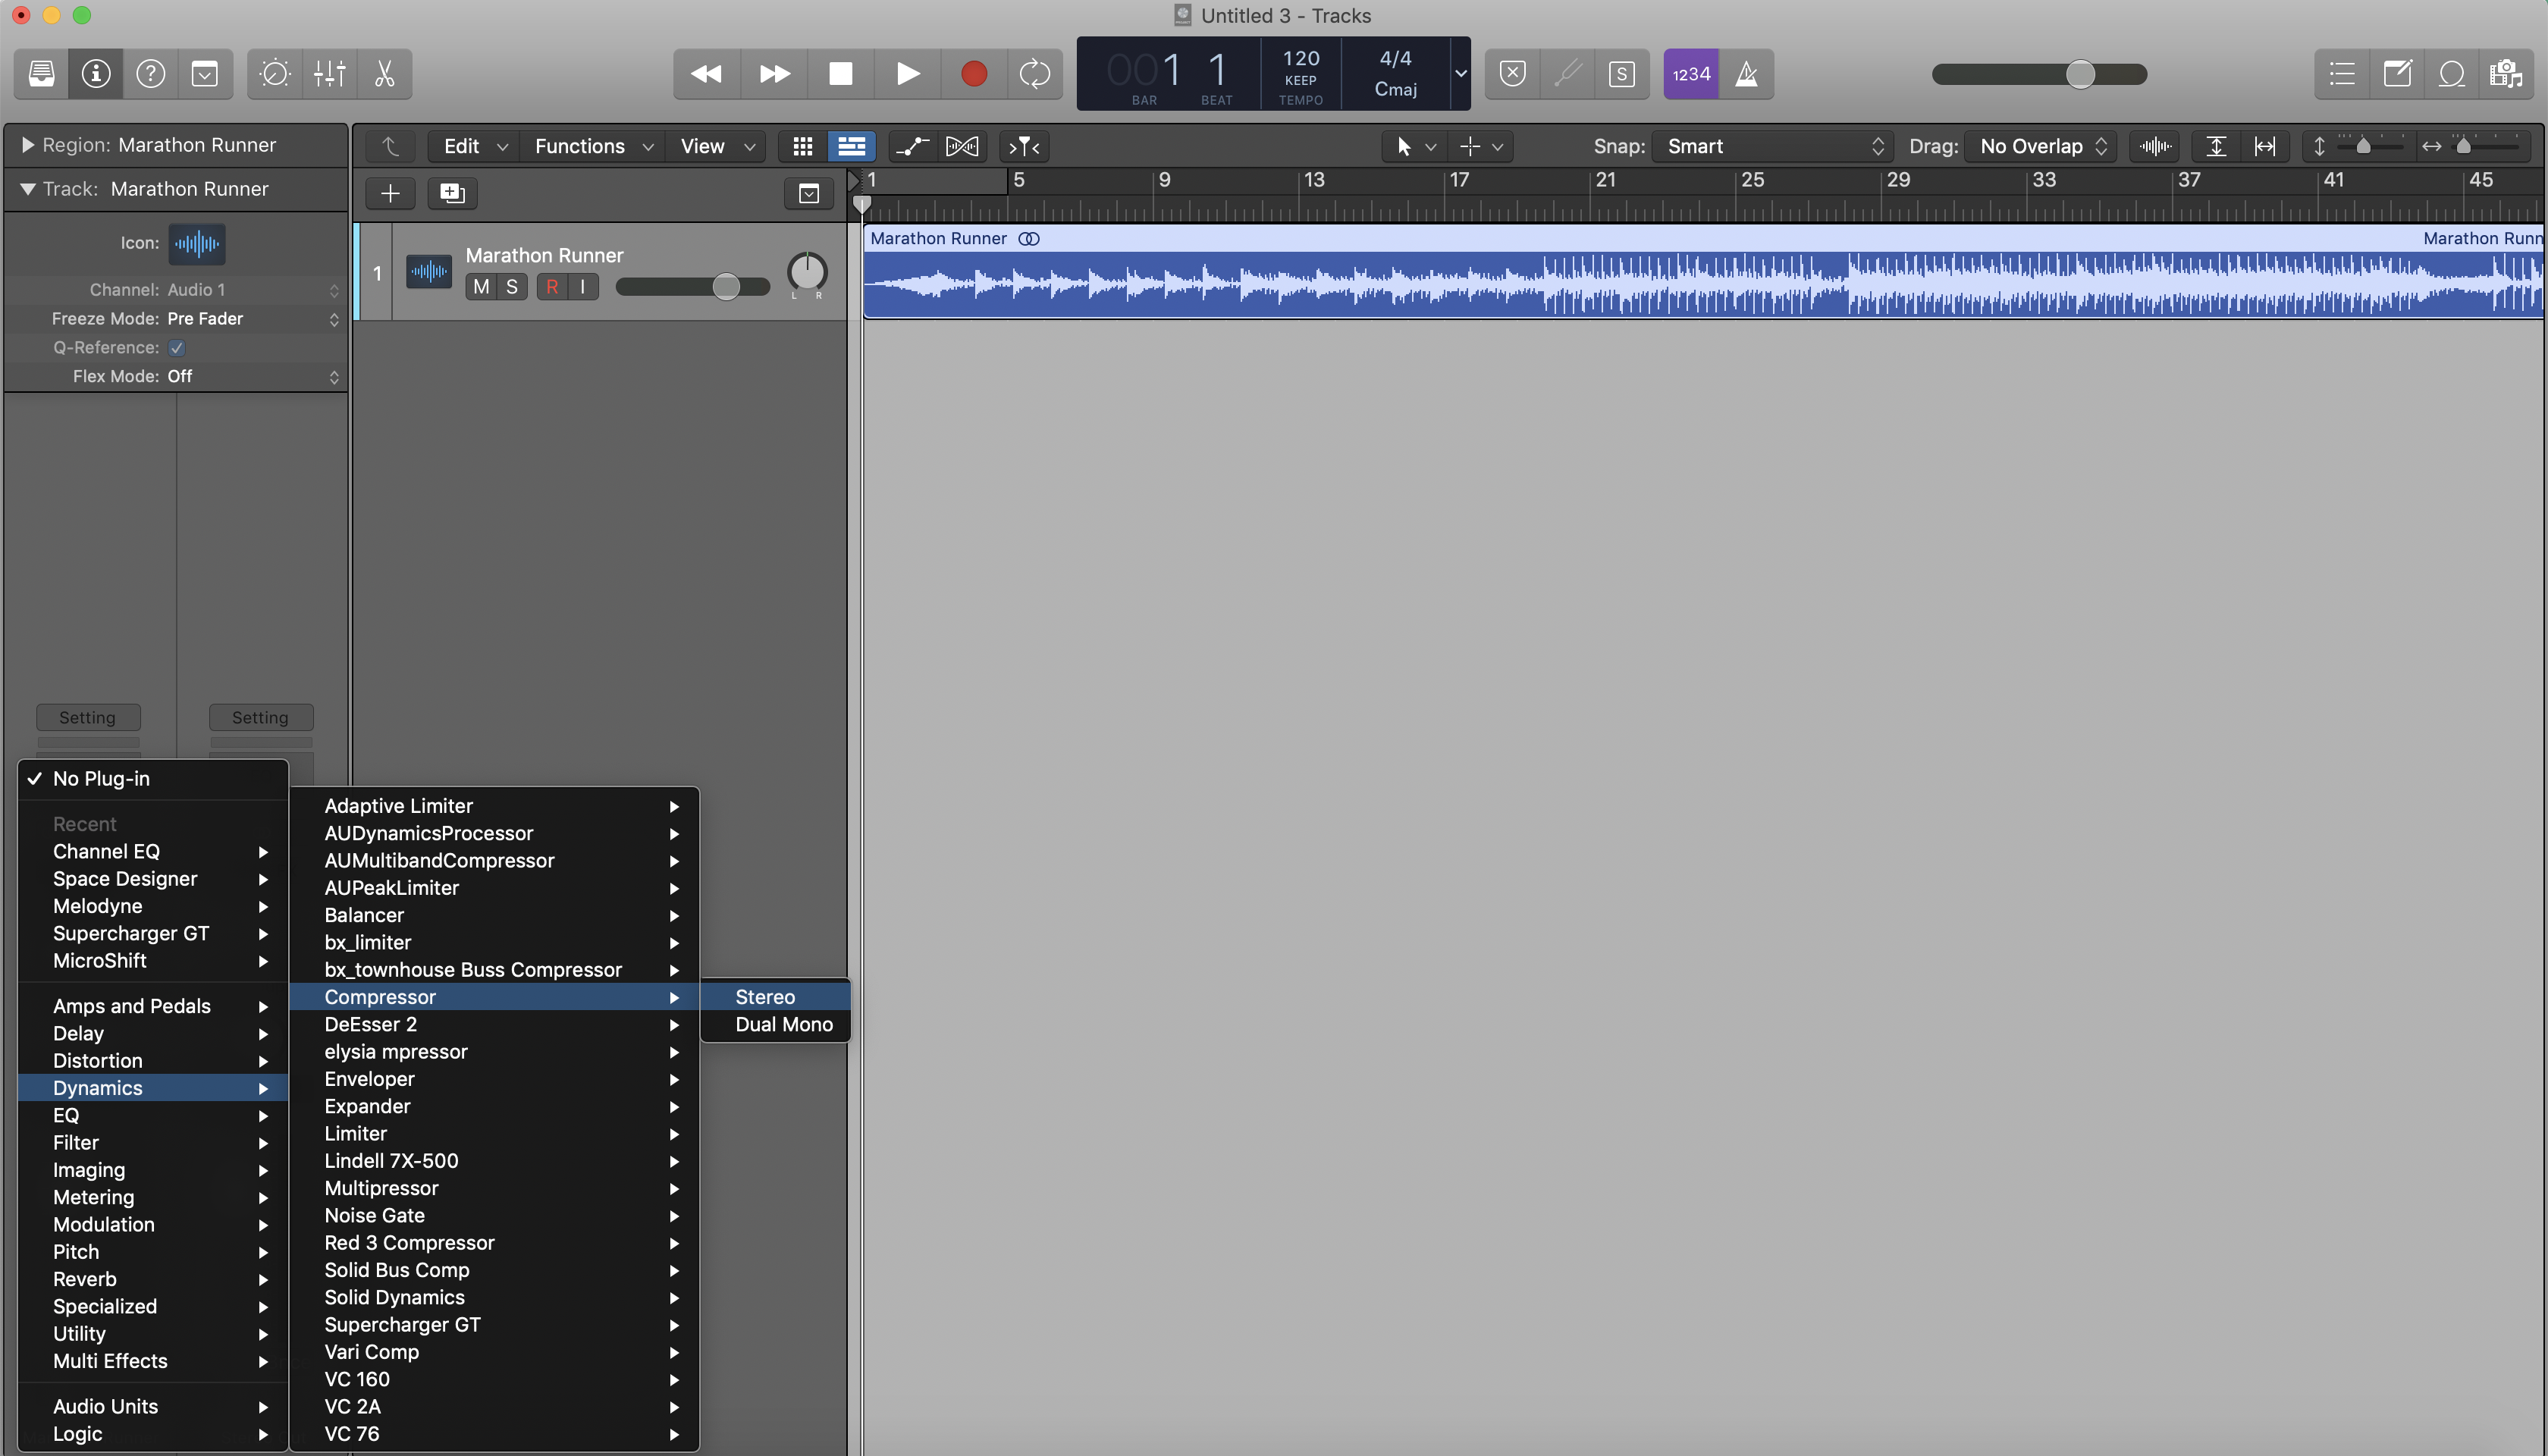
3. Hover over the different plugin categories to find which plugin you’re looking for (tip: compressors, limiters and de-esser's are in the “dynamics” category, chorus and flangers are in the “modulation” category).

You'll notice that Reverb has it's own category since it is a principle plugin that you would likely add on a majority of your tracks. Reverb is one of my favourite plugin to use because it helps create a space for your listener to digest the track. I have another post on how to add reverb in Logic Pro if you're interested.
Hover over the plugin you want to add and click “Stereo” if it’s a stereo track (selecting “Dual Mono” will only apply the plugin effect to either the left or right side).
If it’s a mono track, stick with selecting “Mono” unless you’re using the plugin to add space or stereo image (like reverbs or delays), in which case, select: “Mono->Stereo”.
4. Add more plugins by clicking on the grey box under the 1st plugin.
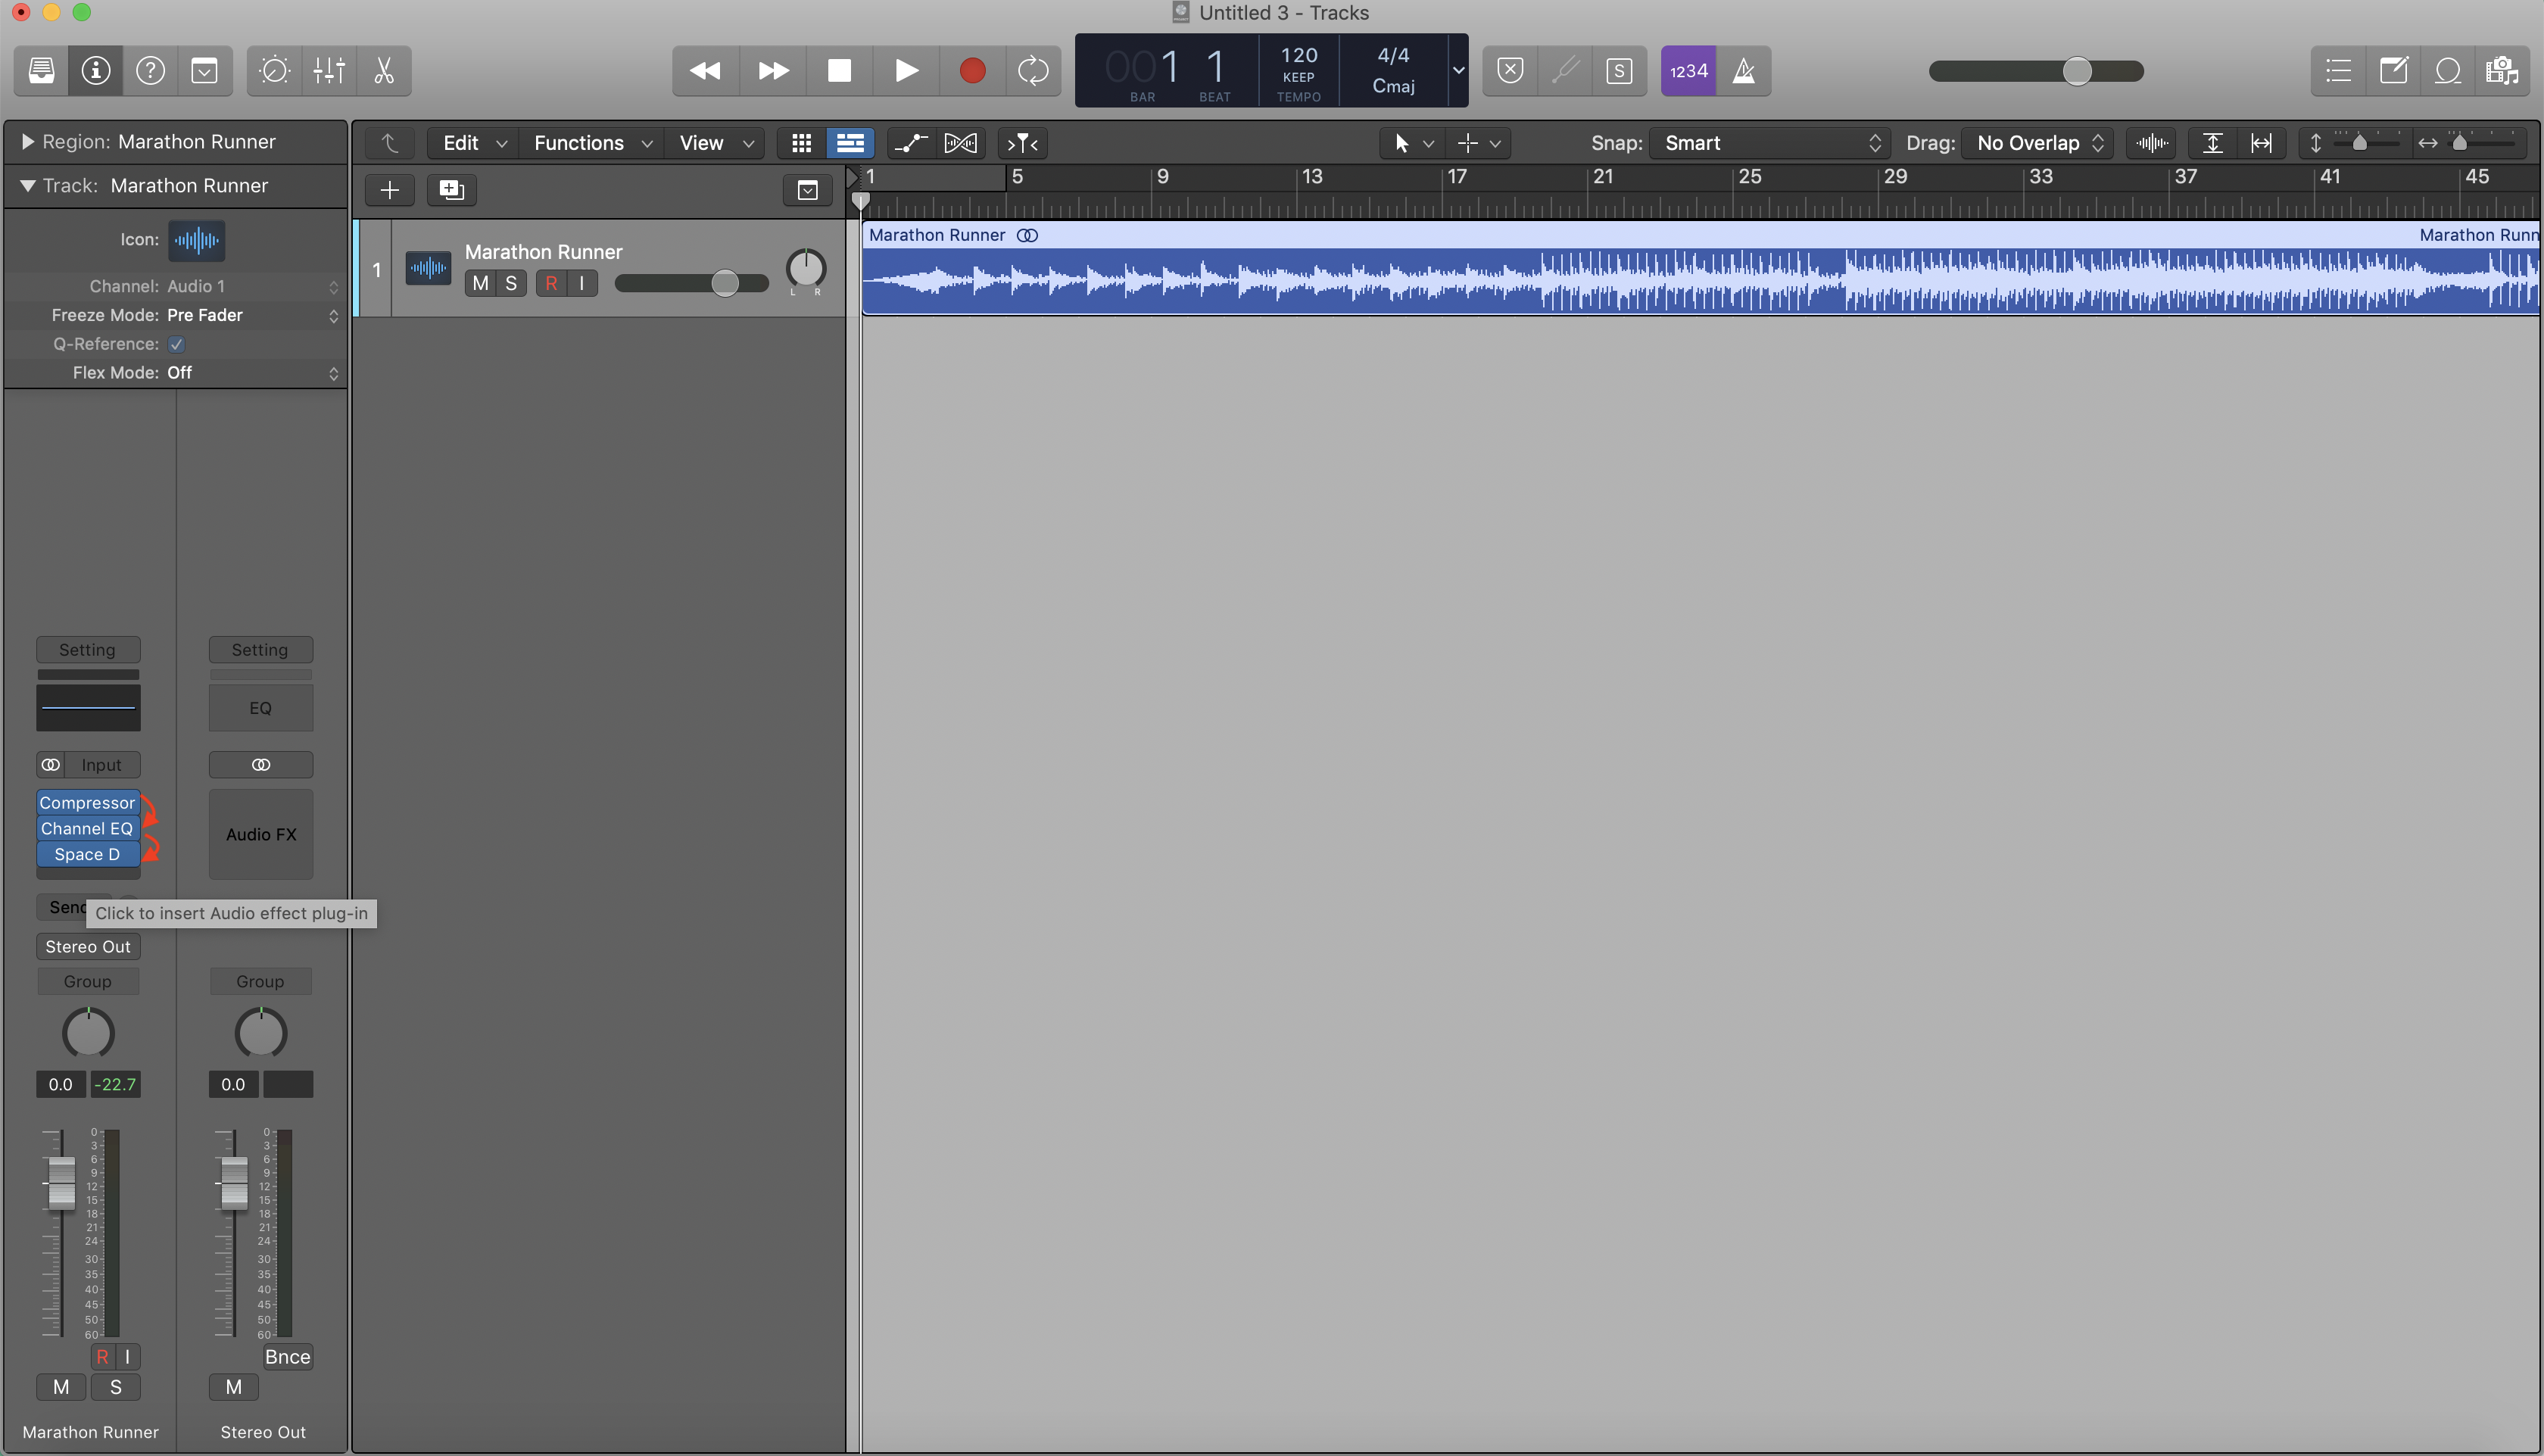
IMPORTANT NOTE: plugins work in a serial chain, meaning that the original sound will go through the first plugin before the second and third, etc.
For example, in the plugin chain below, the compressor is first, then the channel EQ, then the Space D reverb. That means that the audio signal will be compressed first, then EQ-ed, and finally, put into the reverb.

Now go crazy with plugins!
If you are interested in learning more about plugins, songwriting, mixing, mastering, production, Logic Pro then I think you would enjoy my 6 free pillars on learning Logic faster.


