How To Bounce Stems In Logic Pro
Sep 07, 2021
Logic Pro, like many other DAWs, allows the user the option to bounce all the tracks in a project into audio files or stems.
There are multiple reasons why you might want to do this.
If you'd rather watch a video, then I've conveniently made a video for you here on how to bounce and export stems in Logic Pro. Also, if you are a GarageBand user only then you might be more interested on how to to export a GarageBand song as MP3.

Firstly, if you have finished the production stage and are about to do a technical mix down, you commit yourself to the creative choices you have made and minimize temptation to go back and change small details.
Secondly, it means you can load the audio into a separate DAW if you need to, which can be useful especially if you plan on sending the stems to somebody else to mix.
Finally, bouncing to audio can massively ease the load on your CPU if your computer is not particularly powerful.
How Do You Do It?
There are a couple of different methods you can use to turn your tracks into audio files. Each method does more or less the same thing with a few small differences.
The first method we will look at is quick and simple but does not give you much control of the format of the resulting audio stems.
The second method is not as straight-forward and involves a few more steps, but gives you a lot more control over the resulting format of the stems.
Note: If you are just looking to get a general export of your song to share with your friends then you are looking for this: how to export a song in Logic Pro.
Method 1 - Bounce And Replace All Tracks
This method will take place within the project, bouncing all of your tracks to audio files, removing the original tracks and replacing them with audio tracks containing the bounced stems.
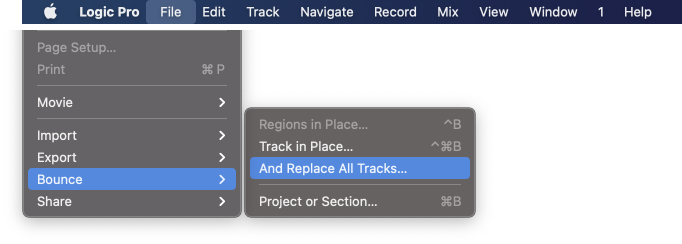
To begin this process, go to the menu bar and select “File > Bounce > And Replace All Tracks”.
If you have not recently saved the project, you will then be presented with the following window giving you the option to do so:
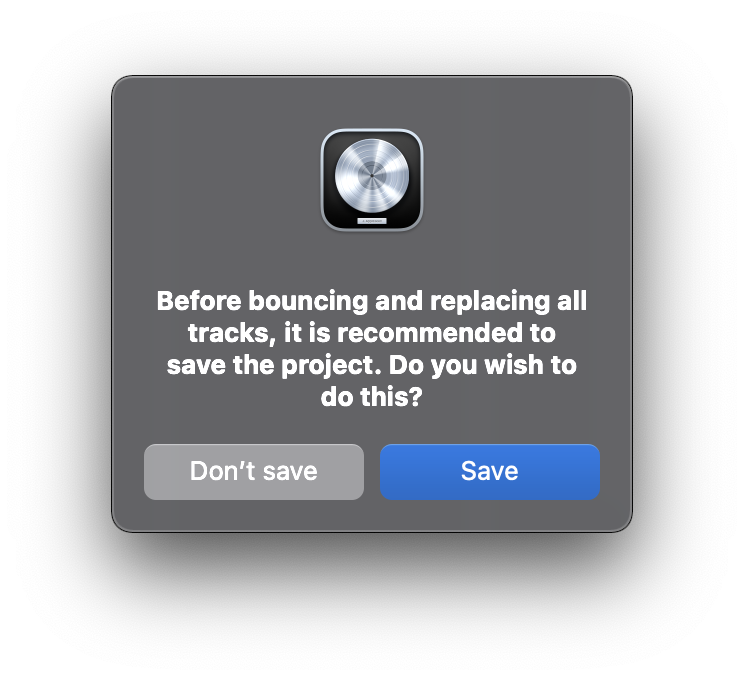
It is good practice to do as the window recommends and press save. Once you have done this, you should then be confronted with the following window:
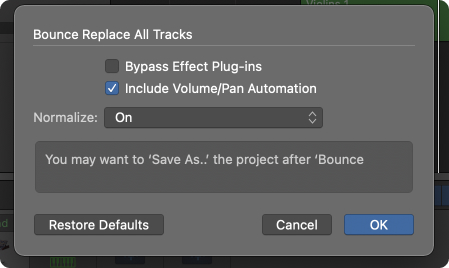

Bypass Effect Plug-ins: Ticking this box will bounce each track without applying any plugin inserts you have on the channel strip. The plug-ins will still be on the new audio track that replaces the original track, but you have the option to remove them if you choose.
Include Volume/Pan Automation: This will apply any volume/pan automation as well as current volume/pan position to the resulting audio file. This is very useful if you want the current volume balance to be applied to the bounced stems.
Normalize. This will adjust the collective gain of all the audio files so that the loudest peak is at 0 dB. This can be useful if your audio is abnormally quiet for whatever reason, but generally it is recommended that you leave this at “Off” or “Overload Protection Only”.
(Note: you will see that the window also recommends you “Save As” the project when the bounce is complete. Since the bounce will delete all of your original MIDI/audio tracks, this is recommended so you can access the original project if you need to)
Pressing “OK” will then initiate the bounce and replace process. When the bounce is complete, you will see all of your tracks replaced with audio tracks containing the new stems. You can find the audio files by going into the project folder’s “Audio Files” subfolder (providing you always save your projects as folders rather than packages).
This is not always very clean since the audio will be mixed up with any other audio files you have used in your production. If you want to specify the location and have more control of the eventual audio files, method two will give you a lot more options.
Method 2 - Export All Tracks as Audio files
The next method does not replace all the original tracks with the bounced stems, but rather exports the tracks as audio files to a location on the computer of the user’s choice.
The first thing to do is to go into the menu bar at the top and select:
File > Export > All Tracks as Audio Files

You should then be confronted with the window shown below:
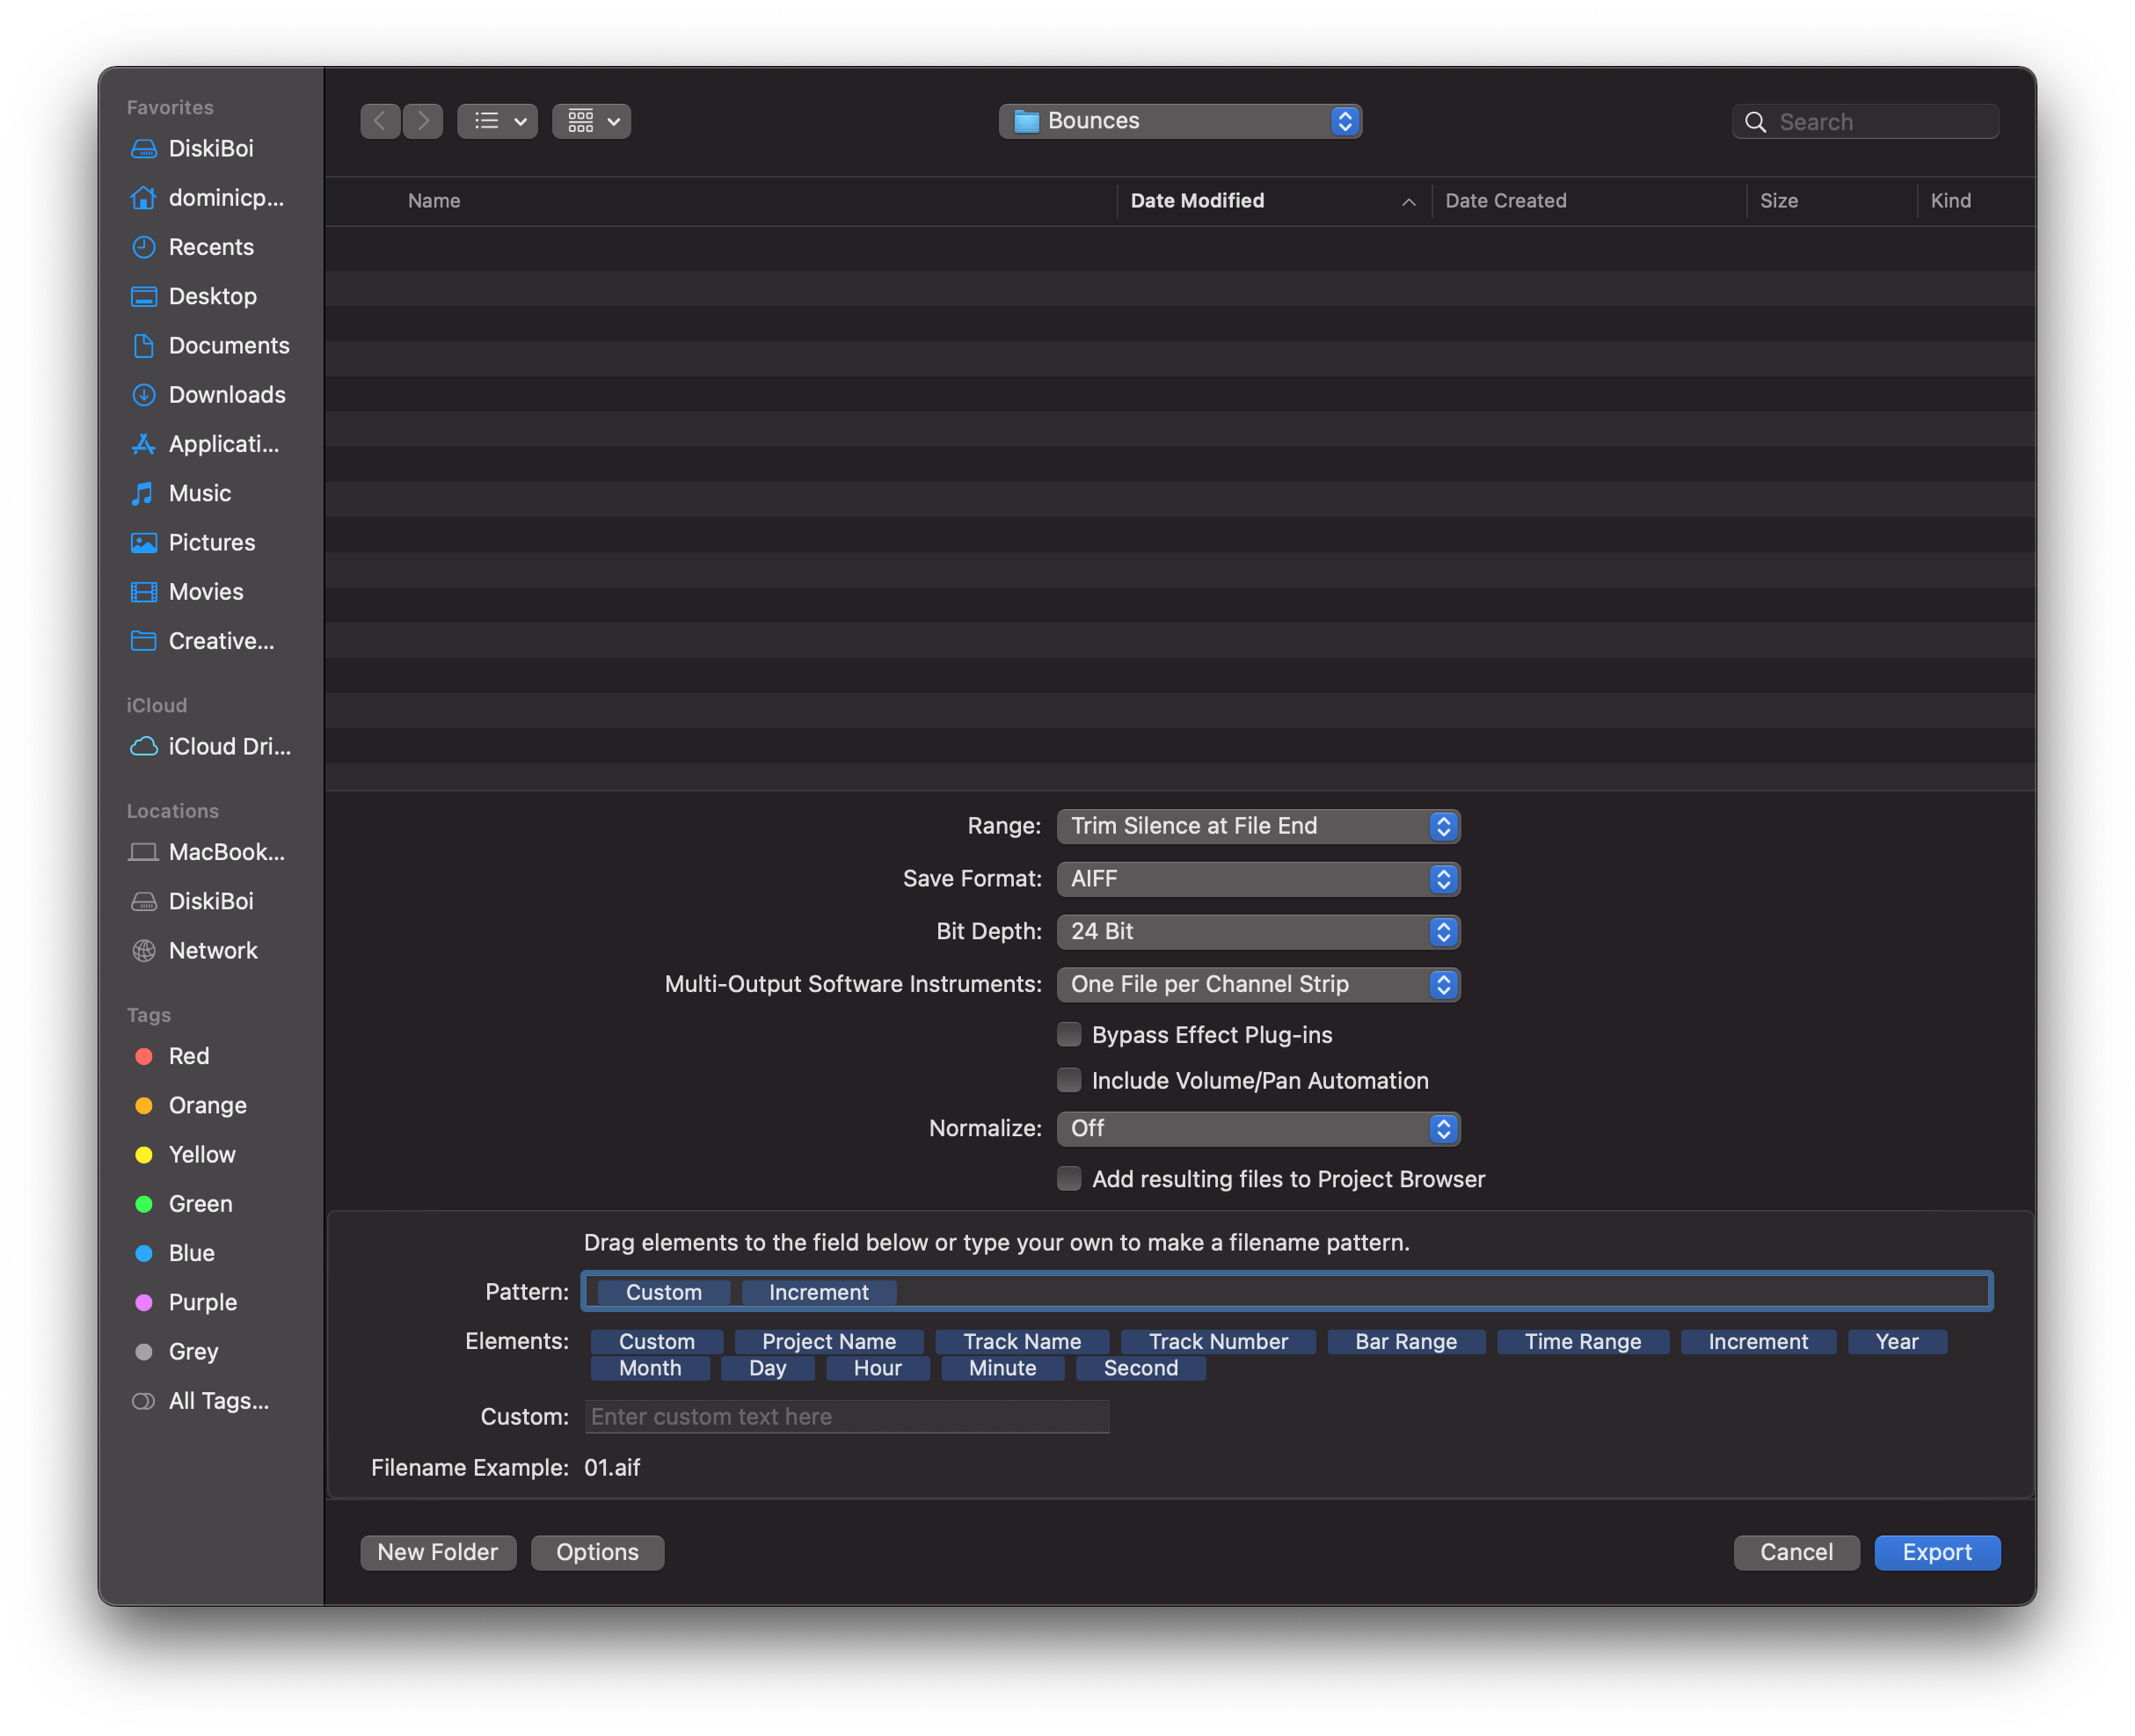
The first thing that it is recommended that you do is create a destination folder for all the audio files. The conveniently placed button in the bottom left corner labelled “New Folder” will do exactly that.
Make sure that the location of this folder is somewhere you will easily be able to find later such as your project folder.
Range - allows the user to define what part of the project will be included in the audio files.
Save Format - allows the user to define what format the audio file will be (AIFF and WAV are commonly used)
Bit Depth - allows user to control the bit depth of the stems (24 bit is commonly used)
Multi-Output Software Instruments - this option determines how many stems to export for multi-output instruments. Instruments such as Drum Kit Designer, Ultrabeat, etc, are commonly used with multiple outputs. Most of the time, you will want to export a separate stem for each output.
Add resulting files to Project Browser - adds a reference to the audio files in the “Project Browser” section of the Project.
Naming System - allows you to specify how each of the files will be named. In the “Pattern” box, you click and drag any combination of the “Elements” seen in the picture. You also have the option to add some custom text in the “Custom” box, which will then be used in place of where you put the “Custom” element.
Once you have selected all of your options, pressing “export” will begin the exporting process.
When it is complete, you can locate the destination folder and you will see it is populated with all of your audio files. If you intend to send the stems to somebody else, you can now simply compress the folder as a .ZIP file making your stems compact and easy to manage.

A Note on Bus Groups
With each of the previous methods, the software will only create audio files for tracks that are in the main window.
Bus groups will not be included in the bounce unless you create a track for them. You can do this quite easily by right clicking on the group bus channel strip and selecting “Create Track” and then this will create a track that will be included in the stems.

Whether you plan on sending the stems to someone else or mixing it yourself, having a rough guide of your bus group can serve as a useful reference.

Conclusion
Personally, I will always bounce into stems near the end of the process if I am working on a serious music project. I find that it helps me stay organized, especially since before the bounce I usually go through and reorganize the project, also deleting any junk.
Furthermore, many software instruments have some randomness built into them in order to make them sound more natural and less mechanical. When you are near the end of your project, you might want things to be a bit more concrete and bouncing into stems will give you this.
This, as well as many other reasons, make bouncing to stems a favourable practice as you work on completing your music project. If you have not yet done so, I would definitely recommend trying it out.
If you like learning more about Logic Pro then here are my 6 pillars on learning Logic Pro faster.


