How To Fade In GarageBand
Feb 23, 2022
Have you wondered why your audio files are popping or there's an odd sound when you try and merge two different regions in GarageBand?
Or maybe you'd like to fade your entire track out in GarageBand?
Both of these questions have to do with crossfading tracks and also fading out the master track in GarageBand.

We'll go over both of these questions in this post. By the way, if you prefer to watch a video on how to crossfade in GarageBand then you can do so here:
What Is An Audio Pop?
A pop happens when two tracks have been merged together without being cross faded.
This often happens when you are trying to merge regions together. For example, let's say you have guitar region but you've imported another guitar MP3 track to join with this region. A pop might occur between these two regions when they are not crossfaded properly.
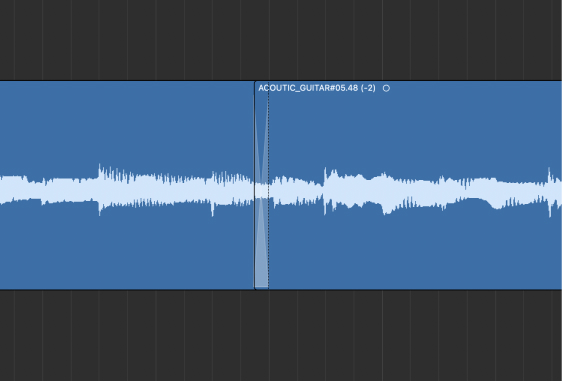
The pop could be very subtle and you might not even notice it when the entire track is being played. However, it's important to create the fade so your audio blends together. A cross fade is when one audio track or region fades down in volume and the other track or region fades up in volume. On top of these, each track or region is overlapped a little bit. That's why we call it a crossfade.
For example, this is a picture of what a crossfade looks like in Logic Pro:
Creating The Fade In GarageBand
Creating a crossfade is much easer to do in Logic Pro since the software is more advanced than GarageBand. If you're scratching your head wondering, why is it so complicated in GarageBand? Then you're not alone. This is one of the limitations of using a free digital audio workstation (DAW).

Either, I'm going to show you my approach to creating a crossfade in GarageBand
Step 1:
The first step to apply a cross fade is open up automation within GarageBand. We can quickly get to automation by pressing the shortcut "A" on your computer keyboard. We won't be diving into much detail on what automation is. However, here is a great tutorial on how to use automation in Logic Pro which will give you a good grounding.
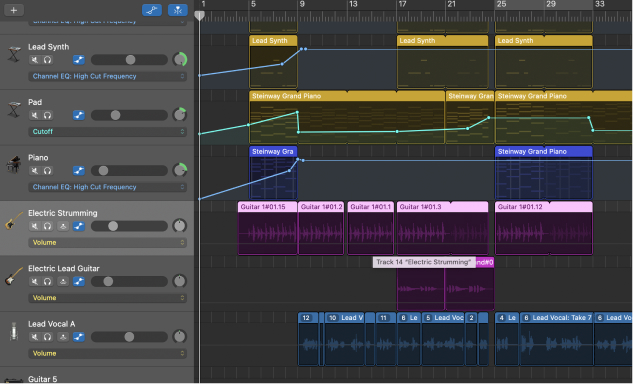
This is what the automation view looks like in GarageBand. Take note of the Electric Strumming track. This is the track we will crossfade.
Step 2:
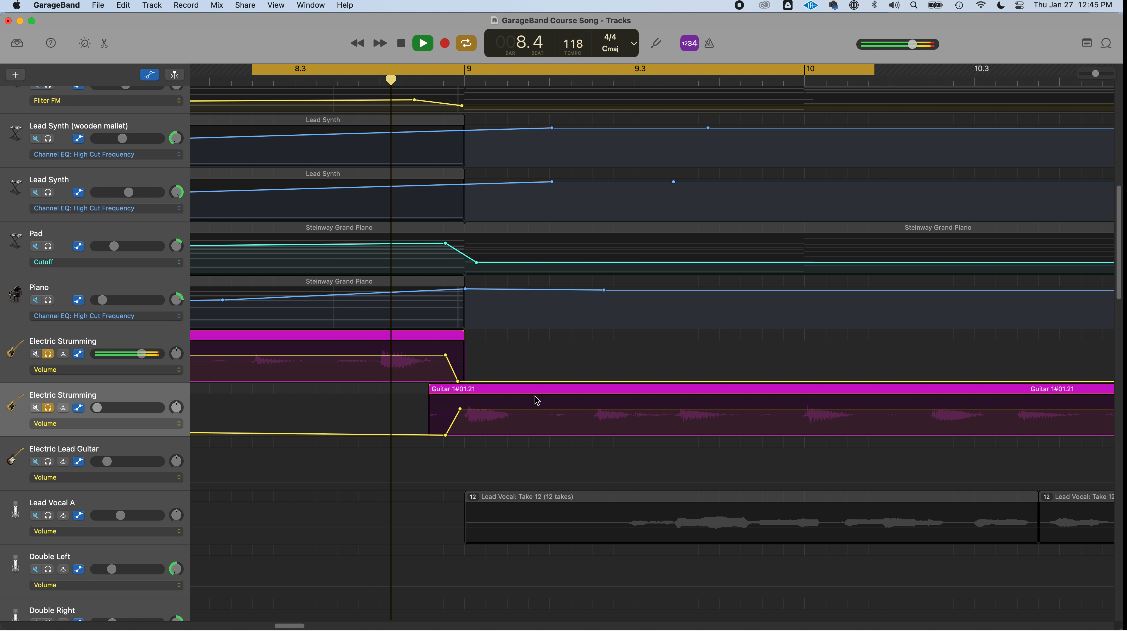
We need to now duplicate our Electric Strumming track. We can do this with the shortcut "Command + D". After you duplicate the track, slide the specific region down that would like the crossfade to happen. For example, take a look at the image below. Now we two tracks with two separate regions.

Step 3:
Now is the time to set the volume automation on each track. Navigate to the track name. There is a dropdown box. Make sure that it says "Volume". You can now left click on the audio region and it will generate a yellow line. Do this for both your audio regions. This yellow link represents the track volume.

Step 4:
Notice when you click on the yellow line that GarageBand will generate dots for you. These dots are flexible and can be moved around the entire track. They give you the freedom to create (or automate) volume at specific points during your song. Therefore, in Electric Strumming example below. At bar 9, we want to lower the volume for the first Electric Strumming guitar and then we want to increase the volume for the second Electric Strumming guitar.
It's very important that the regions overlap each other on their respective tracks. This is what creates the "crossfade".
How To Fade In Or Fade Out Your Entire Track?
You can also apply a fade in or fade out to your entire track doing the exact same process as above. Navigate to the top menu bar:
Track > Show Master Track
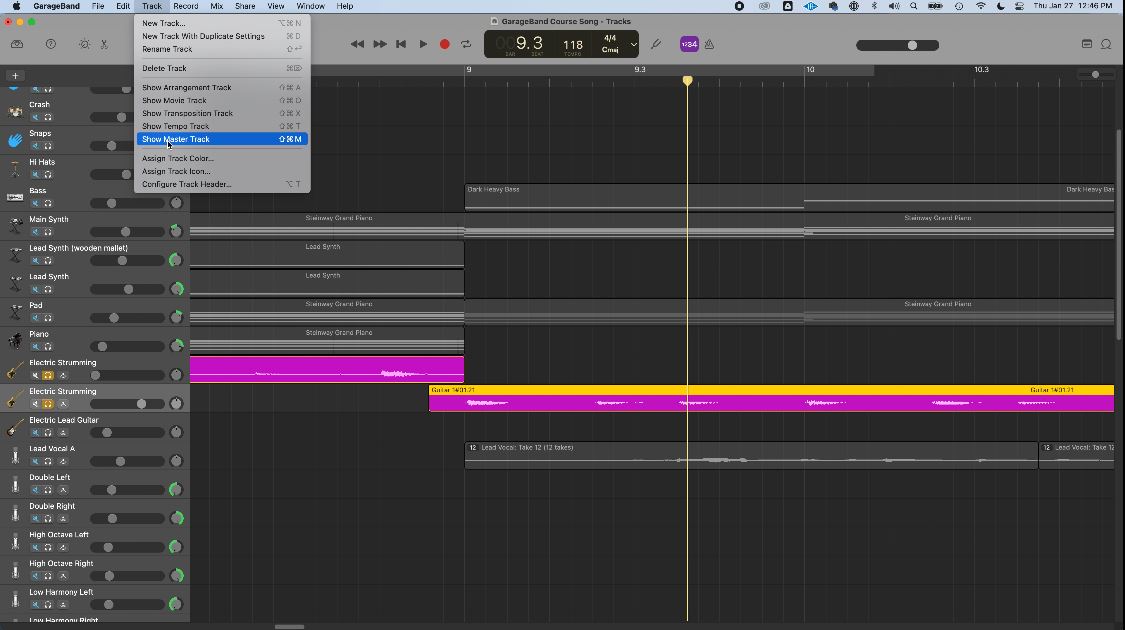
If you scroll to the very bottom, you'll notice a new track has appeared. See below. This is known as the "master track" or "stereo out" track. You can think of this track as the final destination for all tracks. Every single track in your GarageBand session is routed to the master track.
There is a process called mastering which is the final stage to any song before it is published. It's an essential step in the process and it only involves manipulating the master track.

To apply the fade on your master track, you can follow the same steps we did to apply the crossfade on our Electric Strumming track. However, in this instance, you do not need a "cross". It is only a fade. All you need to do is choose the point in time where you would like your song to fade out in volume and apply the fade.
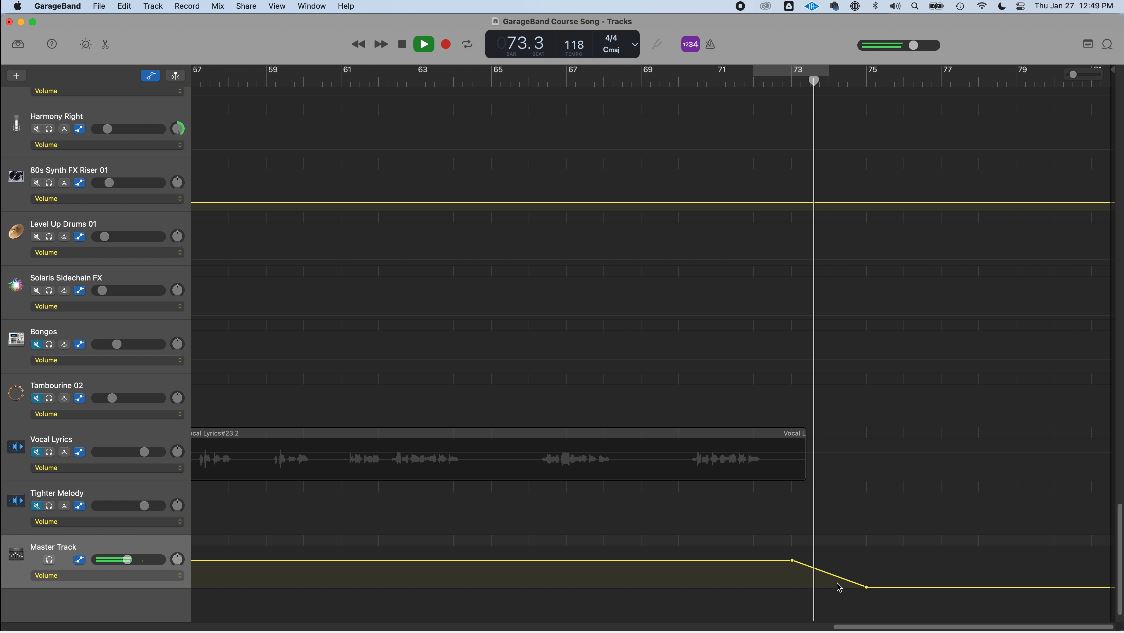
In this example below, I wanted the fade to bar 73 and slowly fade out in volume until bar 75. You can shorten or lengthen the fade. That is up to you.
Using the same steps you can also make a fade in at the beginning of your song.

If that's not easy enough, GarageBand has also added it in their menu settings. Navigate to:
Mix -> Create Volume Fade-Out on Main Output
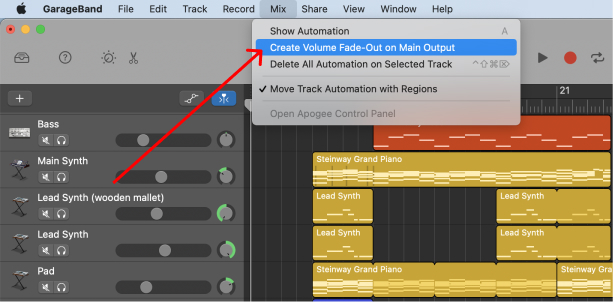
This will automatically create the volume automation for you. You can see it my pressing "A" and scrolling down to your master track.
Conclusion
This is how you create a cross fade in GarageBand. I'm not going to lie, I find it quite frustrating to create these in GarageBand because of it's limitations. This was one of the big reasons why I ended up switching to Logic Pro.
You might be asking yourself, should I switch from GarageBand to Logic Pro?
My answer to that would be. Yes and No. I think you should stay with GarageBand if you are a beginner. If you find you're not limited in your ability to produce music, then stay with GarageBand. As you become more experienced and start to understand the workflow of music production you will likely start to experience the limitations of GarageBand. At that moment in time, I recommend you switch to Logic Pro.
If you have any questions on how to create a fade in GarageBand then please let me know in a youtube comment. You should consider subscribing to my Youtube channel. I have an endless supply of tutorials on GarageBand Logic Pro.


