How To Use Logic Pro Compressors - Ultimate Guide
Jun 20, 2023
Producing music requires working with a wide range of tools and effects to convert raw sounds to what’s ideal for a specific project. Regardless of the genre of music that you’re making, there are two fundamental plugins that are used for almost all tracks during music production:
-
The Equalizer (EQ) and,
-
The compressor.
Especially for vocals, it is vital to use compressors to make vocal channels sound professional.
Like most other parameters in music production, compression has a virtually endless list of techniques and strategies. The more you work with different plugins, such as compression, the more you will build to develop your own workflow and process.

There are many third-party compressor plugins that you can install in Logic Pro. However, Logic Pro’s stock effects and plugins are excellent for beginners and intermediates. I suggest starting with Logic’s compressor plugins to get a firm grasp of what it does, and then, if necessary, moving on to third-party models for more specific tones and sound character.
In this post, I will show you everything you need to know about compressing tracks in Logic Pro. First and foremost, let’s see what a compressor does.
What Does A Compressor Plugin Do?
A compressor makes a track more audible by controlling its dynamics.
In very simple terms, a compressor plugin pulls down the louder parts of a track and levels them with quieter parts. You might think that only makes the whole track sound generally quieter. While that might initially be the case, compressor plugins often come with a gain control to stretch out everything once they’re levelled.
Let’s go through an example: imagine you have a vocal line that has a lot of dynamics. In some segments, the singer is really loud, whereas some other parts, they are almost whispering. While these dynamics could be desirable, such a track can be difficult to hear among a bunch of other instruments and channels in a project. That’s where compression comes to aid.
By lowering the loud parts, we make them closer to quieter parts in terms of volume. Once that’s done, we can increase the master volume/gain on the track to make everything cut through the mix better.

How To Add A Compressor To A Track In Logic
Now that we have a rough idea of what we can expect from a compression plugin, let’s add one a compressor and see how to work around different parameters:
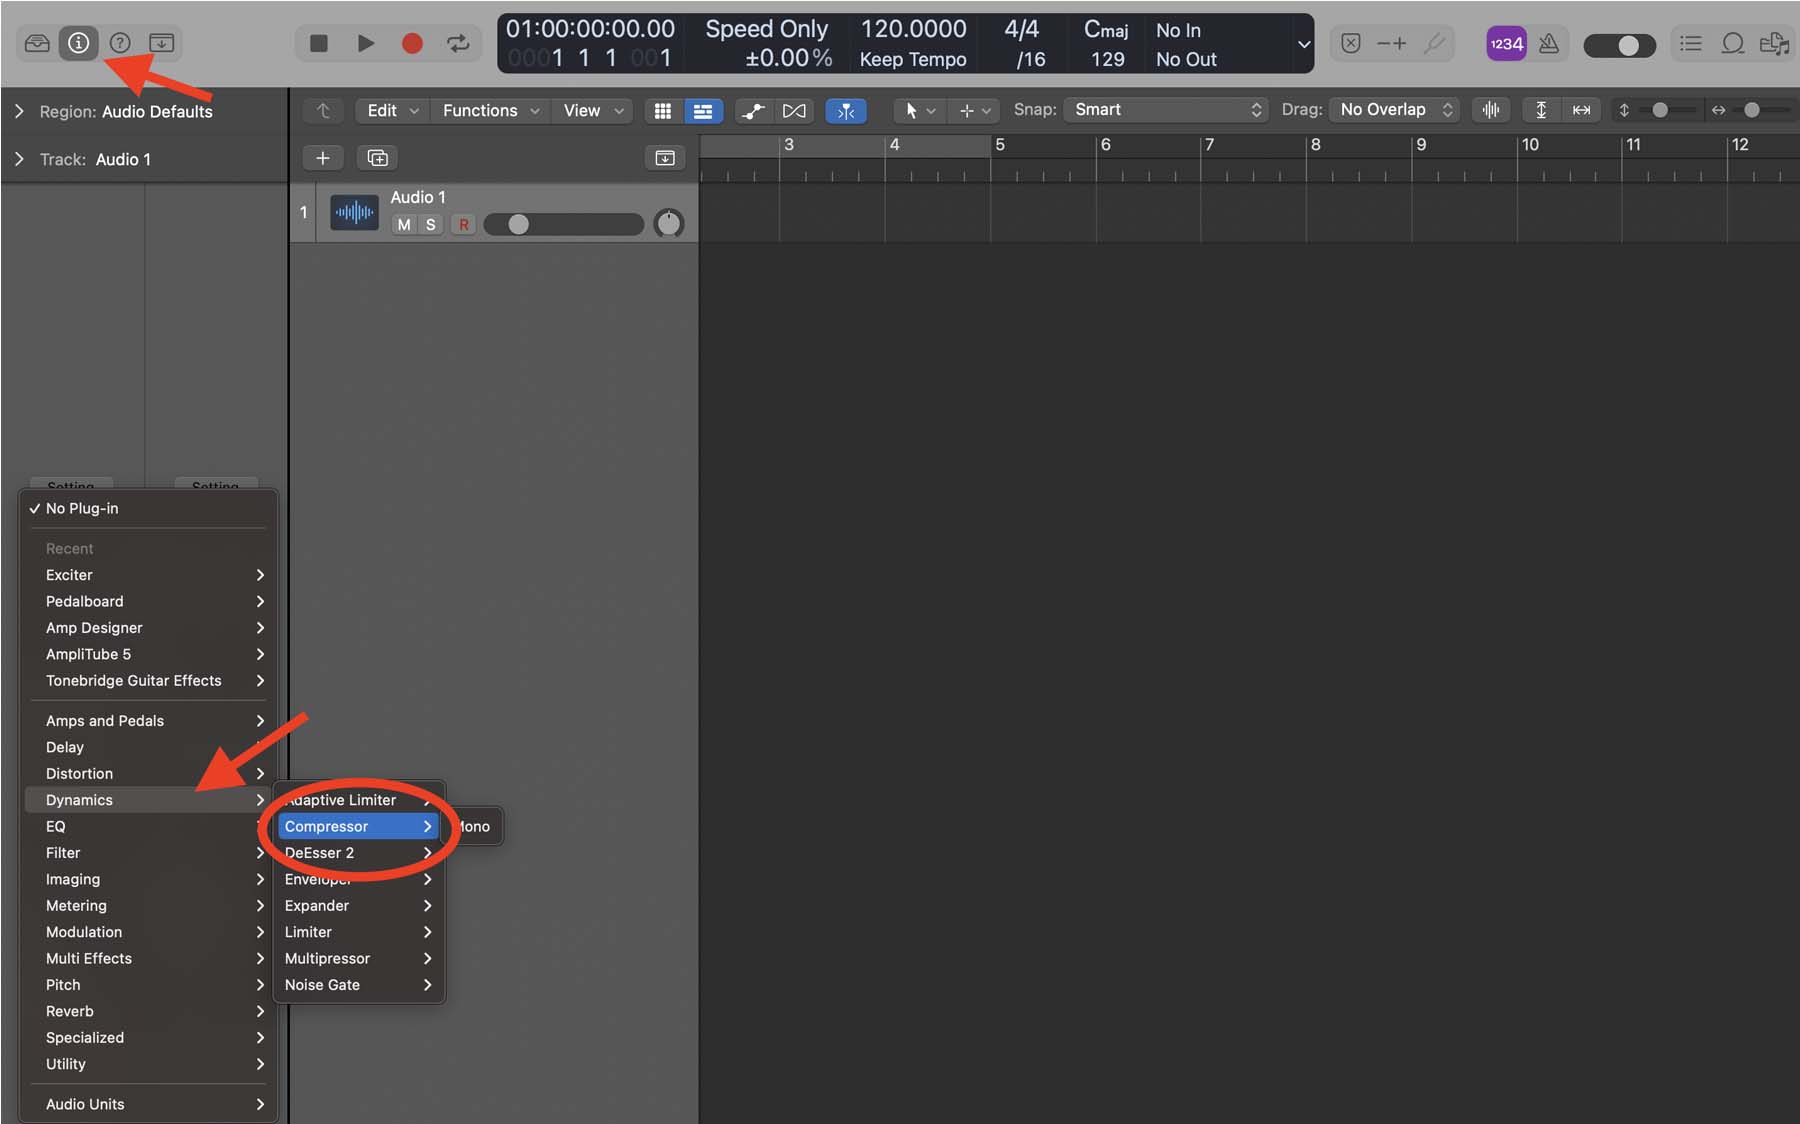
- From the top left corner of your workstation, click on the little “i” in a circle to open the inspector menu strips.
- From the left inspector channel strip, click on the audio effect slot to add a new plugin.
- From the plugins menu, select “Dynamics” and then select “Compressor.”
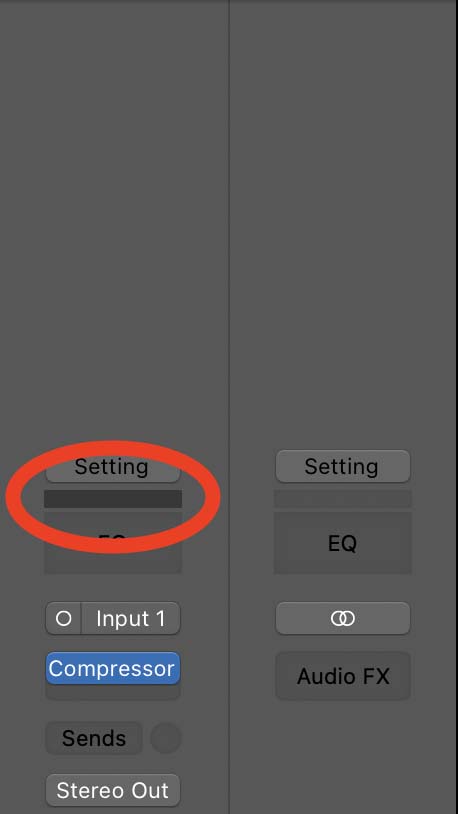
Another way to quickly add a compressor is to click on the little rectangle between “setting” and “EQ” from the inspector menu.
Tip: to make your songs sound richer, you can add a multi-band compressor effect to target various frequencies differently. Using a multi-compressor can also be really helpful when mastering your project. I have a video explaining everything you need to know about multi-band compression in Logic Pro.
Getting Started With Logic Pro Compressors
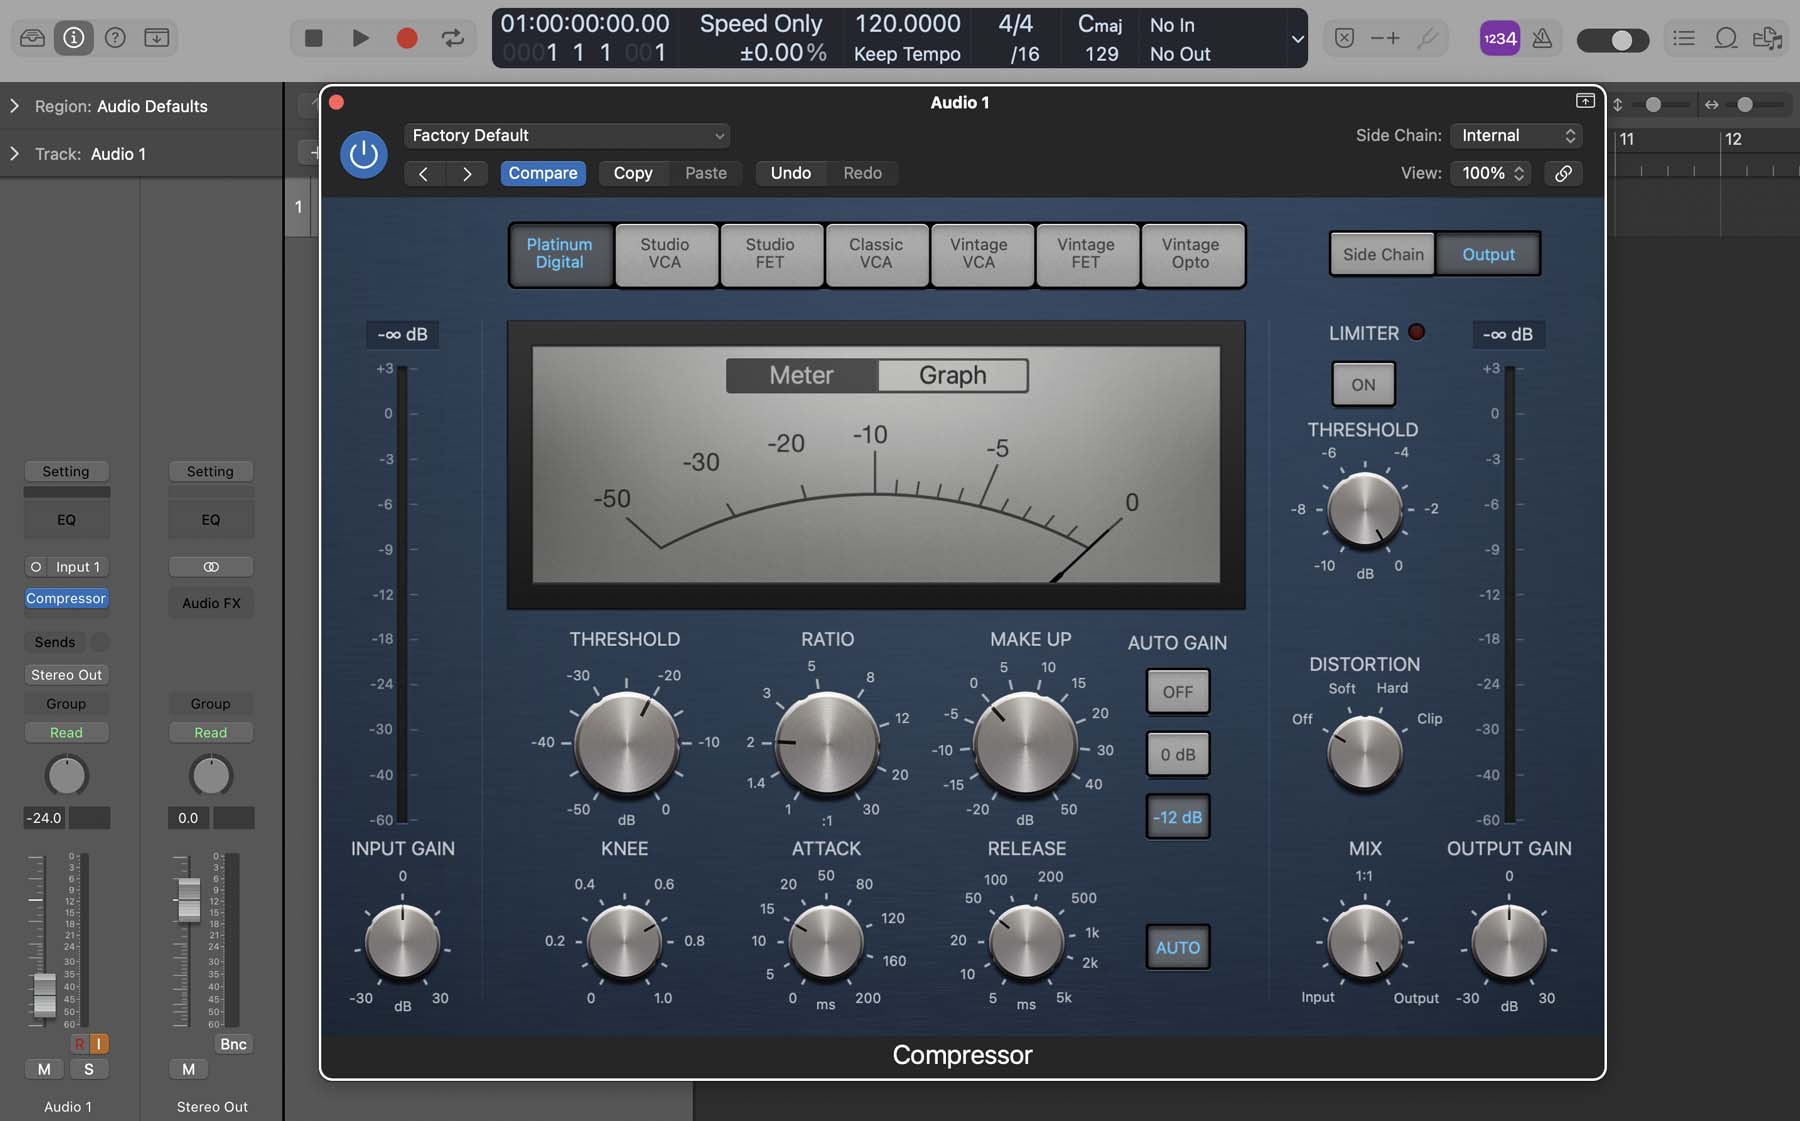
Once you open the stock compressor plugin in Logic, a bunch of knobs and buttons pop up on your screen to control different parameters. This might look overwhelming at first but don’t worry. I’ll go through every essential detail you need to know to start compressing tracks like a pro.

The first thing that catches our eyes is the list of Circuit Type buttons (1). By default, Premium Digital opens, which is a clean-sounding compression with a fast transient response, ideal for different instruments and tracks.
Other types of circuits have their own unique sound and functions that can be used for different purposes. For instance, Voltage Controlled Amplifier (VCA) compressors are ideal for bass guitars and low-frequency signals.
In a User Guide post, Apple explained what each circuit type is suitable for extensively. You can read more about each of them here.
For this tutorial, I’ll mainly stick with the Premium Digital circuit since it is the most versatile one.
The next part you should pay attention to is the primary control knobs (2). The two knobs that you’ll mainly work with are Threshold and Ratio.
If you put the Threshold knob at 0.0dB, no signals will be compressed. Say you’ve reduced the threshold to -15.0dBs; the compressor will reduce any signal above that value. By adjusting the Ratio knob, you can adjust how much reduction happens for signals above the threshold. Let’s switch to the graph view for a second to understand better what these knobs do.
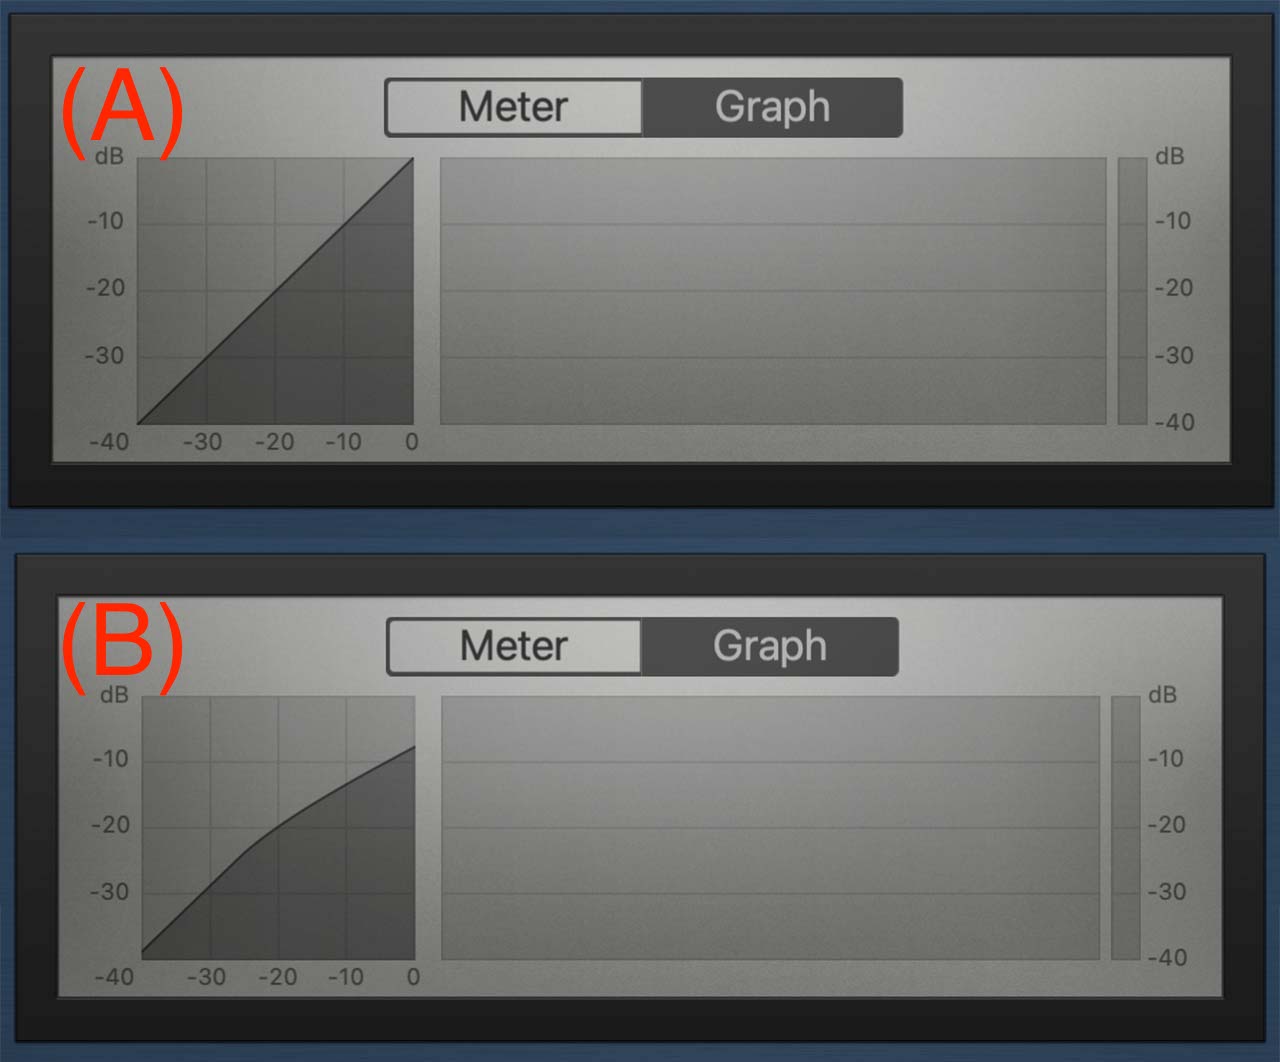
As you can see above, (A) the graph for 0.0dB threshold with a 1.0:1 ratio. On the other hand, (B) showcases the graph for -15.0dBs with a 2.0:1 ratio.
Typically, this creates a new signal that is generally quieter than the raw one. To make the new signal louder, you can adjust the Make Up knob.
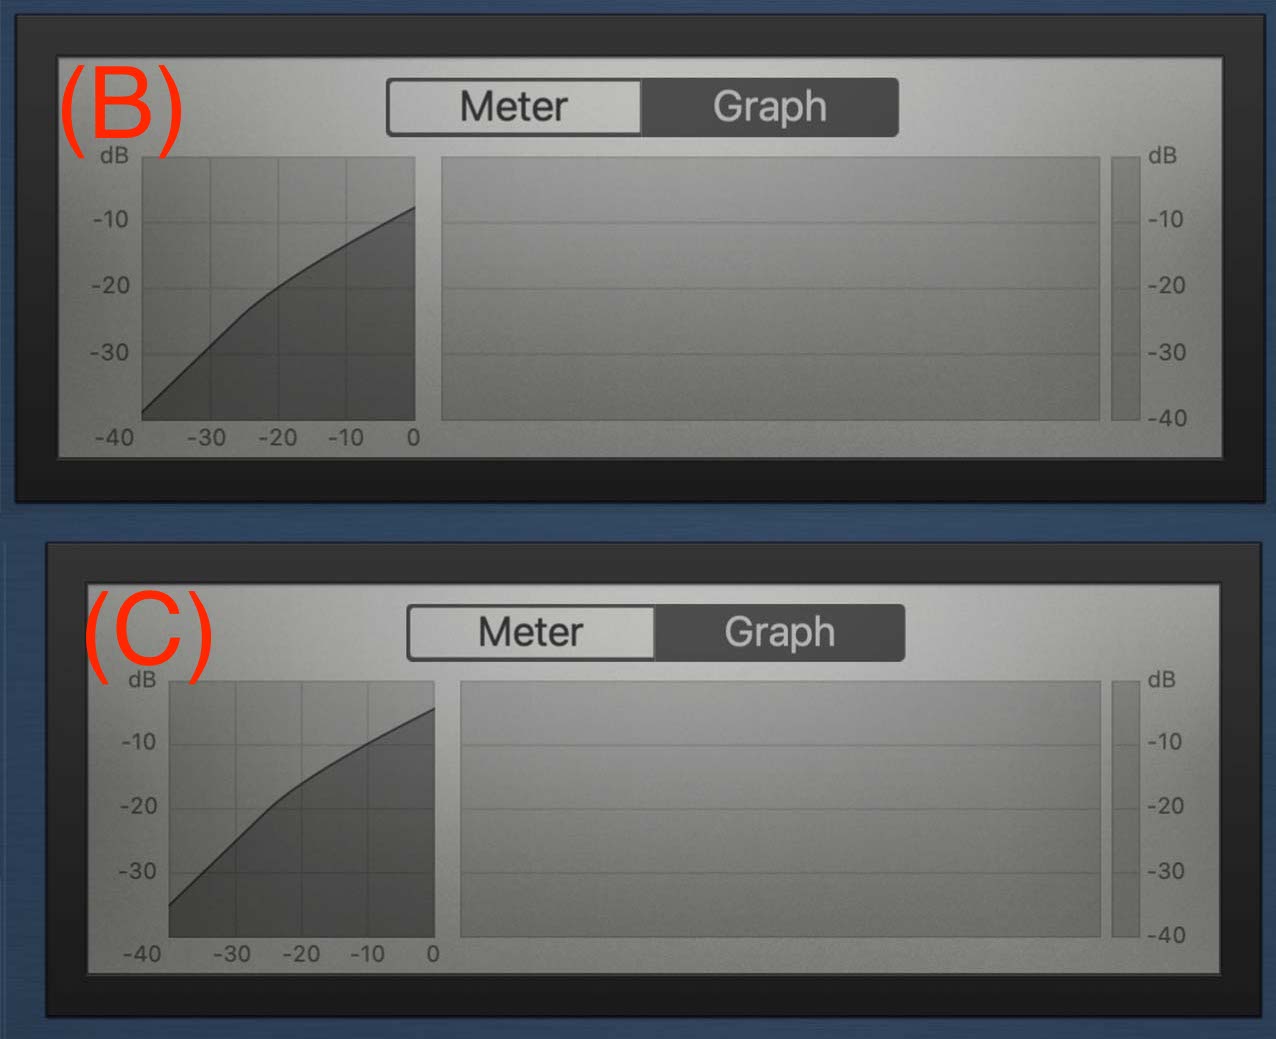
As shown in the screenshots above, all the signals are raised by 5.0dB in (C).
Another critical parameter to adjust is the Knee. The Knee knob determines how much the signal is affected by the threshold and ratio. To understand it better. Look at the screenshots below. In (C), the Knee is set as 0.5, relatively soft. On the other hand, the Knee is ‘harder’ in (D) since it is set at 0.1.

Depending on what you’re compressing, you might want to compress signals right after a threshold (hard Knee) or want the compression to smoothly come in (soft Knee).
Tip: one of the best ways to make the drum kick pop out in your mix is to SideChain the compression to the guitar bass. In this way, whenever the kick happens, the bass guitar gets a little bit quieter. You can learn more about SideChaining compression in my YouTube video tutorial.

Overview Of What We’ve Covered
To make it more understandable, let’s briefly look at everything we did with the compressor plugin in Logic Pro.
We started with no effects (A). First and foremost, we set a threshold to determine which signals get compressed and then changed the ratio to adjust how much reduction is applied (B). Then, we increased the gain entirely on the new signal (C), and finally, we adjusted the Knee based on how tightly we wanted the compression to kick in around the threshold (D).
Moreover, you'll see the other two primary control knobs: Attack and Release. The Attack knob controls how quickly the compressor responds to signals above the threshold. Typically, you’d want to shorten the attack time for drums and other percussive instruments.
On the other hand, the Release knob controls how quickly the compressor stops reducing signals after the input drops below the set threshold. A more release time is ideal for smoothing out sustained notes or chords.
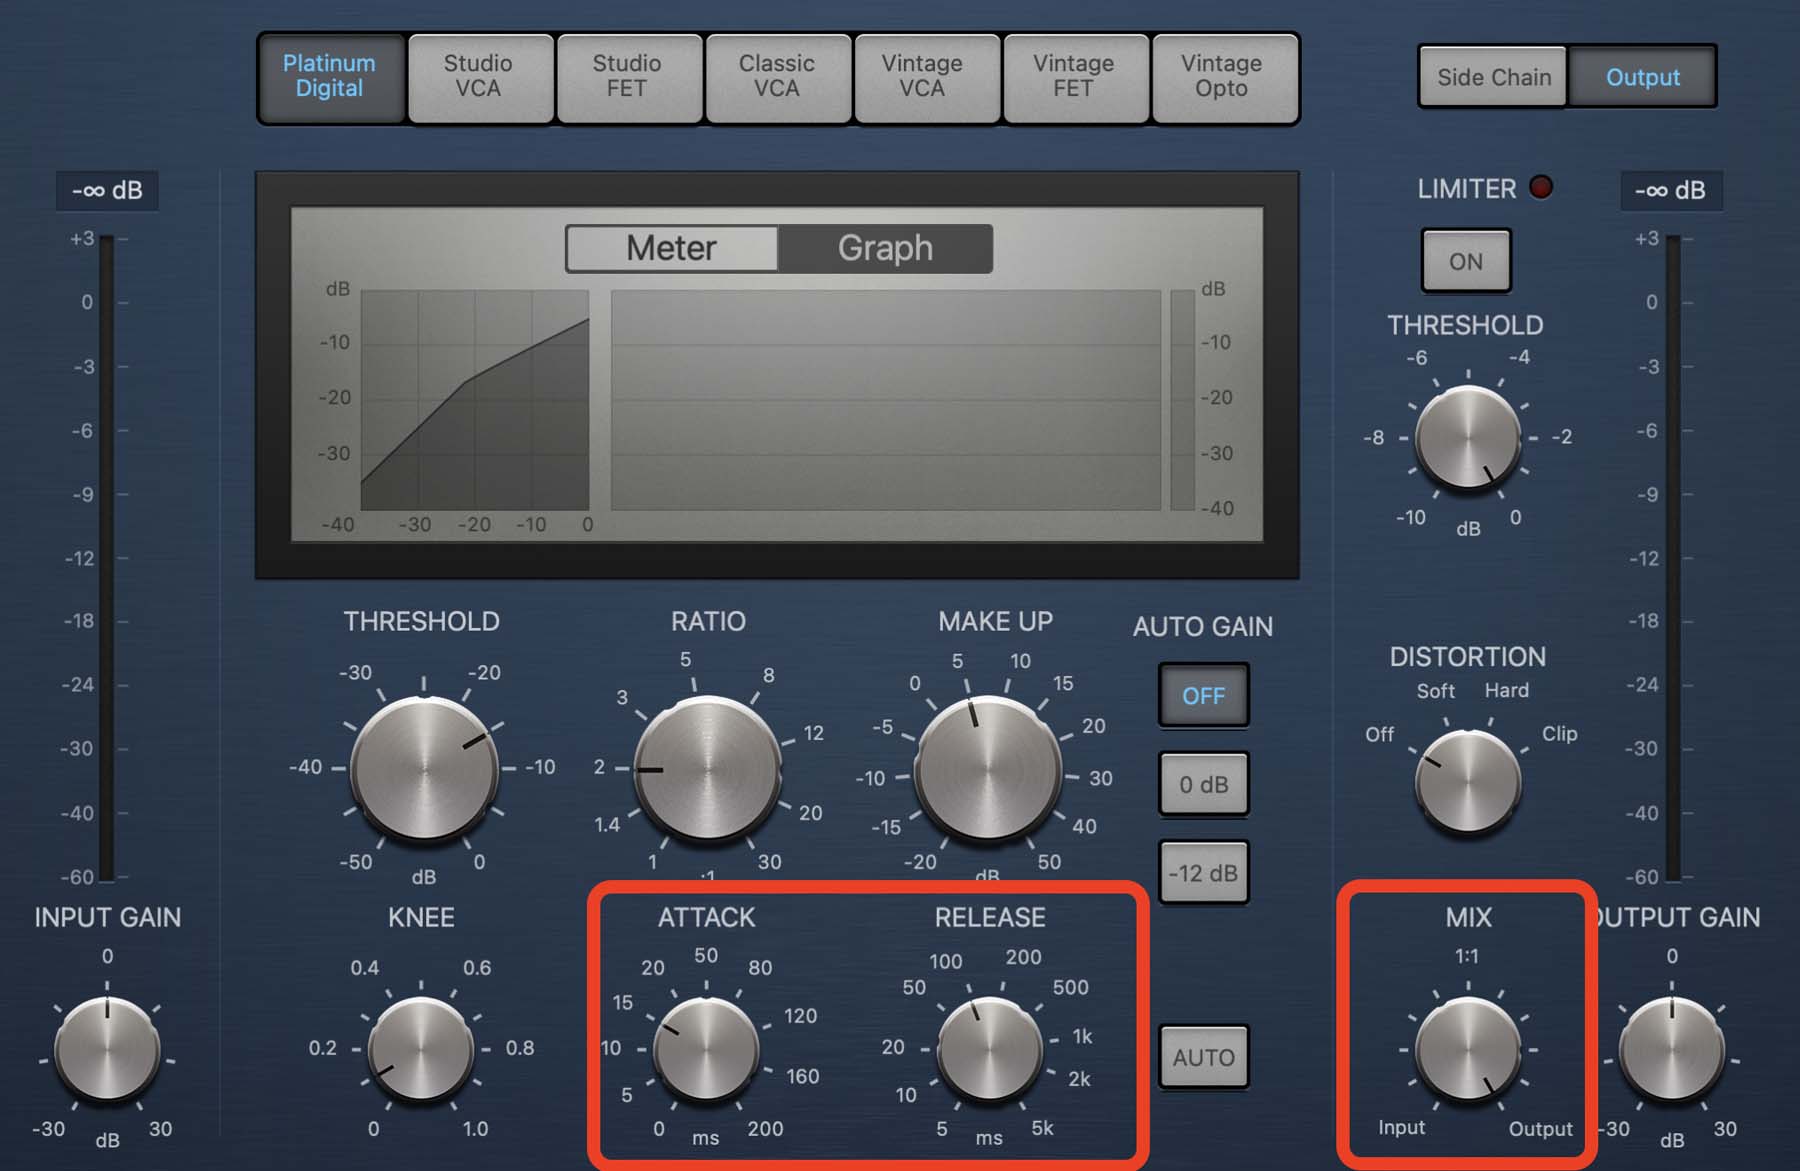
Finally, there’s the Mix knob that you can utilize to mix the original signal with the compressed one to your liking.
Final Thoughts On Using Logic Pro’s Compressor Plugin
Compressing audio is a vital step in music production. Although it might initially look like a confusing process, this guide should get you started with a fundamental understanding of Logic’s Compressors.
Like many other parameters in music, there’s no one-size-fits-all method for compressing audio when making music. Make sure to test different formulas to see what works for your projects best. While some general tips and tricks can be helpful, your ears are your best guide, so try to compress your tracks in a way that sounds ideal to your taste.
If you need more help regarding songwriting, mixing, and producing music in Logic Pro, download my Free 6 Pillars To Learn Logic Pro Faster.


