How To Loop In Logic Pro | 3 Useful Tricks
Aug 26, 2023
Logic Pro offers an abundance of powerful tools for songwriters and producers to express creative musical ideas. Among other professional Digital Audio Workstations (DAWs), Logic stands out as one of the most user-friendly programs both for beginners and experienced users.
No wonder why Apple’s Logic Pro is one of the world’s most popular DAWs!

Learning to use Logic Pro to achieve creative goals is not an easy task. The time it takes to create a solid foundation and cover the basics will put your patience and perseverance to the test. Nonetheless, the process of creating the kind of music that you’ve always wanted can be exceptionally rewarding.
One of the fundamental tools in producing music in Logic is looping. Learning how to loop regions or an entire section can help streamline your workflow. In this post, I demonstrate everything you need to know about looping tracks and using the loop function in Logic Pro.
Looping Regions In Logic’s Workspace
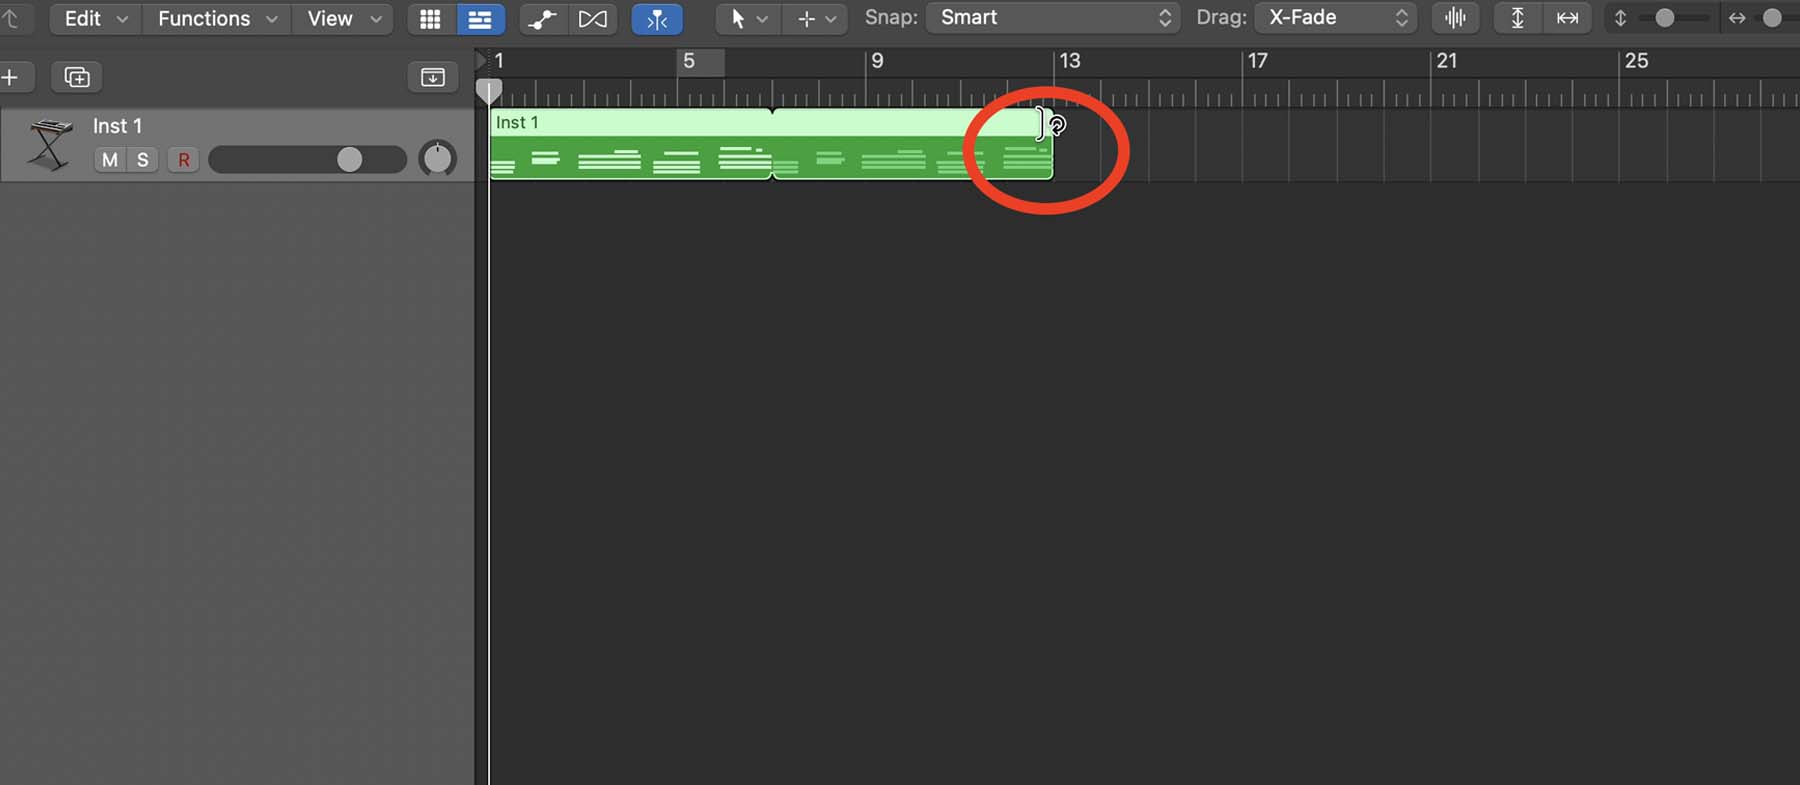
Suppose you’ve recorded a track in Logic and want to repeat it in certain areas of your song.
One way would be to copy and paste the region. However, if you want multiple repetitions, copying can be a time-consuming and inefficient method. Instead, you can use Logic’s looping tool:
-
Select the region you want to loop.
-
Hover your pointer on the top-right corner of the region until your pointer turns into a circular arrow.
-
Click and drag across the grid to create loops of your region.
Additionally, you can use another method to create infinite loops of a region in your project:
-
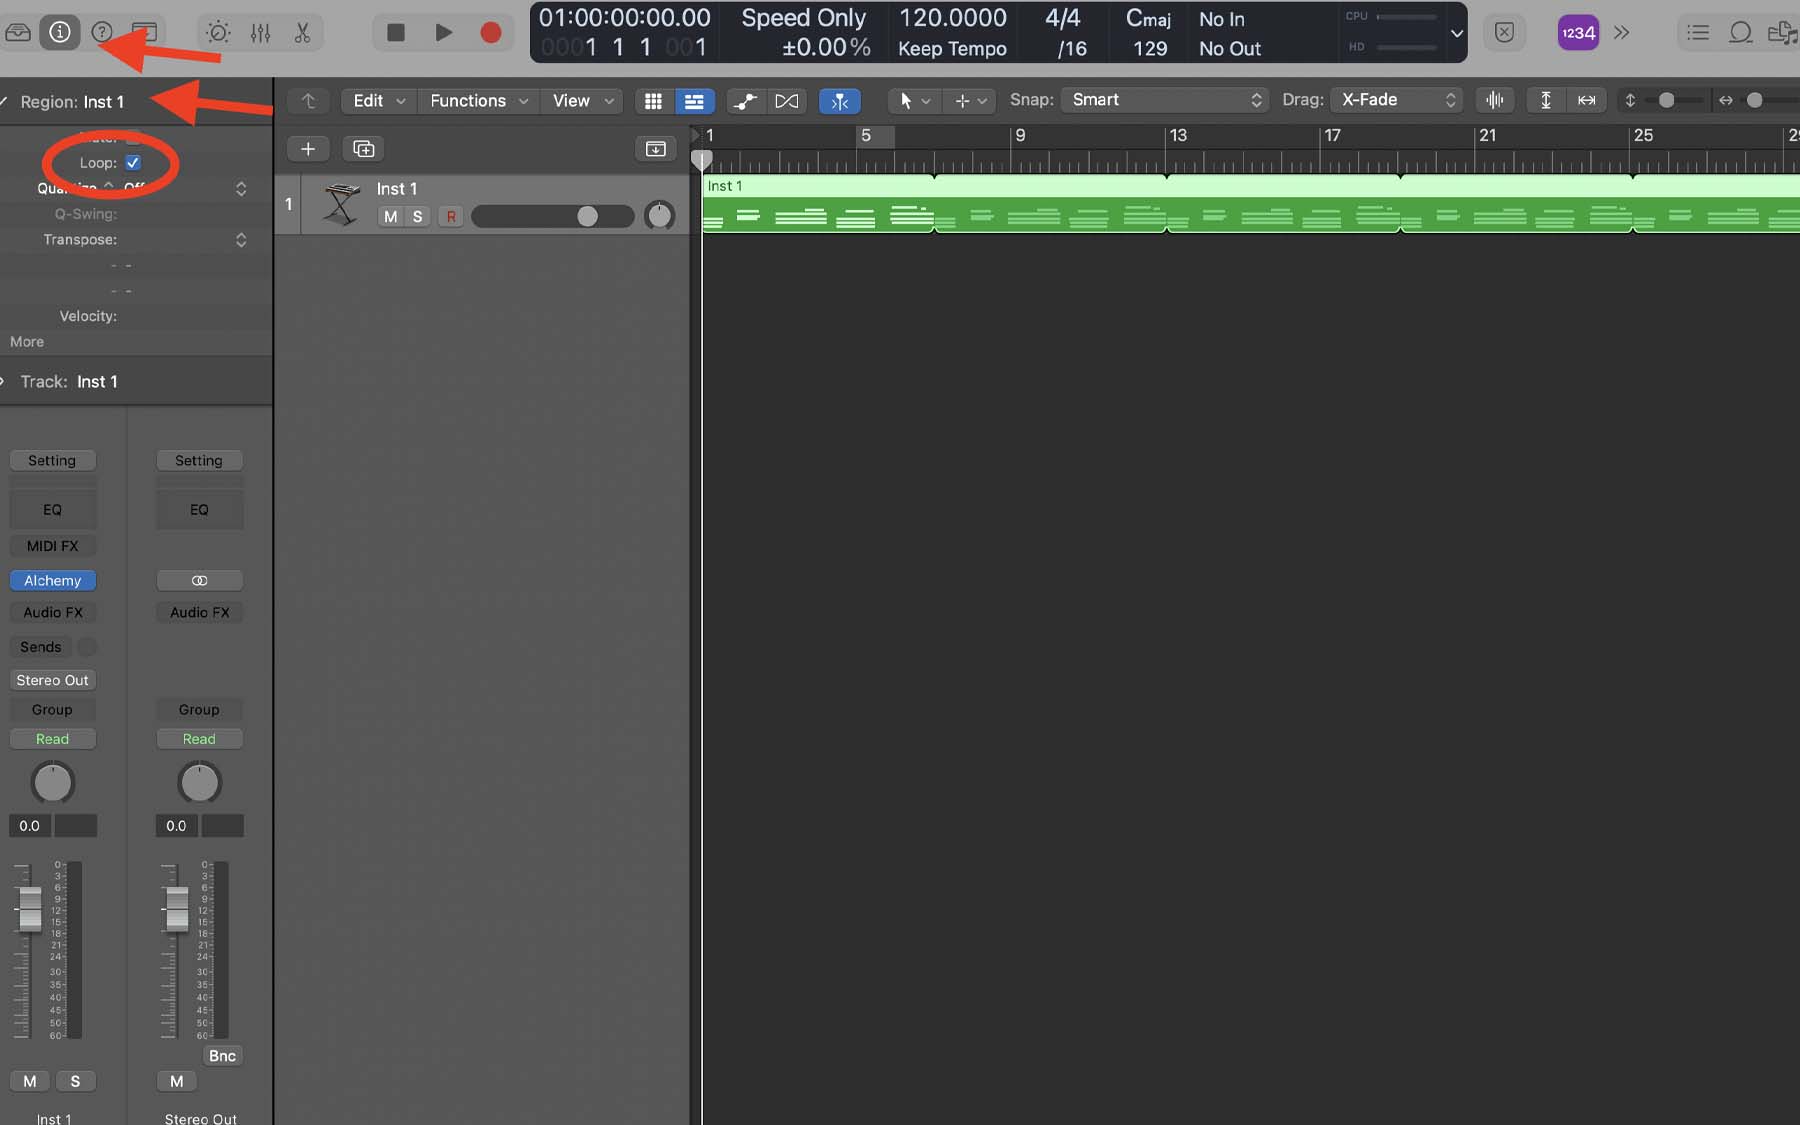
Click on the little “i” in a circle from the top-left corner of your screen to open the Inspector menu.
-
Click on the "Region” drop-down menu.
-
Click the checkbox next to “Loop.”
You can also use the dedicated key command to achieve this. Simply select a region and press “L” on your keyboard to create loops across your project.
Tip: Logic offers lots of tools to create and alter MIDI notes. While practical, too much precision in adjusting a MIDI track’s parameters can make it sound monotonic. In another post, I extensively explained various ways you can make MIDI instruments sound natural in Logic Pro.

Taking Loops A Step Further: Creating Aliases
There are certain limitations when working with looped regions in Logic. One way to eliminate those limitations is turning looped regions into aliases. An alias is a representative of the original region. Any changes to the reference region will also be applied to its aliases.
You can also turn loops into separate regions as if you copied and pasted that region several times across the grid. However, with aliases, you can modify all parts collectively.
-
From the top-left corner of your screen, click “Edit.”
-
Hover your pointer on “Convert” and select “MIDI Loops to Aliases.”
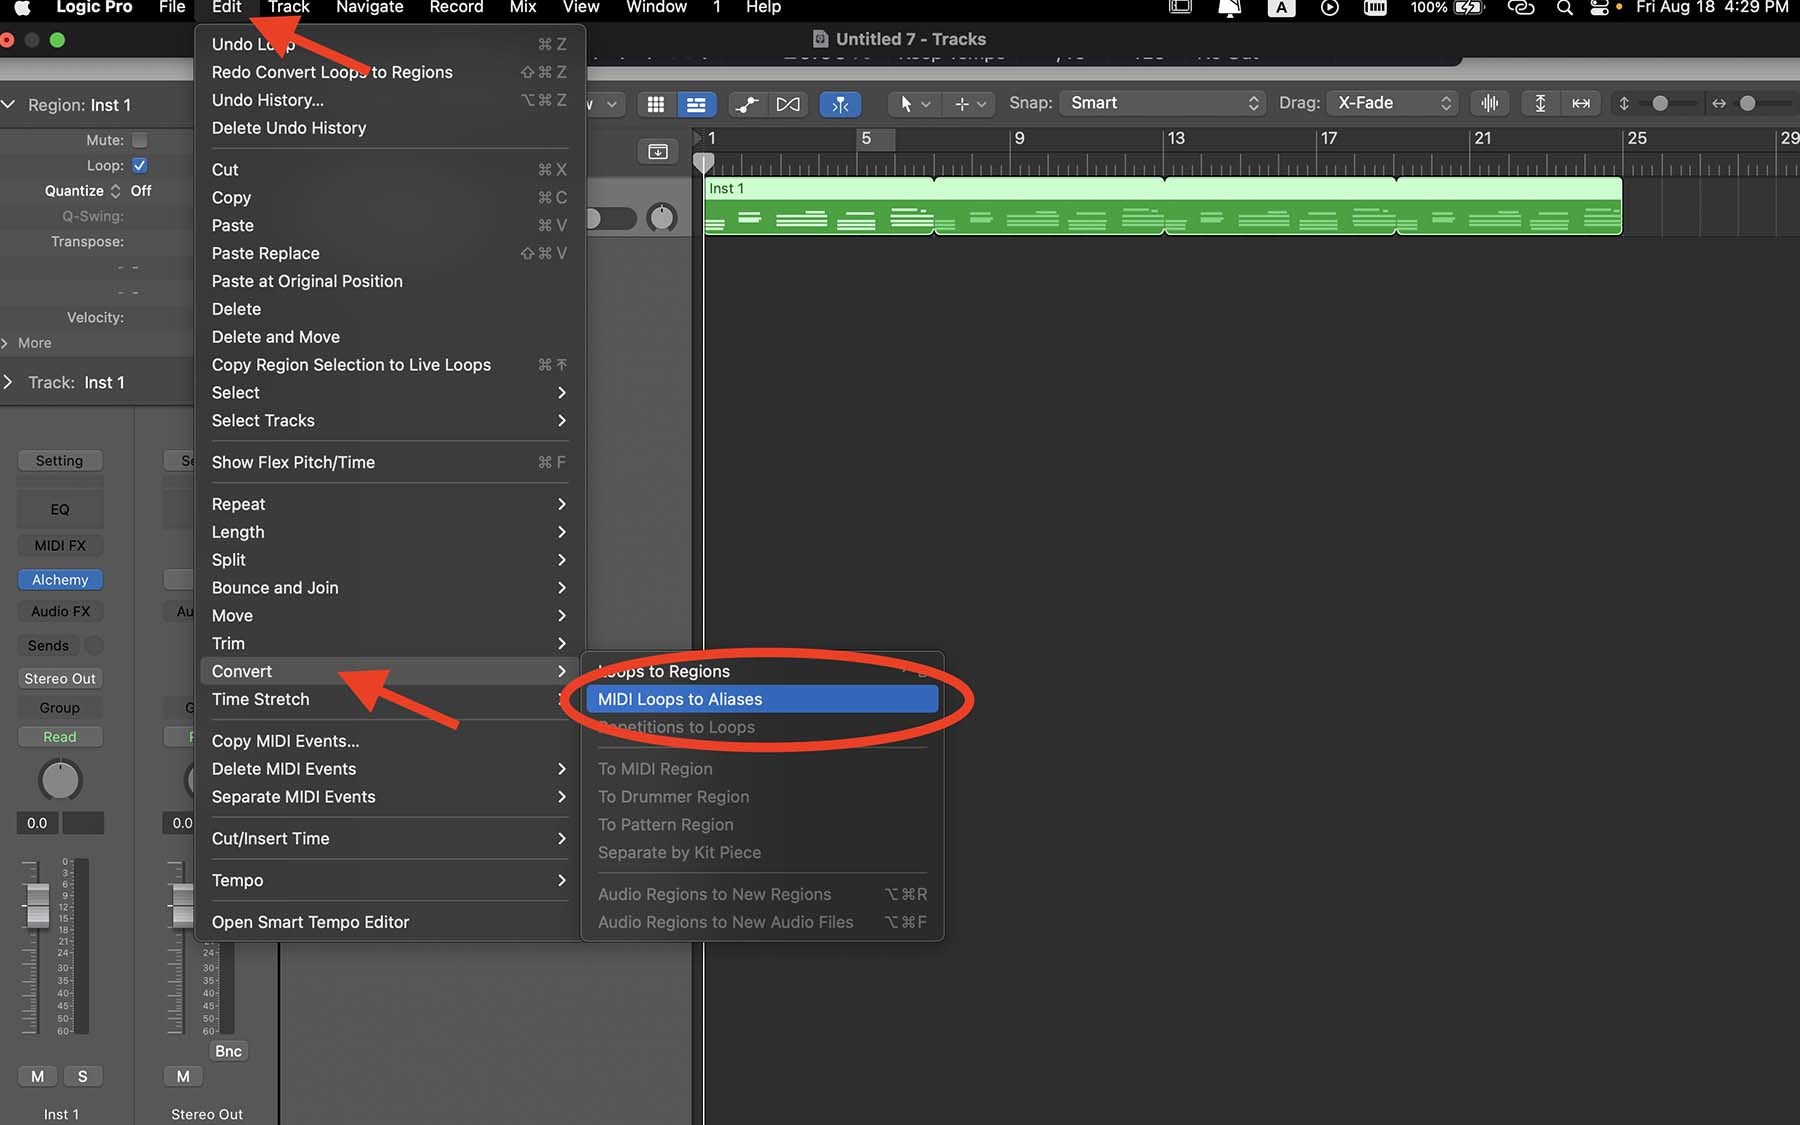
This is particularly useful if you want to repeat a phrase or riff in different sections of your song but still aren’t sure about its effects and sonic characters.
Moreover, you can freely move aliases on the grid. For example, you have a guitar riff that you want to loop across your project, except for the bridge section. Once you turn loops into aliases, you can delete the regions in that section while maintaining the aliases that come after.
Using Logic’s Cycle Function
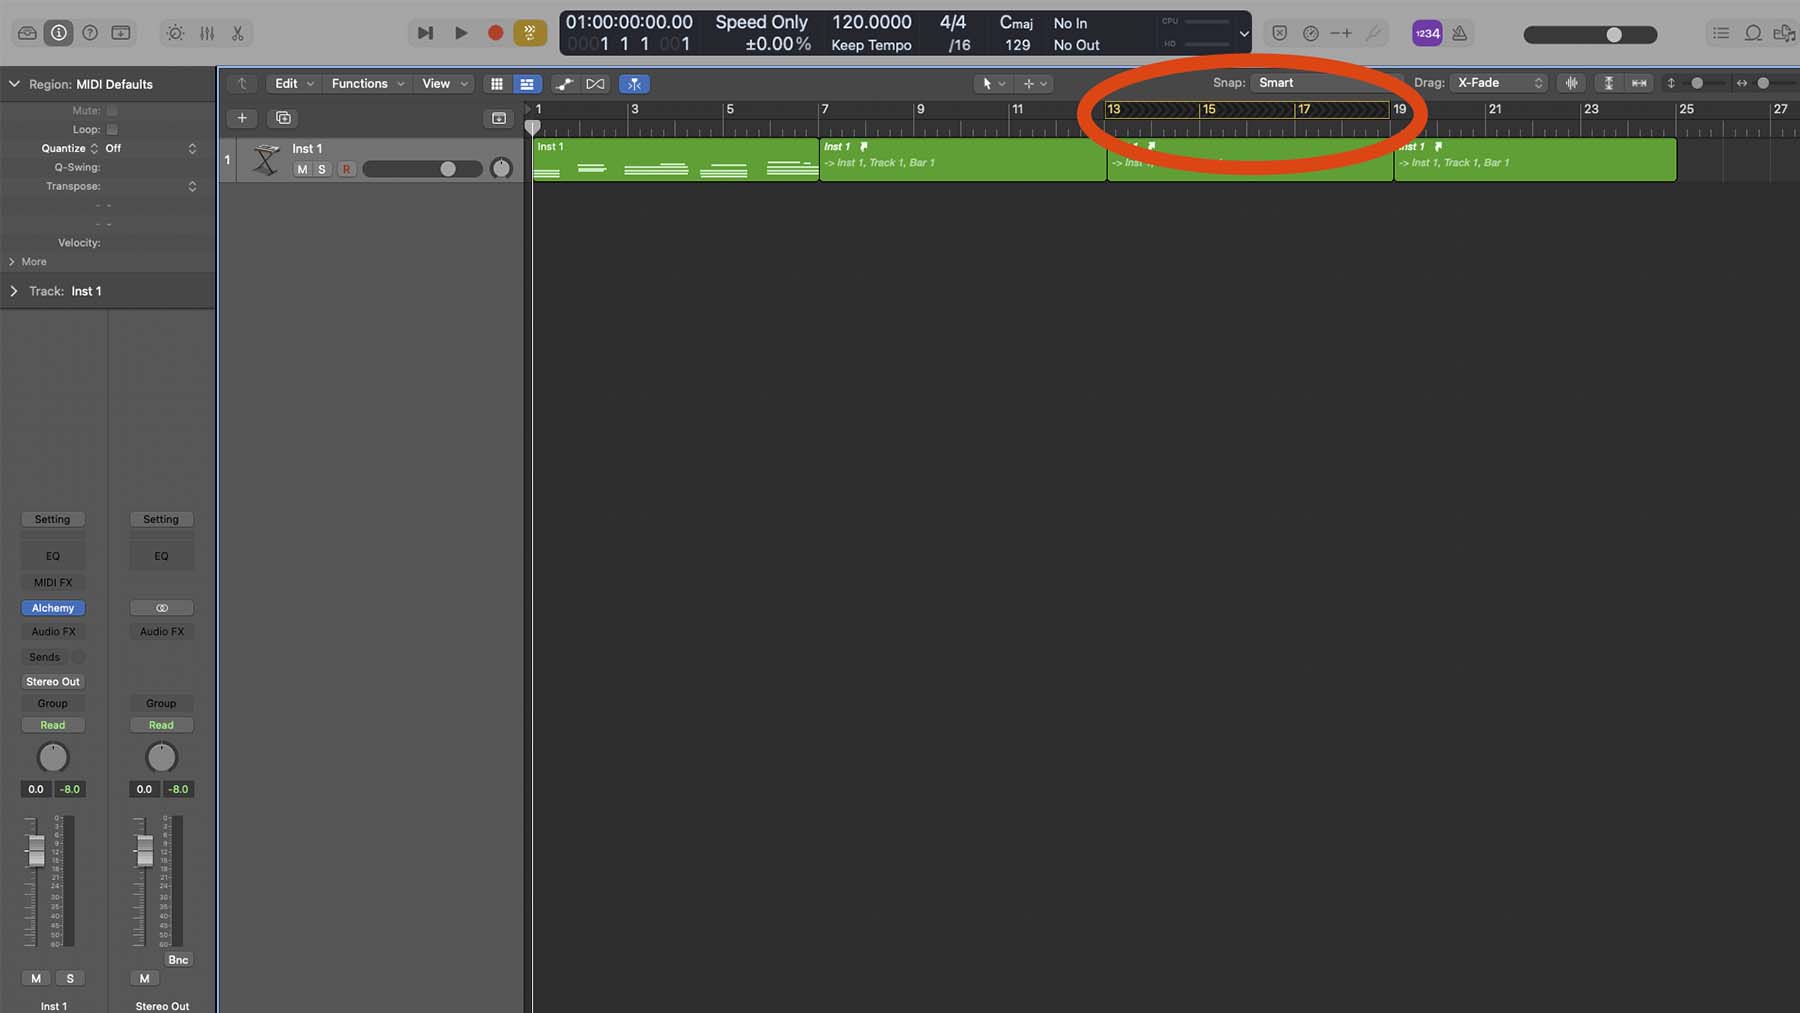
Logic’s cycle function allows you to loop a specific section of your project and listen to it. This tool is very useful when you want to focus on one area in your song. You can enable this feature by clicking on the cycle button from the control bar. Alternatively, you can press “C” on your keyboard to turn the cycle mode on.
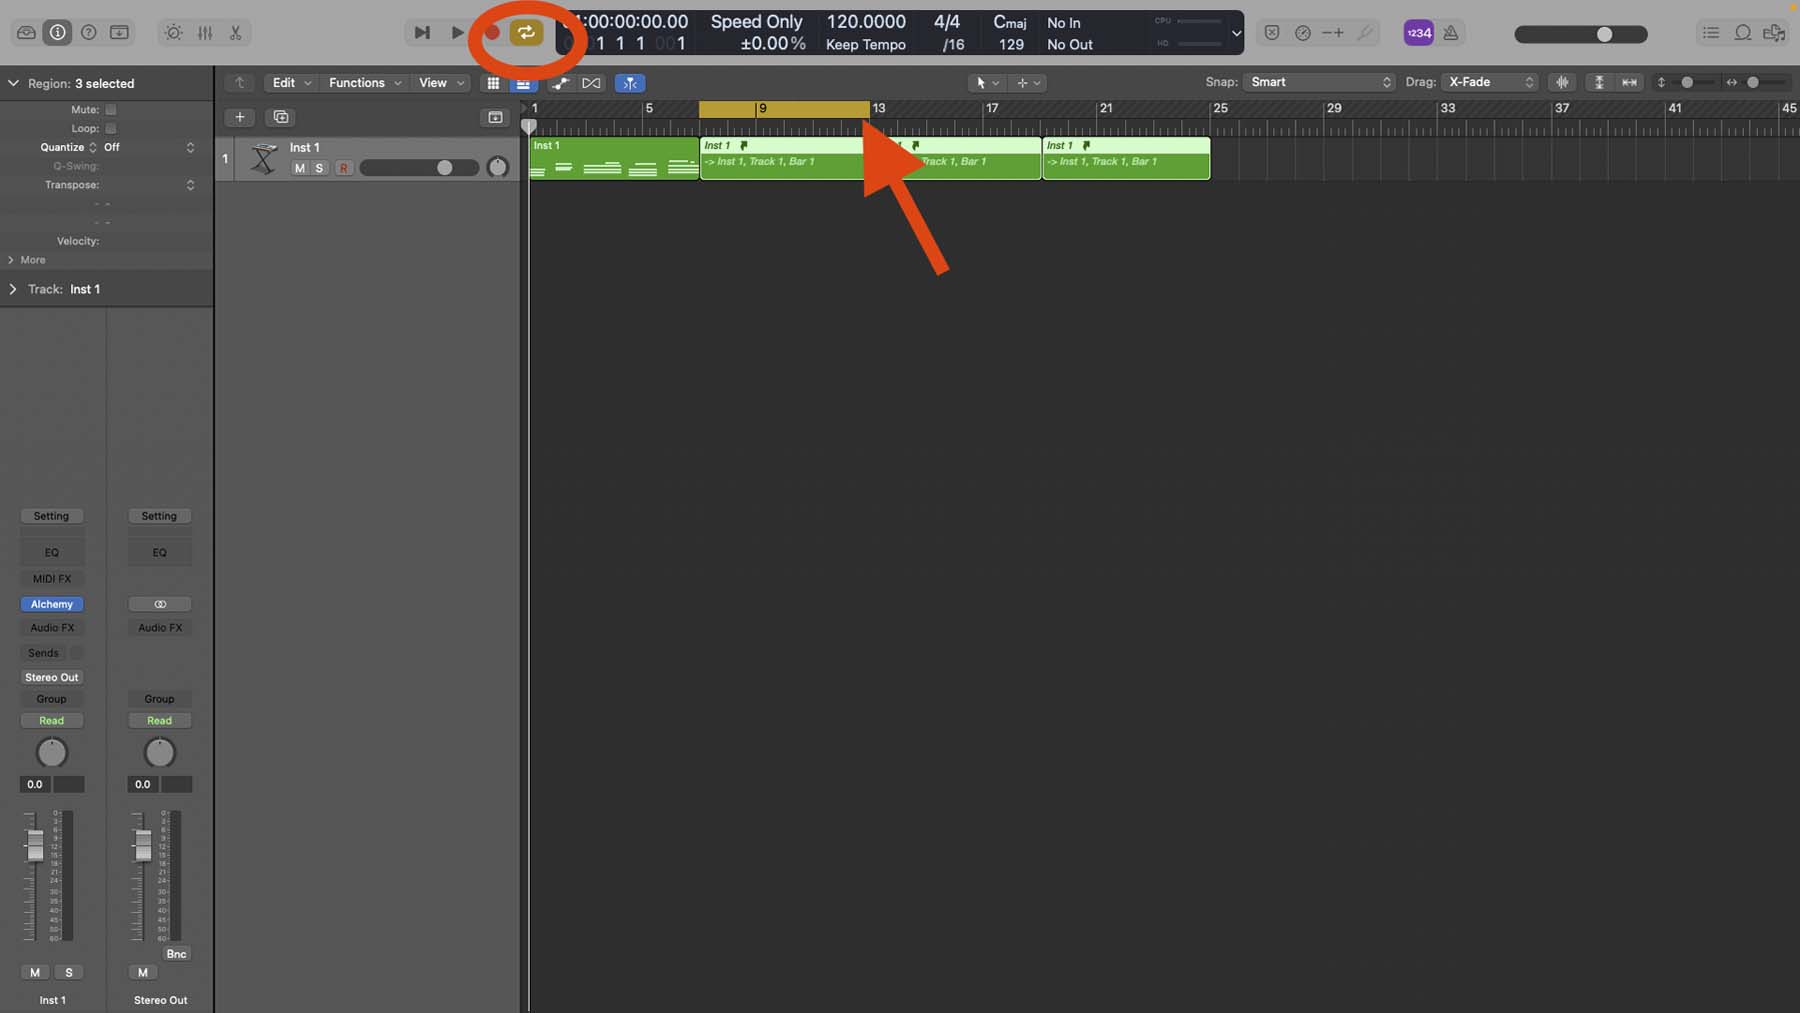
As you can see in the screenshot above, a yellow marker has appeared on the ruler from the beginning of bar 7 until the end of bar 12. If I press the space bar on my keyboard, Logic will only play that section. Once the playhead reaches the end of bar 12, it will jump back to the beginning of bar 7.
The cycle button comes in handy when you want to use the comping method to record guitar or vocals.
On the other hand, you can reverse this function if you want to temporarily cut off a section during playback. Hold “Command ⌘” on your keyboard and select the area you want to remove from the ruler.
As demonstrated, once my playhead reaches the end of bar 12, it will skip to the beginning of bar 19.
Tip: Using shortcuts and key commands in Logic is an essential strategy for making your workflow more efficient. I have listed the top 20 Logic Pro’s key commands in another post.

Final Thoughts On Looping In Logic Pro
Both Looping and cycling are two fundamental tools you should familiarize yourself with. Looping tracks can help you immensely during production. On the other hand, the cycle function can help you focus on a specific section. If you’ve been using Logic Pro for a while, I highly recommend turning your production skills up a notch by taking advantage of aliases.
If you need more help regarding music production, mixing, and mastering, I suggest downloading my Free 6 Pillars To Learn Logic Pro Faster.


