Why You Should Use Flex Pitch Instead Of Autotune In Logic Pro
Aug 03, 2023
Arguably, Autotune is the most famous vocal effect in the world of music production.
Even people who have never pursued a career in music have heard of artists in different genres, especially modern Rap, using this effect. While some criticize using autotune completely, many use it intentionally to create certain stylistic atmosphere in their music.
While that can be the case, beginner music producers might use the aid of autotune for correcting pitch inaccuracies in a vocal track. However, there are better, subtler approaches that more advanced music makers use to fine-tune a vocal track in unnoticeable ways.
You may have heard of Melodyne before. This is one of the leading pitch correction softwares to use on lead vocals. However, did you know that Logic has it's on pitch correction software called Flex Pitch?
Among the many industry-standard features that Logic Pro offers, Flex Pitch is a powerful tool that allows for editing the pitch and timing of audio tracks in your songs. With Flex Pitch, Logic lets you select each note in a monophonic track (single-line melodies with no harmonies) and adjust different parameters.
In this post, I’ll show you everything you need to know about using Logic’s Flex Pitch in your tracks. But before that, let’s see the differences between Autotune and Flex Pitch and where you should use each.

Autotune Vs Flex Pitch: Where To Use Each
First and foremost, I should mention that if you use Autotune in your project and you like how it sounds, then you should go for it; at the end of the day, you should make the kind of music that captures your sonic character and taste.
However, if you’re not achieving the results you’re looking for, you might be using the wrong tools.
Logic’s built-in autotune plugin is called “Pitch Correction.” You can find it here:
-
On an audio track, click the little “i” on the top-left corner of your screen to open the Inspector Menu.
-
Click the “Audio FX” slot to open the effect categories.
-
Hover your pointer on “Pitch” and select “Pitch Correction.”

Now you can use Autotune on your audio track. I have explained the basics of this plugin in another post.
Nowadays, producers use autotune primarily as a stylistic choice. Significant levels of autotune can create robotic characteristics to your track that, depending on the genre you’re producing, can be desirable.
On the other hand, if you want to fix minor pitch inaccuracies in your vocal tracks while maintaining the natural shape of the whole take, you should use Flex Pitch instead.
Flex Pitch breaks down your vocal track to each individual note and lets you work on different parameters. You can change the pitch, move, resize, split, or merge each note. Moreover, you can adjust pitch drift, vibrato, and gain on each note. Think of it this way; Flex Pitch Allows you to treat your vocal track as if it was a MIDI track.
Tip: Having accurate pitch across all your vocal tracks is important, but it’s not enough to make them sound clear and crispy in your projects. Make sure to EQ vocals properly to make them cut through the mix.

Getting Started With Flex Pitch In Logic Pro
Note: Before you start using Flex Pitch on your tracks, make sure you’ve updated Logic Pro to the latest version. In some previous versions, enabling Flex Mode would make your audio track glitchy.
As mentioned before, Flex Pitch is most useful to correct minor errors in your track. If, for instance, you have recorded a vocal line that is way out of tune, trying to glue everything together with Flex Pitch would sound too unnatural. I highly suggest trying to get the best vocal line you can capture before moving on to tidying things up during production.
Once you’ve recorded your audio track in Logic:
-
Select your track. Press “E” on your keyboard to open the Editor Menu.
-
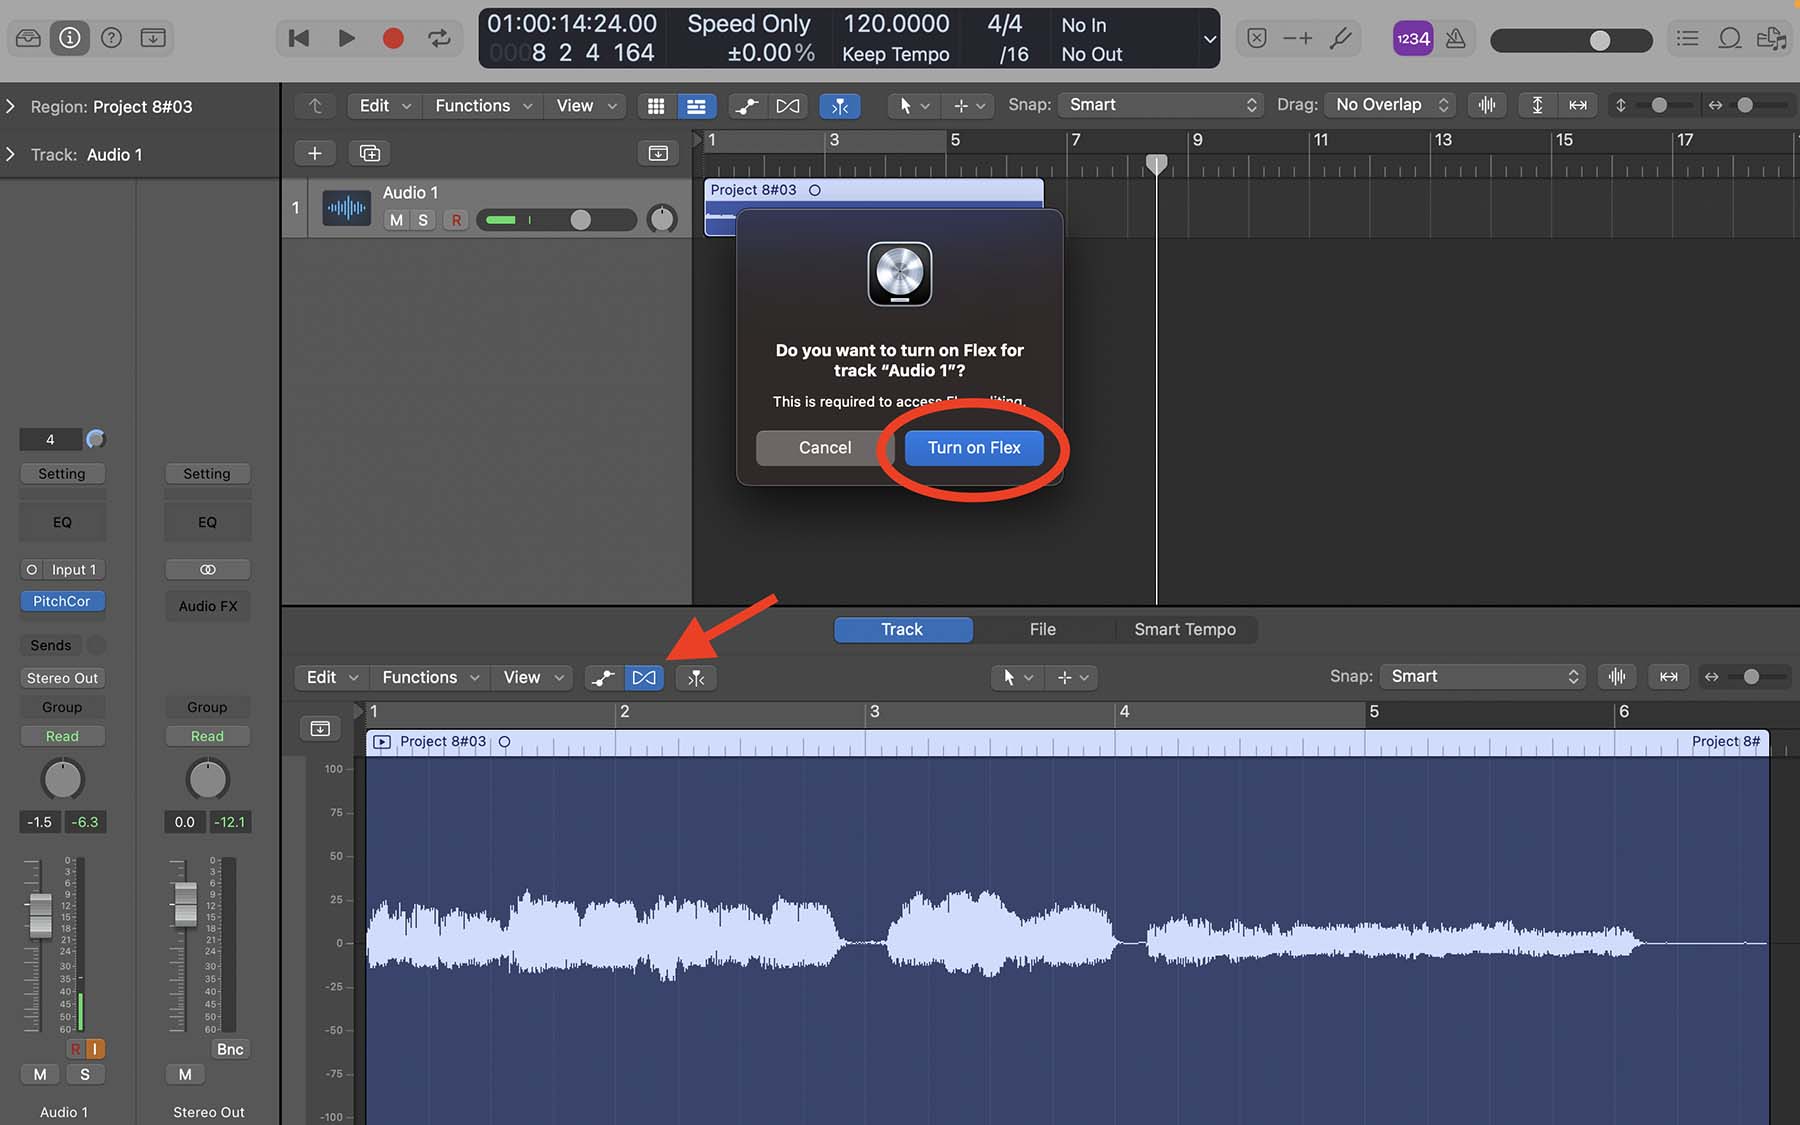
Click the Flex Button (looks like an infinity loop) on the top-left side of the Editor Menu.
-
Logic Will ask you if you want to turn on Flex for that specific track, select “Turn on Flex.”
- You’ll see a new pop-up menu appear next to the Flex button. Click on it and select “Flex Pitch.”
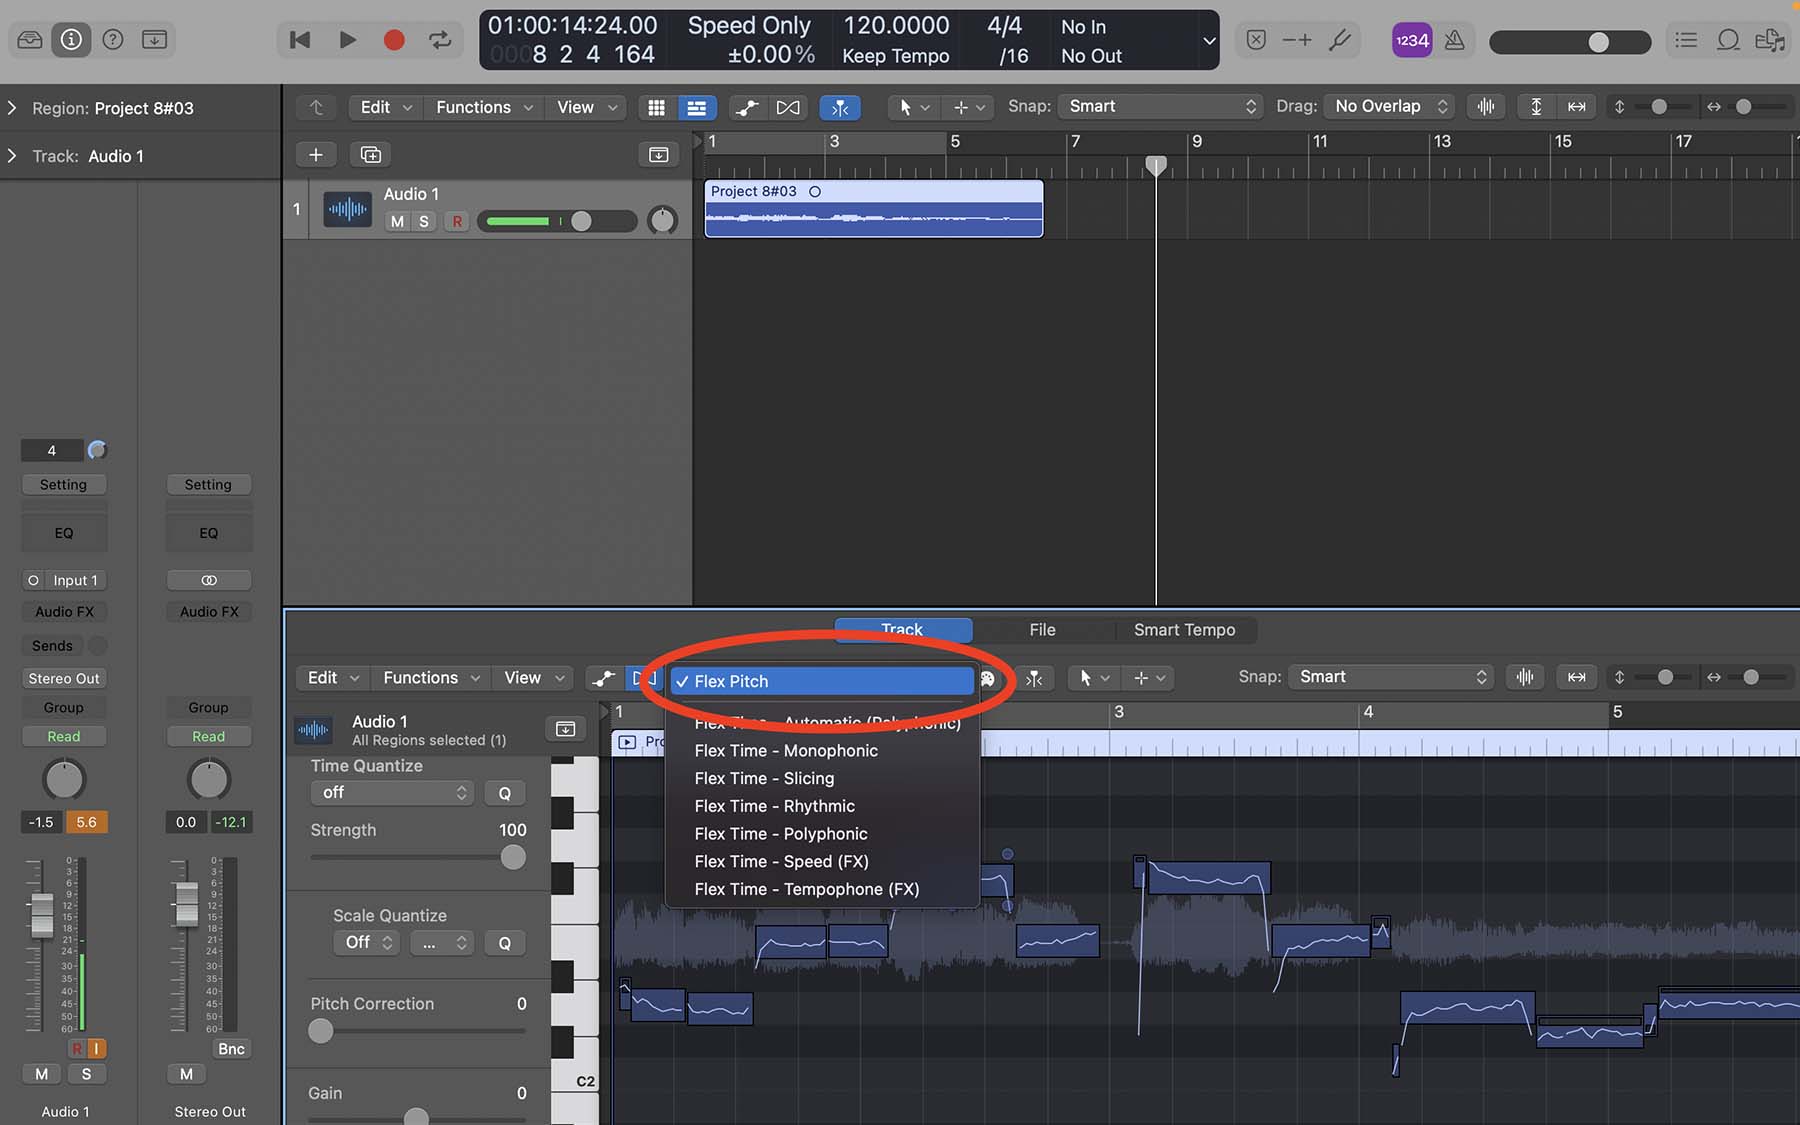
Now, Logic should show you a piano roll on the left side of the editor window, along with some tools and slides to adjust parameters like Time Quantize, Scale Quantize, Pitch Correction, and Gain.
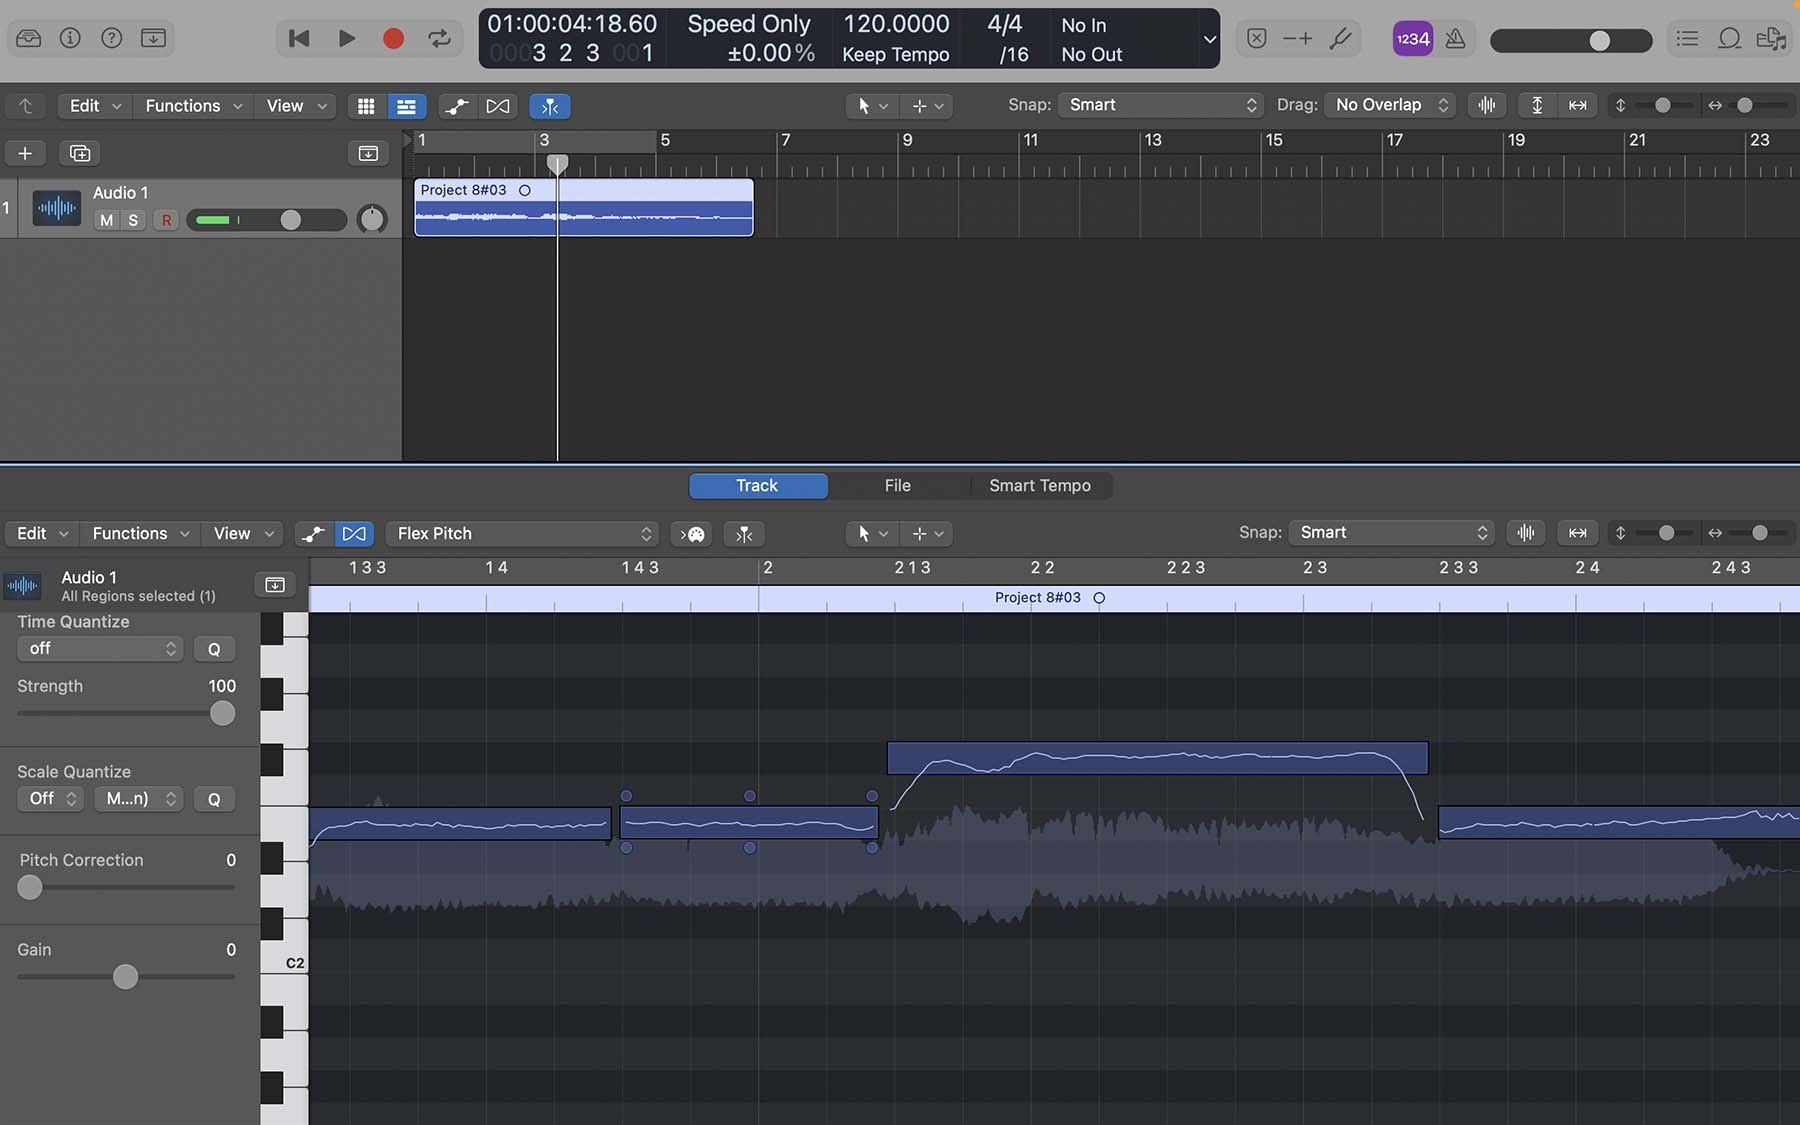
Scroll up and down in the editor window until you find your track’s notes appear in front of the audio editor’s keyboard (the piano).
As shown in the screenshot above, Logic’s Flex Pitch algorithm has analyzed my audio track and has sliced it down into individual notes. Each note is identified by a box in front of the piano notes. Within each box, you’ll see a line that indicates the actual waveform of the audio track.
Now you’re ready to use Flex Pitch and add some magic to your track!
Tip: it’s not always possible to record vocals in an absolutely isolated and acoustically treated environment. To get rid of the mic stand’s rumbling noises and background sounds, you can use Logic’s Noise Gate plugin.

Editing Audio Tracks With Flex Pitch
Let’s kick things off by looking at one of the note boxes more closely. Once you select a note box, six small circles (also called Hotspots) appear around it that you can use to adjust different parameters.

-
The top-left and top-right hotspots (1&3) adjust the pitch drift. You can adjust how acutely each note slides from the previous one (1) and how it slides to the next note (2).
-
The top-center (2) circle allows you to adjust the fine pitch. You can move the entire box up and down and on the piano roll to make it sharper or flatter.
-
On the bottom-right corner (4), you’ll have the format shift hotspot, which allows you to adjust the tonal characteristics of each note.
-
The bottom-center hotspot (5) controls Vibrato. Moving the Vibrato closer to 0% will flatten the waveform, whereas moving it to higher quantities will add vibrato.
-
On the bottom-left (6) of each note box, you’ll find gain control. You can adjust the gain to make each note louder or quieter.
You can grab each of these boxes and move them vertically to change the note entirely. Moreover, you can hold the left or right sides of a note box and move them horizontally to change the time duration.

Now let’s put all of that into practice:
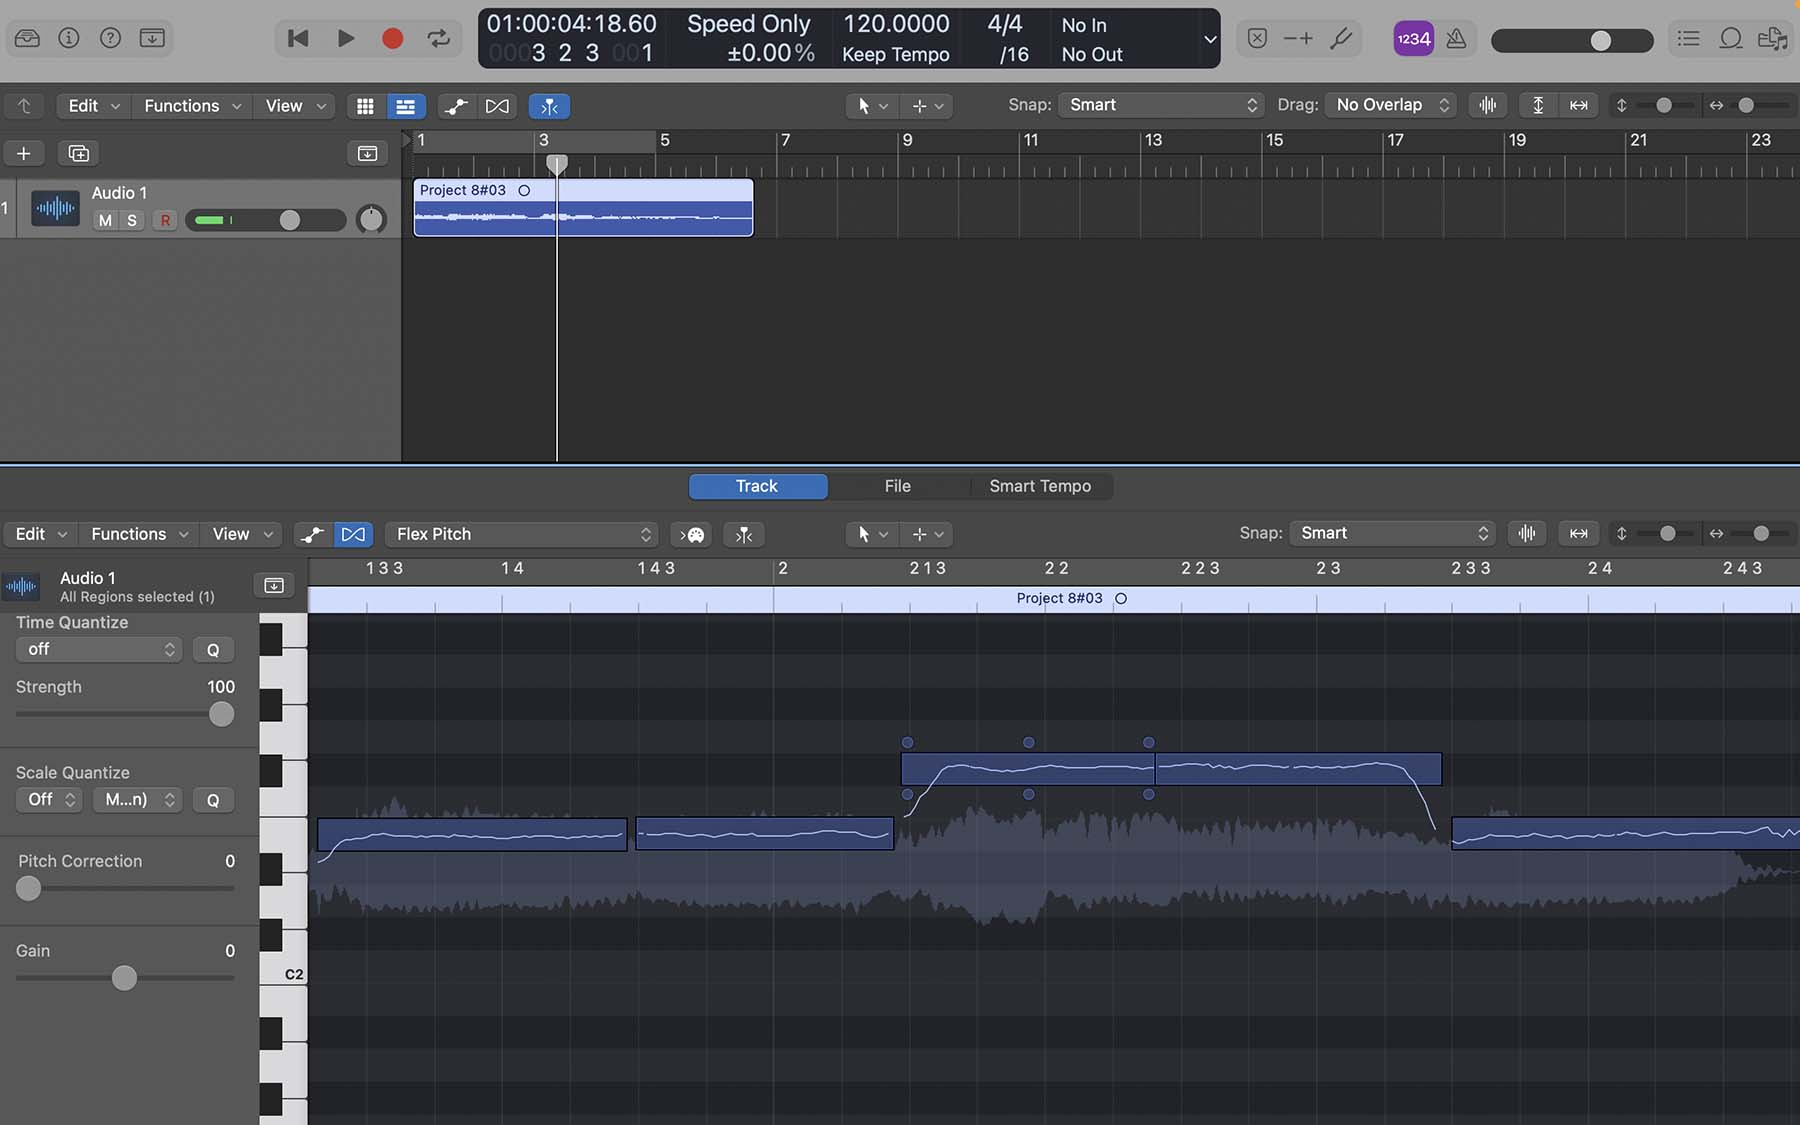
In the screenshot below, Logic’s Flex Pitch algorithm has chopped my vocal recording into numerous notes and I’ve zoomed on four of them. I want to tidy things up a little bit to make this section sound cleaner.
For the most part, the first note has a steady waveform and is in the middle of the E2 key on the piano. But I want to get rid of some of the shakiness in the recorded vocals. So I grab the Vibrato hotspot (bottom-center) and reduce it from 100% to 75%.
Next up, I want to raise the Pitch Drift hotspot at the end of the next note ever-so-slightly to make it slide into the next note more smoothly, so I raise it from 0.00 to 0.10.
The first half of the #F note is bizarrely shaky and all over the place, while the second half is much steadier. I want to reduce vibrato in the first half without making the rest of this note sound too flat. To do that, I can change my Pointer Tool to a Scissor Tool and cut notes in two. Once I’ve done that, I’ll reduce the vibrato and increase the starting pitch drift slightly on the first #F note.
Lastly, I will decrease the ending pitch drift on the last note to avoid sounding too sharp.
After said adjustments, that section would look like this:
Comparing it with the previous screenshot, you can notice slight alternations to the waveforms, exhibiting a steadier trend across the whole section.
Final Thoughts On Using Flex Pitch
Thanks to features like Flex Pitch, a rich sound library, and many high-quality plugins, Logic Pro is one of the world’s most popular DAWs both for beginners and advanced users. Autotune for pitch correction might not be the most practical method. Using Flex Pitch can lead to significantly better results.
What’s more, if you want to turn it up a notch, you can install Melodyne Plugin to make vocals sound professional. Melodyne offers similar tools as Logic’s stock Flex Pitch but with superior audio quality and more advanced options.
If you need more help regarding mixing, mastering, songwriting, or producing music, I highly recommend downloading my Free 6 Pillars To Learn Logic Pro Fast.


